Monday Tee Tutorial

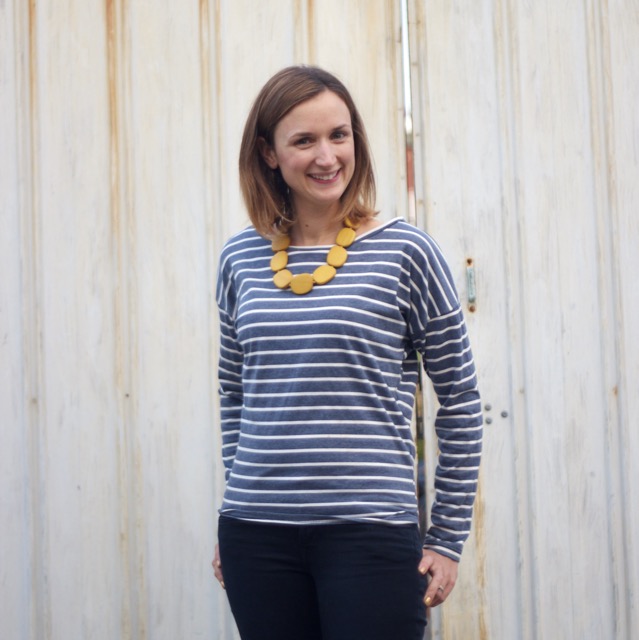
I'm really pleased with this tee.  It's such a simple style, but I do love the shape.  It has a lovely neckline, dropped shoulder seams, tapered waist and perfectly cosy long sleeves.

First of all, let me please state that this pattern is untested by anyone except for me!  It is also a single size pattern, approximately size Small.  The bottom is quite tightly fitted and will fit those with a high hip measurement of approximately 92cm / 36".  The rest of the pattern is quite a relaxed fit however so if you wanted to have a go and just increase the width at the bottom a little to fit then I think it would probably work pretty well.

Download the pattern pieces by clicking on the image above. Printing Instructions can be found on page 12.

For tips on sewing with knits click here

Sorry for some of the poorly lit diagrams below - the only time I really get a chance to sew is once the kids are in bed!

You will need:

  • 1.4m of knit fabric
  • Coordinating Thread
  • Twin needle (optional)
  • Rotary cutter and mat (optional)

Monday Tee Sewing Instructions:

Hem Pieces:

Hem the sleeves and the bottom edge of the front and back pieces.  Fold 1cm to the wrong side and press.  Fold another 1.5cm to the wrong side and press again.  Pin in place.  Stitch the hem with a zig-zag stitch or with a twin needle, sewing 1.2cm from the edge. 

IMG_2621.jpg

 Join the front and back:

Lay the Tee main front and back pieces on top of one another, with right sides together and align shoulder seams.  Join with a 1cm seam.  Press seam open, or if you have serged your seam, press it towards the back of the Tee.

Join the sleeves:

Pin sleeves in place, placing sleeve and body of tee right sides together and aligning centre notches of sleeves with shoulder seams.  Join with a 1cm seam. Repeat to join second sleeve.

Sew Underarm Seams:

Fold tee so that right sides are together and join the underarms and sleeves in one long continuous seam.  Pin in place first and make sure that the wrists, hem and underarm seams all match.  Begin stitching at the wrists and sew towards the bottom hem. 

Finish Neckline.

To finish the neckline, cut a piece 67cm long and 4cm wide.  Fold along it’s width, aligning short edges and placing right sides together. Join the ends with a 1cm seam. Press seam open.

Fold the neck binding in half along it’s length this time with wrong sides together. Press.

IMG_2624.jpg

Pin the neck binding to the neck of the Tee, right sides together and placing the seam of the binding at the centre back of the neck.  You will need to stretch the neck binding slightly as you pin to make it fit.  This helps the neckline to sit nicely without puckering.

Join (sew or serge) the binding to the neck of the tee, sewing with a 1 cm seam.  Fold binding over to the right side and press. 

And you're finished!

I hope you have had fun with this tutorial and that you love this tee as much as I do.  Please feel free to get in touch if you have any questions - I always love to hear from you!

A Week of Tees

So the birthday presents are finally all made - having taken waaay longer than I expected they would, and before I turn my attention to the gorgeous stack of fabrics sitting patiently in my cupboard, just crying out to be turned into Geranium Dresses, Junebug Dresses and Gumnut Dresses, I am going to do something for myself.  Something just for me.  

My wardrobe is pitifully depleated of T-shirts and I have a huge stack of lovely knits begging to be used.  So, I am going to put everything else to one side and declare this to be Selfish Sewing Week.   Who's with me on this one?

I'm going to try to make a top every day for the next week (yikes!) I have a couple of patterns that I want to use, but I think mostly I'm going to be designing them myself so I should have a few more projects to add to my Patterns and Tutorials page by the end of the week as an added bonus.

I'm really looking forward to the chance to make some things for myself and to make a dent in my stash.  I don't often sew for myself and I feel like committing to a whole week of selfish sewing is pretty much the only way to make sure I don't get distracted with other projects. 

So.  First up:

Monday Tee.jpg

Sorry but making and blogging about a Tee every day this week, on top of work, housework and general kiddy wrangling is pretty much going to stretch me to my limit as it is. I'm afraid there is simply nothing left for imaginative pattern naming! So, the 'Monday Tee' it is.

Monday Tee
Monday Tee photobomb
Monday Tee
Monday Tee photobomb

Cheeky little photobomber!

I'm really pleased with this tee.  It's such a simple style, but I do love the shape.  It has a lovely neckline, dropped shoulder seams, tapered waist and perfectly cosy long sleeves.  Stay tuned for the Pattern and Tutorial; Coming up next!

A Beginner's Guide to Sewing With Knits

A Beginners guide to sewing with knits

I am going to be doing a lot of selfish sewing this week and am hoping to be able to get a couple more free patterns up for you at the same time (yay!).  But since most of them are going to be Tees I thought that it might be helpful to write a guide to sewing with knits for those of you who would like to try these patterns but are just TERRIFIED OF SEWING WITH KNITS!

Okay?  So here we go:

The first point to make about sewing with Knits is that it is NOTHING TO FREAK OUT ABOUT!  I used to have such a fear for sewing with knits until one of my lovely friends who has taught me a lot about sewing, gently pointed out that this was a completely irrational fear and very kindly guided me through my initial panic.  I have to say that she was right and knits are now one of my favourite things to sew.  A few simple techniques are all you need to get started and the best way to learn is to just go for it!  Buy some cheap fabric that you are not scared to ruin and just start sewing.  It won’t take you long to figure it out and it is so worth investing the time to learn because once you feel confident you will find a whole new world of sewing opens up to you.  (That was my experience anyway!)

Second important point: YOU DO NOT NEED A SERGER  / overlocker to sew these tees.  I am lucky enough to have one so I often use it but it is definitely not compulsory.  You can easily sew every one of these tees with a sewing machine and they require no specialist techniques. 

One thing you do need however is a STRETCH OR BALLPOINT NEEDLE.  Stretch needles have a slightly rounded tip so that they will slide into the gaps between threads in your fabric, rather than cutting through the threads (as a sharp needle could do) which can result in runs and holes in you fabric (exactly as it would in stockings / pantyhose).

Cutting Pattern Pieces:

When cutting out pattern pieces from a knit fabric it is best to USE A CUTTING MAT AND ROTARY CUTTER  if you have one.  Using a mat allows you to lay your fabric flat and ensures that it will not stretch and become misshapen as you cut it.  This can easily happen when using scissors as you have to lift the fabric in order to be able to cut it.  

TIP:  A rotary cutter with a smaller diameter blade is useful for cutting around tighter curves or corners.

When sewing with knit fabrics, often the SEAM NEEDS TO BE ABLE TO STRETCH along with the fabric.  If you just sew a straight seam you run the risk of either not being able to put on your garment or of the seam thread snapping. There are several ways to achieve a seam which can stretch:

1. USE A STRETCH STITCH: Many sewing machines have a stretch stitch. The one on my sewing machine looks like this: (#6)

2. USE A ZIGZAG STITCH: If your sewing machine doesn’t have a specialist stretch stitch then you can use a simple zigzag stitch.  If you don’t need a lot of stretch in your seam then you can make your zigzag quite narrow.  If you need it to stretch a lot you will need to use a wider zigzag. 

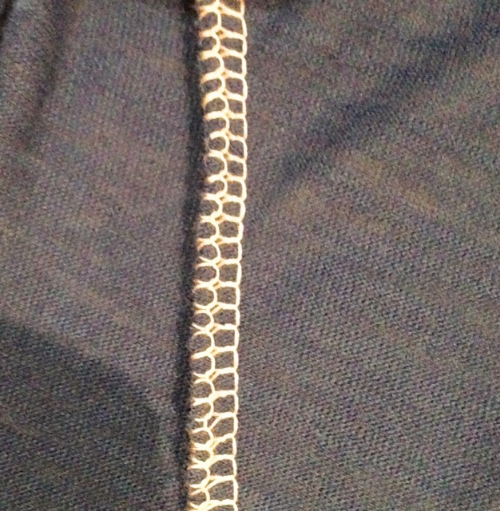
3. USE A SERGER / Overlocker.  If you have a serger / overlocker you can use it to sew these seams.  Serger stitches allow some stretching of the fabric and have the added bonus of tidying up the seam allowance at the same time.

Serger seam finish

Take a scrap of the fabric you are going to be working with and have a play with some of these stitches.  Try stretching your stitching afterwards to see how it reacts.

HEMMING

There are 2 main ways of hemming a knit garment.  The simplest way is to use a zigzag stitch like this:

Zigzag hem

If you’re feeling a little more adventurous you could try using a twin needle which is the finish traditionally used for Tees, it looks like this:

Using a twin needle is nowhere near as complicated as you would imagine.  Twin needles look like this and fit onto your machine in exactly the same way as an ordinary needle. 

twin needle

The only difference is that you need two spools of thread on top.  On my Janome sewing machine I place the second spool (a bobbin) on the bobbing winder.  I have used 3 different colours here for clarity.

twin needle machine threading

Thread your sewing machine as usual, with both strands of thread together.  When you get to the needle you will need to pass one thread through the usual guide and thread the left hand needle. Pass the second thread through a second guide to the right of the other, then through the second needle. 

Set your sewing machine to an ordinary straight stitch and sew! (I usually increase my stitch length to about 3mm as I find it gives a neater finish).  Your finished stitches will look like this from the right side:

Twin needle Hem right side

And like this from the wrong side:

Twin needle hem wrong side

 And I think that's pretty much all you need to know for the time being.   I hope you have found this guide useful. If you need any more help then feel free to ask questions.  There is also a lot of information out there on the big old inter-web so go and have a look around, then take a deep breath and JUST BEGIN.  It'll be the best thing you ever did... (or one of them anyway!)


Three Years Old

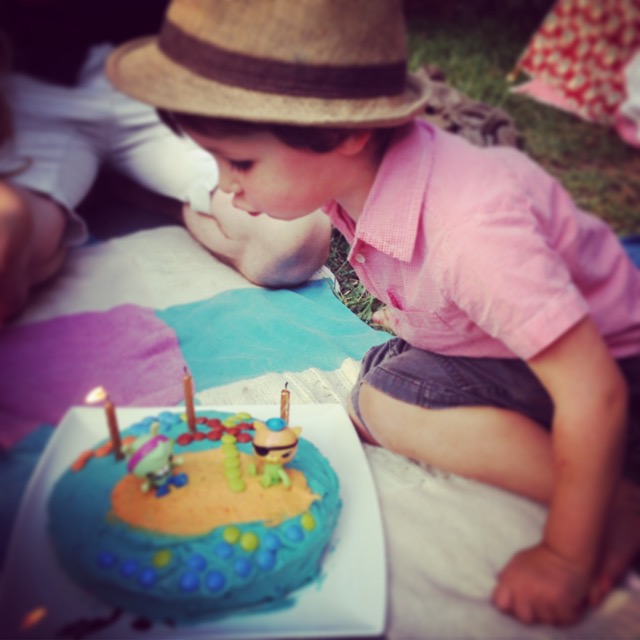
Octonauts Cake

My little boy is three.  Three! Growing up so fast - even though he still maintains that he is - in his own words - "tiny".

He had such a wonderful day.  His request for his birthday was to ‘go swimming and to go under the water and have an octonauts cake with blue on the bottom and orange on top.”  Which, of course, is exactly what he got.  (How could we say no to such a modest request!)

He had so much fun a the pool and did indeed go under the water.  It is so amazing to watch his confidence grow and see his joy as he discovers he can do new things.  He was also very pleased with his gifts (the mama-made elephant has been christened 'Ice Age' (I think after the wooly mammoth in Ice Age...) there were also lots of Octonauts, Dinosaurs, and Dragons.  Win.

For me though the best moment of the day was when he was sitting quietly at the table, after all of our guest had gone had gone, when he quietly observed to himself ‘That was a lovely birthday’.  (Heart melts)

Birthdays have taken on a whole new meaning for me since our children were born.  It is impossible to celebrate their birthdays with out remembering the day they were born and all the emotions that went along with that.  It is impossible not to remember the newborn baby they once were and the way our world changed in an instant when they arrived.  It is impossible to imagine our world without these amazing little people, without the happiness and the love and the laughter that they bring.

I love that birthdays give us the opportunity and perhaps a reminder to stop and appreciate the people we love for who they are.  A whole day in which we focus on all the amazing things that make them who they are.  

Happy Birthday Jacob.  You are the dearest little boy.  I love your cuddles and your smile.  I love your enthusiasm, I love the way you talk and the way you gesture with your arms when you do.  I love watching you grow and learn but I wish could bottle you, just as you are, so that I might always be able to hold onto the gorgeous little boy that you are in this instant.

Happy Birthday Sweetheart.

Xxx

A Handmade Birthday

My little boy, my baby, turns 3 on Saturday.  I almost literally cannot believe it. So I have been trying to distract myself this week by pouring my love for this little man into some handmade birthday presents for him.

I've been meaning to make a duffel coat ever since I found these amazing wool remnants in the bargain bin at my favourite fabric store on Brunswick Street.  I struggled to find a pattern for a while but settled on this Oliver & S one in the end.  It's their Schooldays Jacket / Coat.  I'm pretty pleased with how it turned out.  It's going to be much too big of course - as everything I make generally is - I seem to live in fear of spending lots of time and effort making something only to find that it's too small.  I'd much rather it was too big and could be grown into.  In this case I had to make a size 4 because the pattern is sold in 2 sizes and I opted for the 4+ size so that I would be able to make more in the future.  

I originally had my heart set on lining it with a brown fabric with big white polka dots, but of course I couldn't find exactly what I had imagined so went with this Rupert Bear fabric which is actually really cute and Jacob will probably love it more than he would have liked brown anyway!

The Elephant is from a RicRac pattern that I spotted in my local fabric store.  I think he's rather lovely don't you?

Paralysed by Choice...

Do you ever feel overwhelmed by possibilities? Paralysed by choice?  That’s me right now.  There are so many things I want to do.  Things I want to sew for myself. Things I want to sew for the kids.  Birthday prezzies that I need to make. Masks to sew for my shop. Patterns to develop and grade. Newsletters to write, marketing to do, blog posts to write.  So may things and I want to do them all.  So many things that it is completely impossible to choose one. So many things to do that really, all I can do is sit on the sofa and re-watch The West Wing and admit that I might be just be a tiny little bit obsessed with it.

Even my beloved To Do lists can’t help me at the moment.  They’re just too big and my available time is too small.  Plus my indecision means that I end up starting several things and finishing none which means that I never get around to crossing things off which, really, is the best thing about lists.  It's also why I always, always hand write them! So I just end up resenting my list which is metaphorically tapping me on the shoulder while I sit on the sofa. 

I'm sure I'll get out of my funk soon enough and start making progress again, but in the meantime I'm going to sit on the front porch with a glass of wine and enjoy this beautiful late summer evening.  

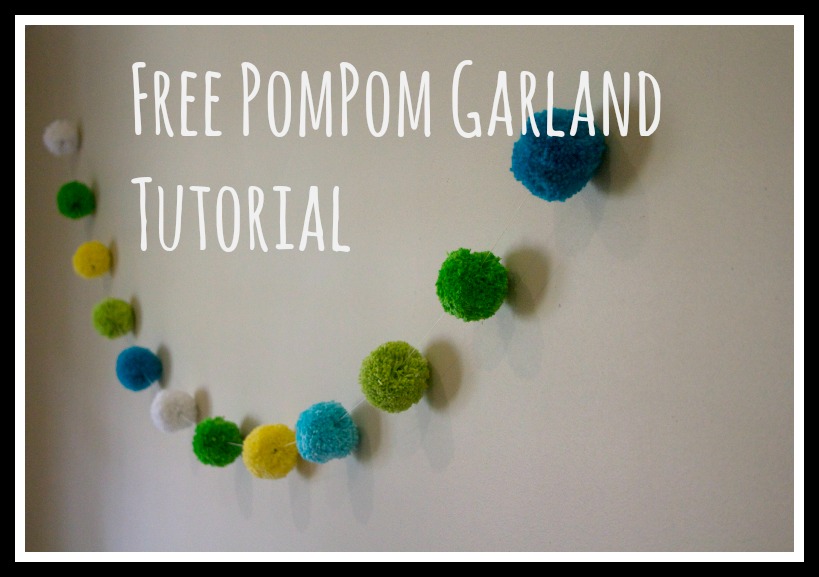
Free Pompom Garland Tutorial

Free Pompom Garland

Pompoms. I love pompoms.  They're like little balls of woolly goodness.  Even just the name is awesome. Pompoms. Say it with me. Pompoms. Tell me you don't love it!

Pompoms are great fun to make and so easy. It’s the sort of thing that should be done curled up on the sofa with a blanket and a cup of tea. If you have older children they will love making these so get them involved too!

You can use pompoms to make scarfs; you can use them to decorate stuff; and other stuff. Hell I don't know.  So they might not be very useful but they are just so damn awesome that you won't be able to stop yourself once you get started making them.  I'm no knitter but I'd probably knit a (very bad) hat just so that I'd have somewhere to stick my pom pom.  My sister and I used to spend whole days making these during the school holidays.  I always thought a pompom ball pool would be pretty amazing.

Anyway, just in case you get hooked on making them and need something to do with them, here's a little tutorial for a pompom garland.

First things first - Make your Pompoms:

You will need:

  • Wool in the colour(s) of your choice
  • Light - medium weight card

1.  Print the template provided.  Be sure to select 'Actual Size'  or set scaling to 'None' in your print settings.  

2.  Paste the template to the side of a cereal box or some other card of a similar thickness and cut them out. Place two rings together, one on top of the other.

3.  Take a long length of wool (several metres), fold it double and tie it onto your cardboard at one end. Begin to wind the wool around your template, passing it through the hole in the middle, over the edge and back through the middle. Work your way all around the template, creating a second layer of wool once you get back to the point where you started.  You can actually fold your length of wool 4 or 8 times before you start wrapping it around the template, the more times you fold it the quicker your pompom will grow. 

3.     When you come to the end of your piece of wool, tuck it under a neighbouring strand to keep it in place.

4.     Continue like this, tying on a new piece of wool each time you run out, until the hole in the centre of the card is almost closed and you can’t pull anymore wool through it. It should now be like a huge woolly doughnut.

5.     Choose a point on the outer edge of your pom pom and part the wool so that you can see the cardboard templates.  Insert your scissors between the two layers of cardboard and cut through the wool all the way around the edge.

7.     Take a length of wool and slide it between your two pieces of cardboard. Wrap it around a few times, pulling tightly to secure your pom pom and tie off. 

TIP: if you are going to be sewing your pom pom to a hat, scarf or other item leave these ends long.

8.     Tear through your cardboard templates and remove them from the pom pom. You should have a nice firm ball of wool.

9.     Trim the pom pom, cutting off any longer pieces of wool so that you have a nice round ball.  This is my favourite bit.  It's very satisfying; it's like shearing a sheep (or so I would imagine, not ever having actually sheared a sheep...) 

Make the Garland:

You will need:

  • 10 or more pompoms
  • 3 yards + (2.7m +) extra strong thread
  • Buttons or beads
  • Large needle

1. Pass your needle through the first button or bead and pull the thread through leaving a 1 yard / 1 metre tail.  Tie a knot around the button or bead to hold it in place on the thread.  

2. Use your fingers to find the centre of one of the pompoms and push your needle through it.  Pull the pompom along the thread and slide it right down onto the button / bead.  The button or bead should be completely buried in your pompom.  Thread another button / bead onto your string and push it right down onto the pompom. Tie it in place to keep the pompom from sliding around on your thread. Make sure that the button / bead is hidden in the pompom.

3. Repeat approximately 6" (15cm) along the thread to secure the next pompom to the string.

4. Continue in this way until your garland is the desired length (or until you have used up all of your pompoms!) Then hang it up and enjoy!