Macrame Plant Hanger Goodness

Modern Macrame Plant Hanger

Oh my goodness.  I LOVE this latest project.  

This has been on my 'To Do' list for months now and I kept putting it off because it just seemed like such a big project, but funnily enough, when I actually got down to doing it it was done in an afternoon!  

It was probably a bit ridiculous to choose such a large project as my introduction to Macrame but I just fell in love with the design of it and have been looking for something to break up this massive expanse of blank wall in our new extension (which has 4.5 metre high ceilings!).  The pattern was an Etsy purchase from Boho Journal Shop and it was great.  Easy enough for a complete beginner to follow and I think the end result is just beautiful!  Besides, I've never been one to do things by halves....

Modern Macrame Plant Hanger / Wall Hanging

I can totally see myself getting addicted to making variations on this theme.  I need to build up my knotting repertoire, it so far consists of square knots in various forms and that's about it. Luckily I bought about 250 metres of rope so I should have enough to experiment with!

Sorry to those who know me - you're all getting a 70's Macrame plant hanger for Christmas, if anyone objects you'd better let me know in advance! 

Modern Macrame Plant Hanger / Wall Hanging

Freezer Paper Stencilling

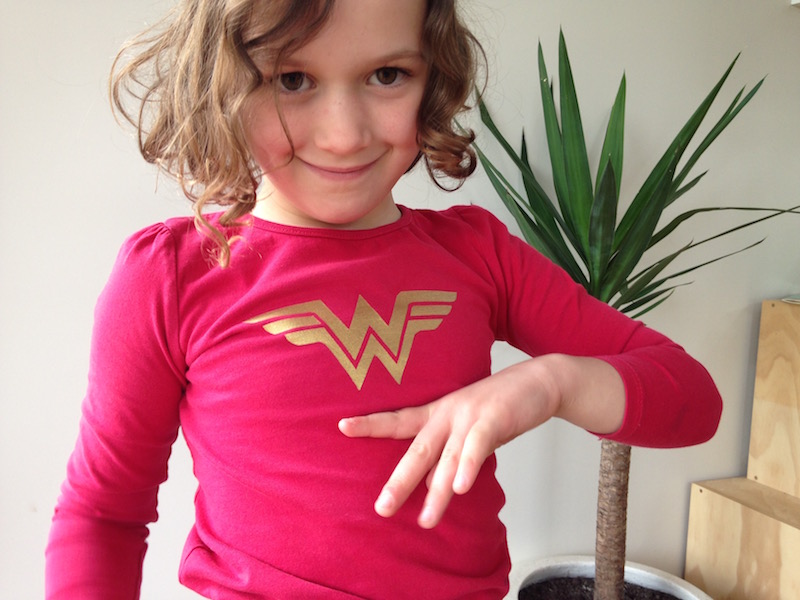
Freezer Paper Stencilling - Wonderwoman

Is it a bird?  Is it a plane?  No! It's Wonder Woman!  Someone is very pleased with my first efforts at Freezer Paper Stencilling!  Ella had a superhero party this weekend so we dug out one of the Wonder Woman headbands from my Etsy store stock, rustled up a blue star spangled skirt and jazzed up an old red T-Shirt by adding the Wonder Woman logo.

The Try Something New Every Month theme for July was 'Yarn' which I obviously didn't stick to.  I had intended to have a go at macrame but didn't manage to get organised in time so that's going to be next month's project instead - I've got grand plans for that one!

Instead I decided to have a go at Freezer paper stencilling which is one of those things that I have been meaning to try forever so it was great to finally have a reason to do it.  The freezer paper really is pretty amazing - which is fortunate really given how ridiculously difficult it is to get hold of here in Australia.  I had no luck in 3 of my local craft / fabric stores and then spent what felt like an eternity on the phone to another trying to get them to understand exactly what I wanted and then being passed from department to department while they tried to figure out whether they actually had any....  Still, we got there in the end and I bought a ton of it so that I hopefully never have to go through that palarver again!

Superheroes are very serious...

Superheroes are very serious...

Check out that awesomely wide gold elastic waistband - thanks Jimmy Buttons!

Check out that awesomely wide gold elastic waistband - thanks Jimmy Buttons!

Freezer Paper Stencilling - Wonderwoman

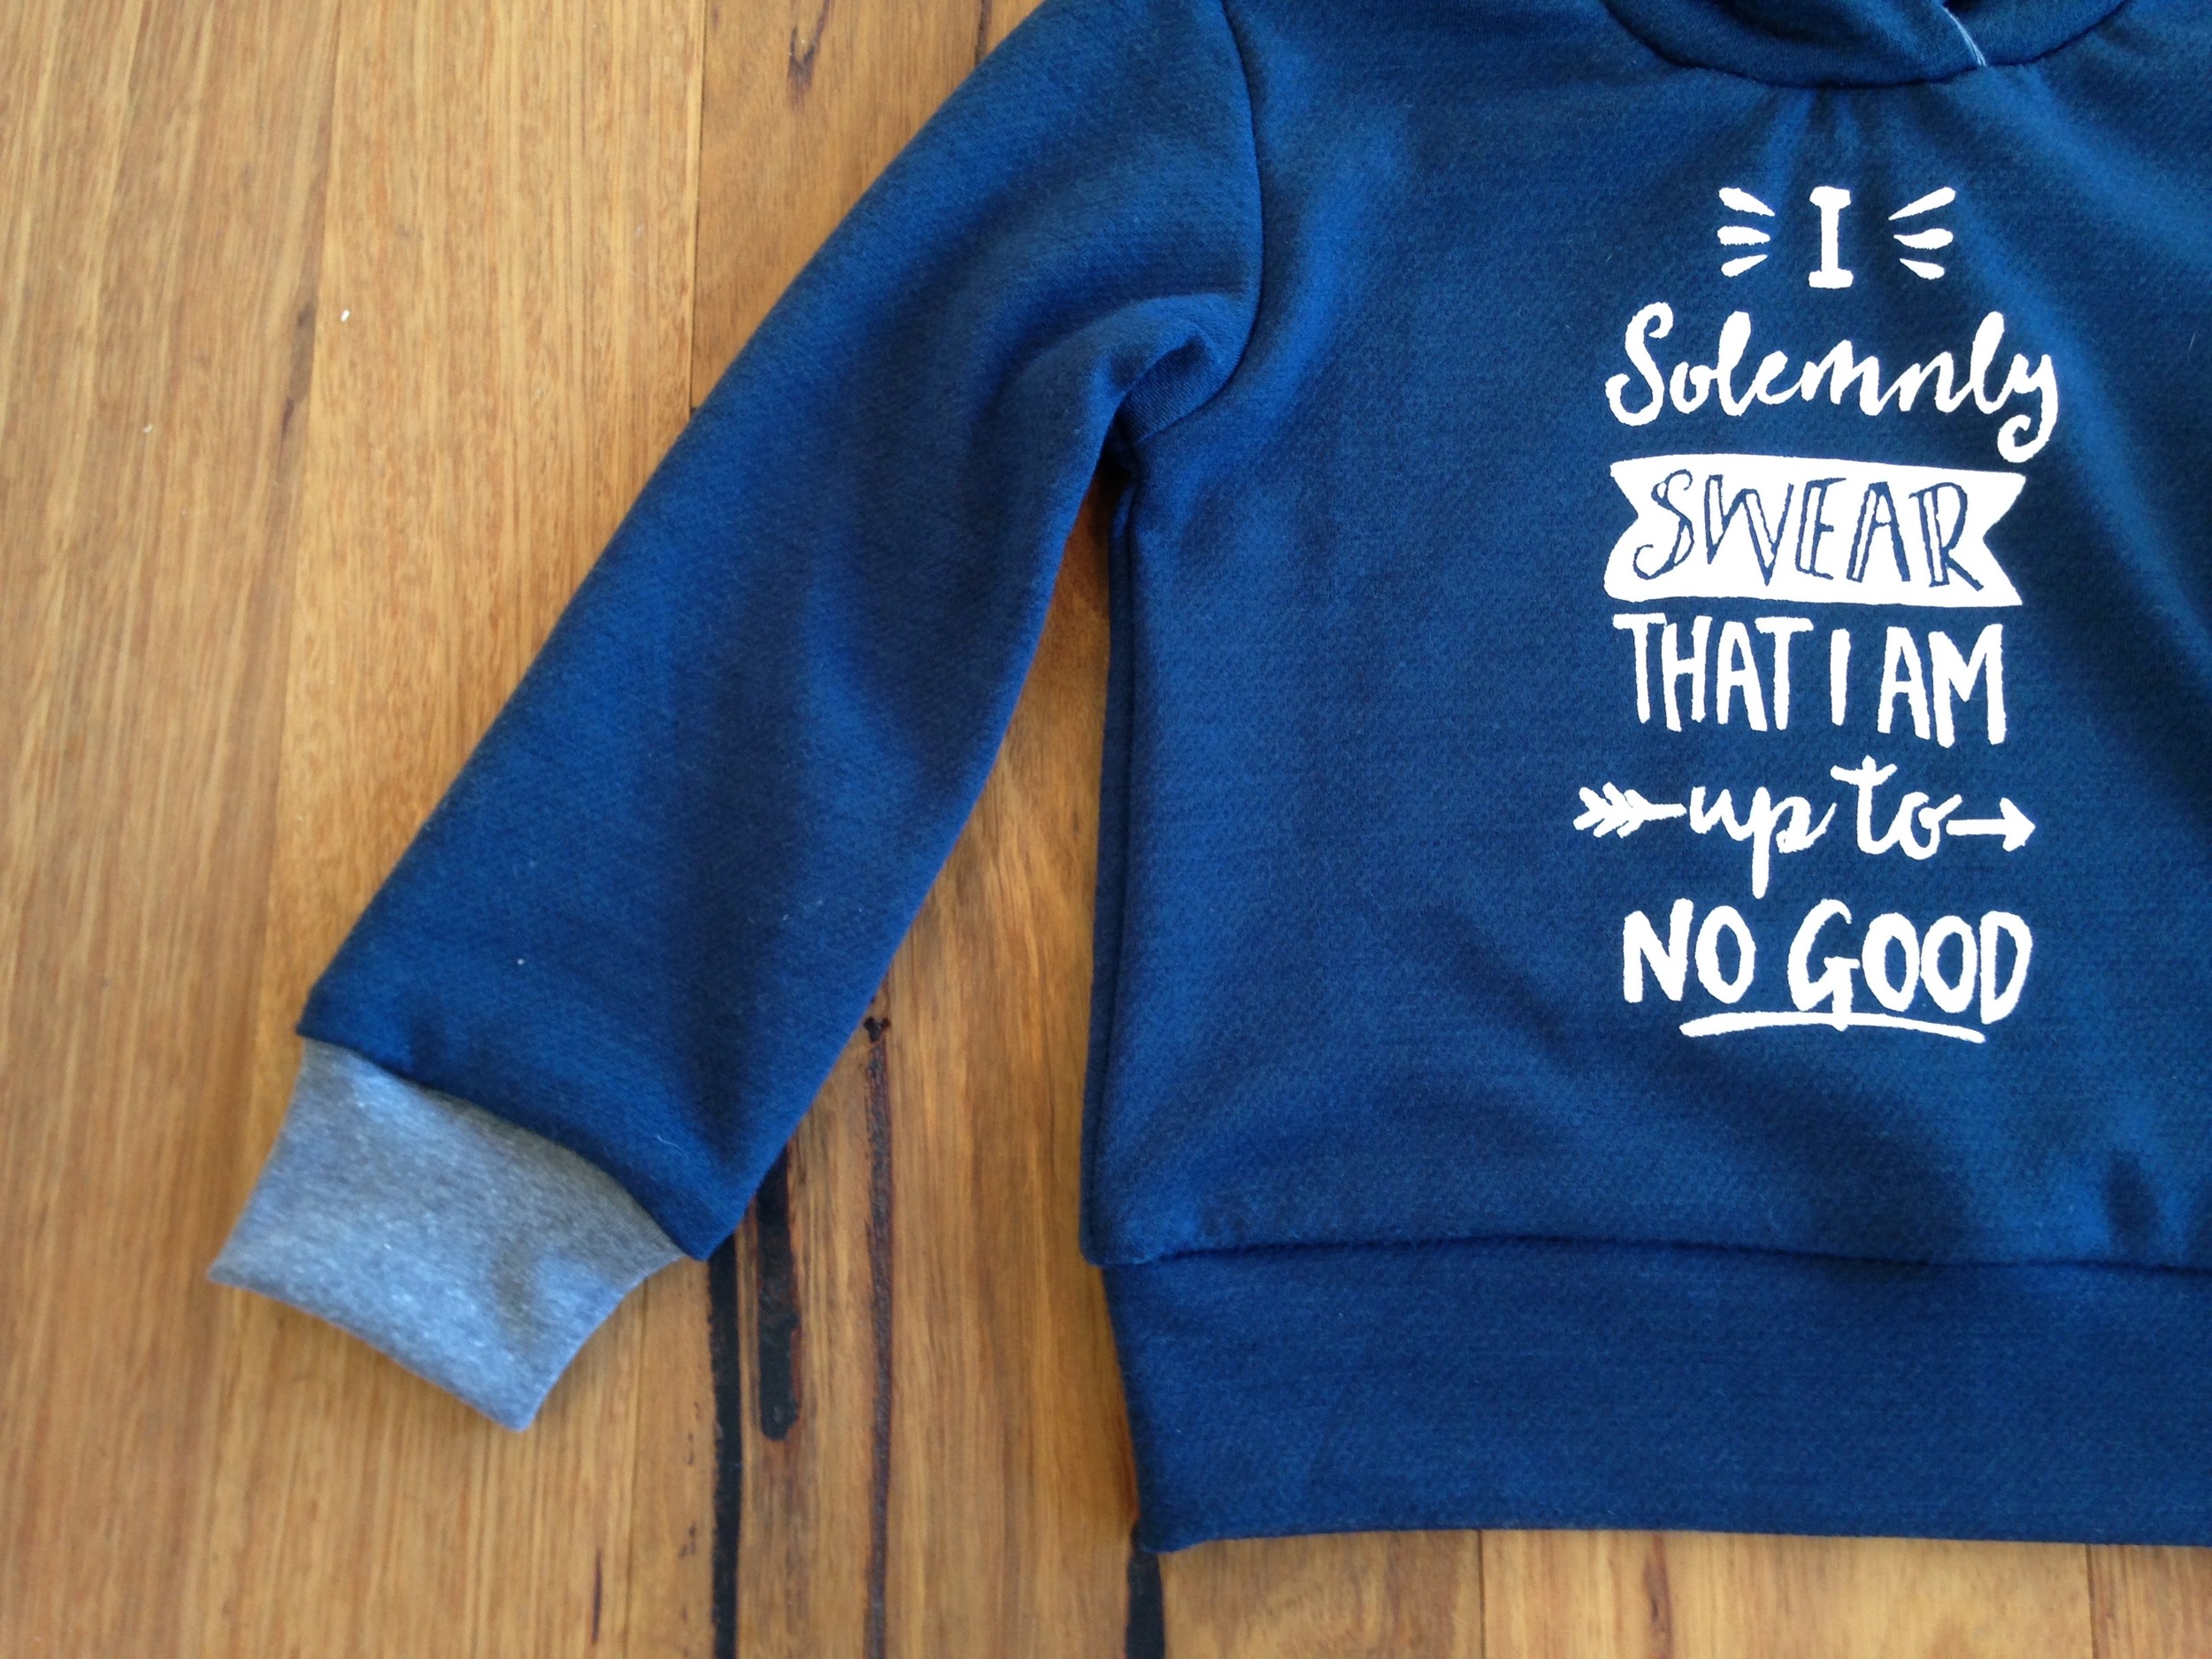
Having got the hang of Stencilling I decided to go for something wildly ambitious, because, well I'm ridiculous and I fell completely in love with this illustrated quote from Harry Potter by Rachel White Art. 

I spent about 2 hours cutting this one out and then managed to stuff it up in several different ways!  Firstly I melted my lovely merino wool while ironing on the freezer paper because I accidentally left my iron on very hot.  So, I had to try to peel the freezer paper off and reaffix it to a new piece (It took forever to cut out so I wasn't about to start again!) Consequently it didn't adhere quite as well as it should have and I got a little bleeding under the paper in places.

I solemnly swear I am up to no good hoodie - freezer paper stencilling

 I also used 3 coats of paint which was too much and made it really quite difficult to pull all the fiddly little bits around the letters off.  Still, I got there in the end!

The pattern was just a generic pullover pattern from an old Ottobre Magazine which I modified to give sleeve cuffs and a waistband because, well, frankly I'm too lazy to be bothered with using the twin needle on my sewing machine to hem it!  I also added a hood (arguably to avoid having to do the neck binding) but also because I really wanted to have a hood on it.

I can't help but think that this one was more for me than for the boy, but I did think the quote was very apt for such a cheeky little monkey!  Being the cheeky monkey that he is however, the little toad refused flat out to put it on.  This is his standard approach to jumpers at the moment but he usually comes up with some meandering excuse like 'I  don't like red, I only like blue' or 'I don't want to wear it if it used to be so and so's' (the vast majority of his clothes are hand-me-downs). It was partly this which led me to make him a jumper in the first place - my logic being that if I made something especially for him, in a colour that i know he likes, he surely won't have any problems with wearing it, right?

WRONG.

What I failed to take into account with all my well applied logic, was that my darling 4 year old exists beyond the realms of reason, in a world where 'I don't want to try it on now, I want to try it on next Wednesday' is a perfectly valid argument and no amount of persuasion, bribery or threatening is going to change his mind.  So.  Here are some pretty flatlay photos for you.... I give up, I'm going to throw myself on the sofa and watch Outlander.  Good night. xx

I solemnly swear I am up to no good hoodie - freezer paper stencilling

You May Also Like...

Making Flower Crowns - and a Fairy Birthday Party

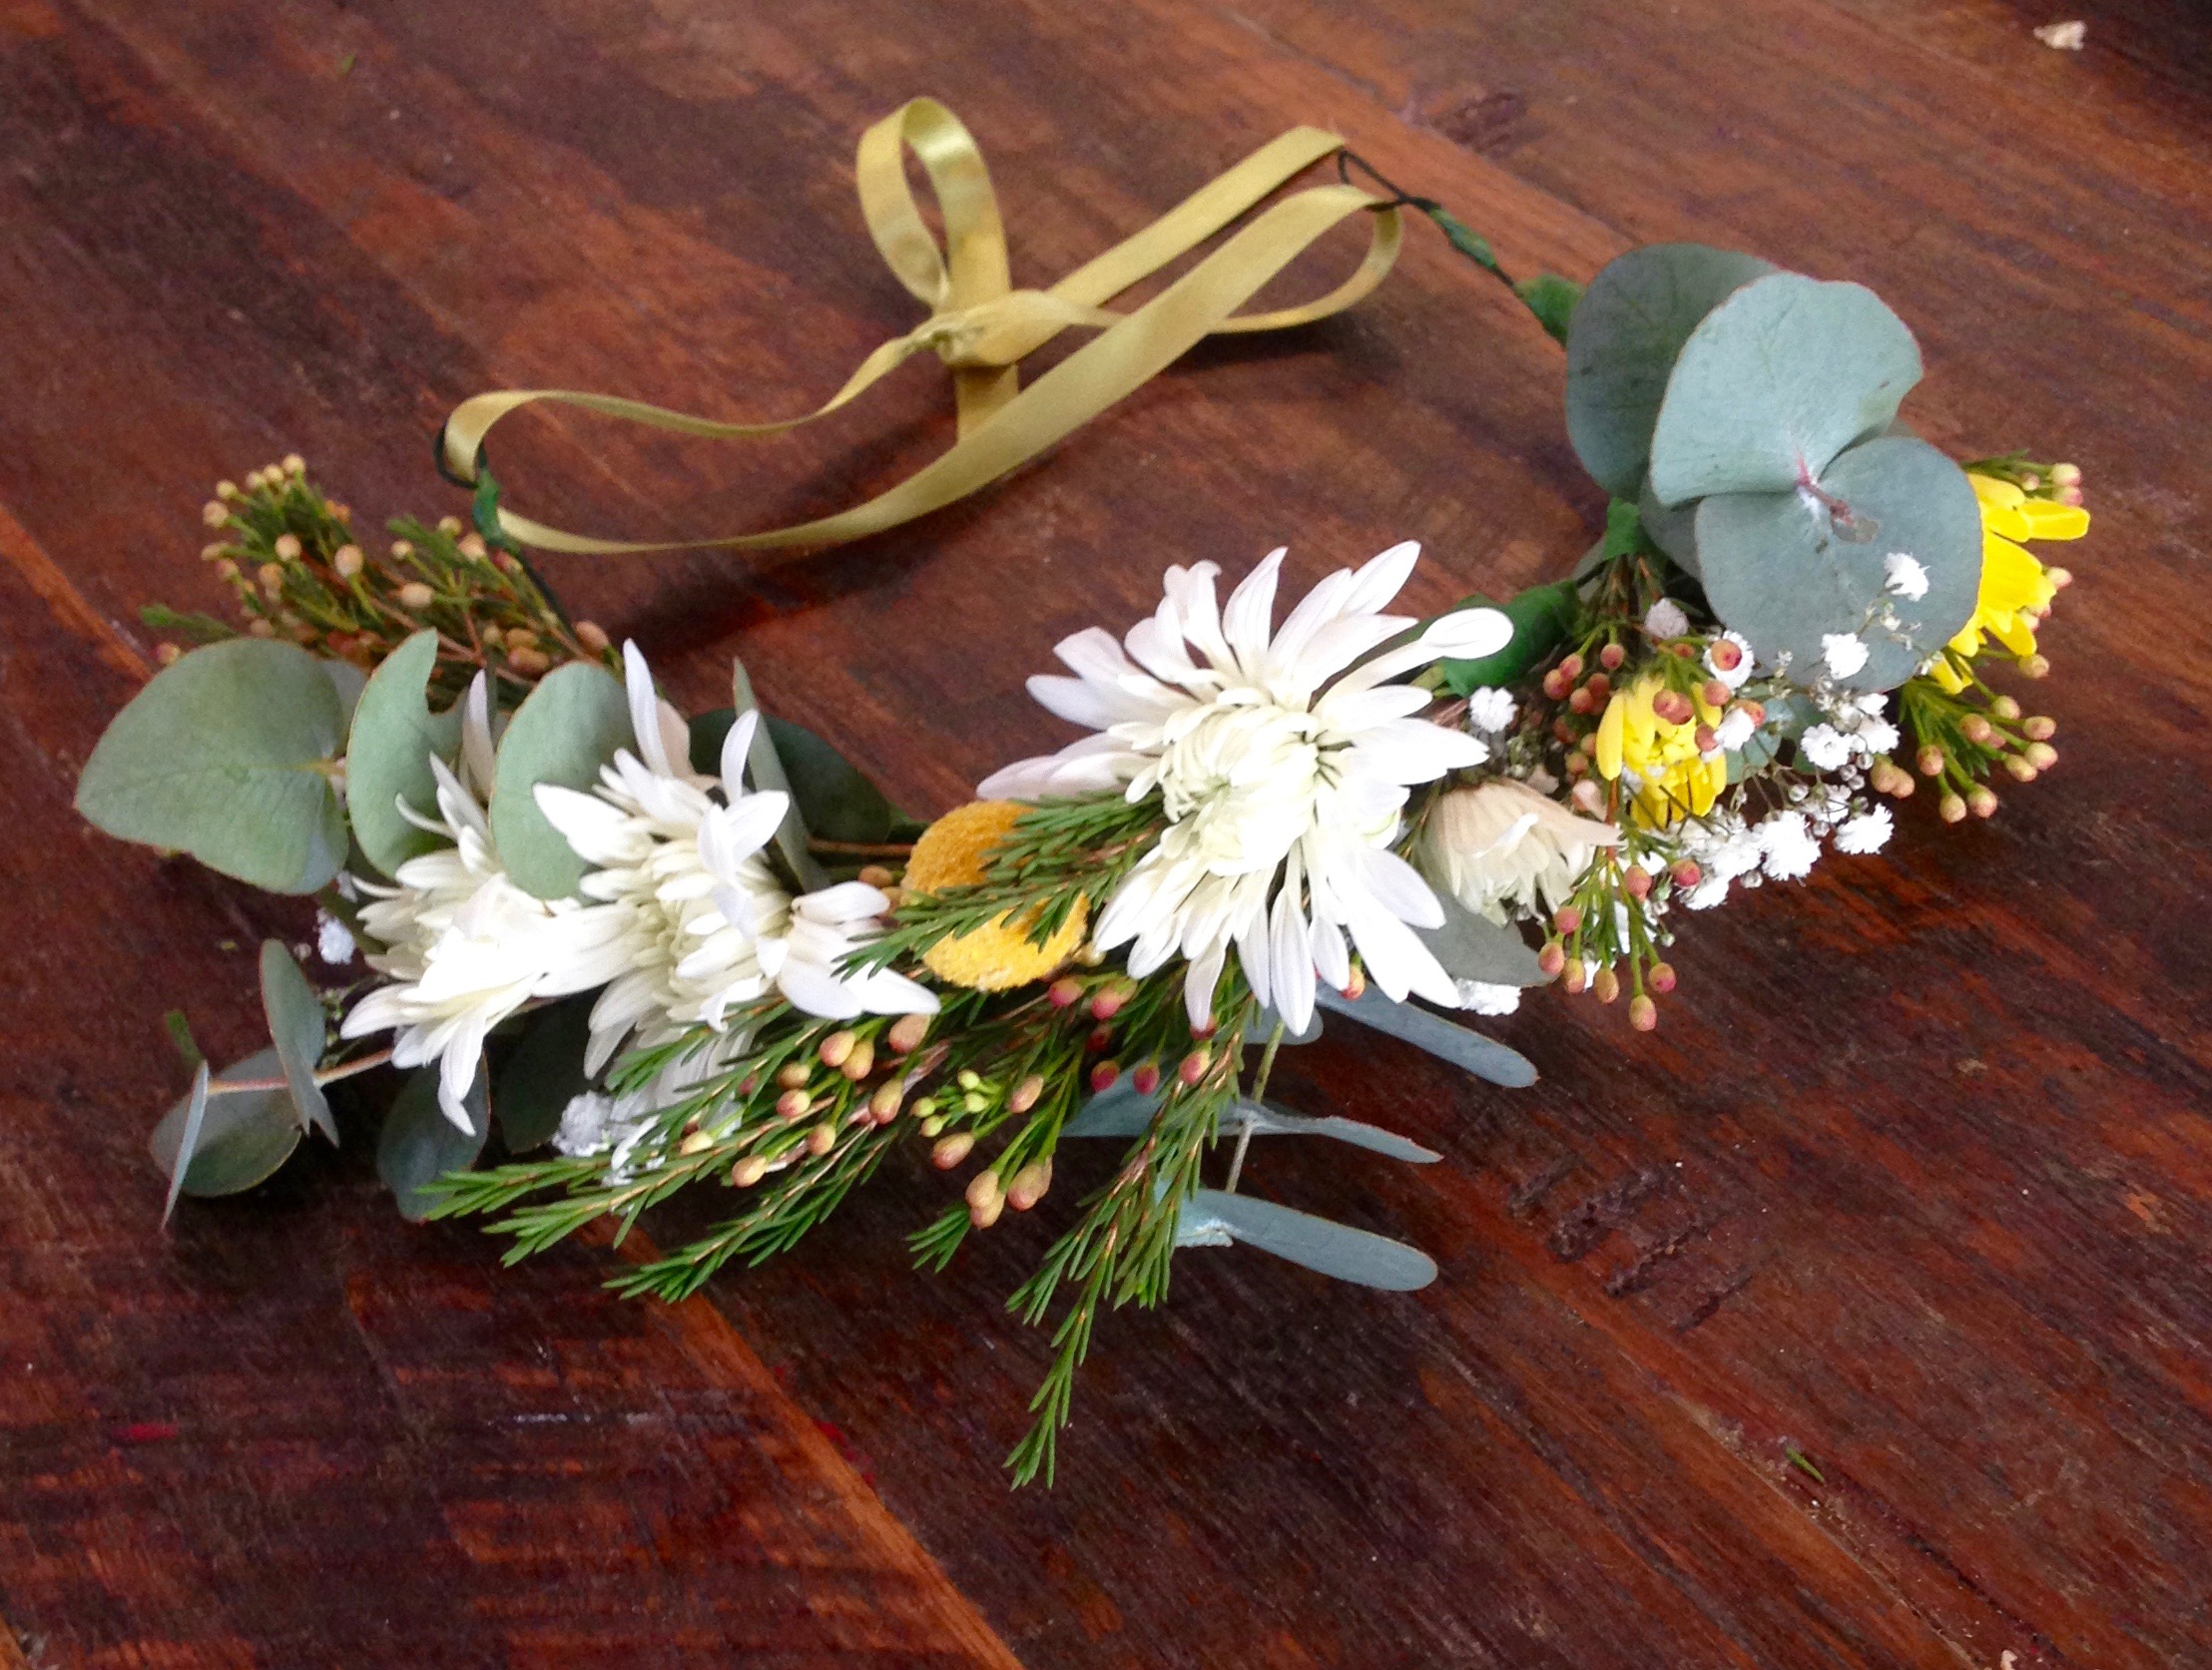
Handmade Flower Crowns

I've been dying to have a go at making these gorgeous flower crowns ever since I saw Siobahn Rogers' beautiful crowns on instagram.  So, when my big girl announced that she wanted a Fairy party for her 6th Birthday it seemed like a good opportunity to give them a go. 

Handmade Flower Crowns

Given that it's the middle of winter here I didn't have a massive choice of flowers at the market, but I managed to find some pretty pinks and yellows and some lovely native Australian greenery to go with them.

I didn't think that Ella's party guests' attention would stretch to making the crowns from scratch so I wanted to prepare as much of it as possible in advance.  There is a great tutorial here on Siobhan's website.  I bent the wires into shape and made loops at the ends through which they could be fastened with ribbon and I trimmed all the stems and arranged the flowers into little bunches so that the girls could choose 5 or 6 to wind onto their crowns. (This was the point at which I began to regret the whole exercise...!)  Anyway, finally, about 2 hours later I had enough bunches for all of our little fairy friends to make a themselves a crown.  

Handmade Flower Crowns

We even had a few bunches left over which I popped onto the top of the birthday cake.  I'm going to be doing this for every little (and big!) girl's birthday cake from now on.  It was quite incredible - the cake went from being very ordinary to amazingly special in about 10 seconds flat!

Just put a flower on it.

Just put a flower on it.

A happy little Birthday Fairy in her Flower Crown.

A happy little Birthday Fairy in her Flower Crown.

As one of the party games we had about 50 balloons which we filled with confetti and silver stars. We gave each of the children a pin and let them go nuts.  Literally.  It was complete madness.  The balloons lasted about 10 seconds, vanishing in an explosion of pops, bangs, glitter, confetti and delighted squeals.  

Confetti Filled Balloons

I had thought I might get some cute photos of children being showered in confetti.  Wrong. What I actually got was 10 seconds of insanity.  When I looked up from comforting the poor kid in the corner who turned out to be terrified of balloons popping, all that remained was a few shrivelled pieces of rubber and an almighty mess.

Confetti Filled Balloons - the aftermath
One of our little fairy's handmade birthday presents - her very own fairy garden.

One of our little fairy's handmade birthday presents - her very own fairy garden.

I really loved this project, it made me wish I was 6 years old so that I could run around wearing flower crowns every day. We'll definitely be making these again, particularly now that I have all the supplies, perhaps we'll go for a nature walk and try making one out of wildflowers next time.

Handmade Flower Crowns

You May Also Like...

English Paper Piecing - A Scrap Busting TSNEM Project

English Paper Piecing - A scrap busting Try Something New Every Month Project

Ok, so it might be halfway through June but here is my May 'Try Something New Every Month' project.  The theme for this month was 'handwork' and in a rare fit of compliance I decided to go with it and have a go at English Paper Piecing.  

I'm going to blame my tardiness on a combination of technical issues (my cloud is full which apparently doesn't make it rain but does make it hard to get photos off your phone and onto your computer.... I know - Yawn! Sorry!...), the glacially slow progress of my hand sewing and the fact that I had lots of other (frankly more interesting and instantly gratifying) projects to sew.

English Paper Piecing - A scrap busting Try Something New Every Month Project

This was, first and foremost, a scrap busting project.  I seem to be incapable of throwing away even small scraps fabric and thought that this would be a great way to use some of them up.  I genuinely thought that I was starting small with this project - it was the first time that I'd tried English Paper Piecing so it made sense to keep it small and simple right?  The theory was good, but unfortunately it takes a LOT of 1" hexies to make even a rather small piece - I mean just LOOK at that pile of cardboard templates! 

English Paper Piecing - A scrap busting Try Something New Every Month Project

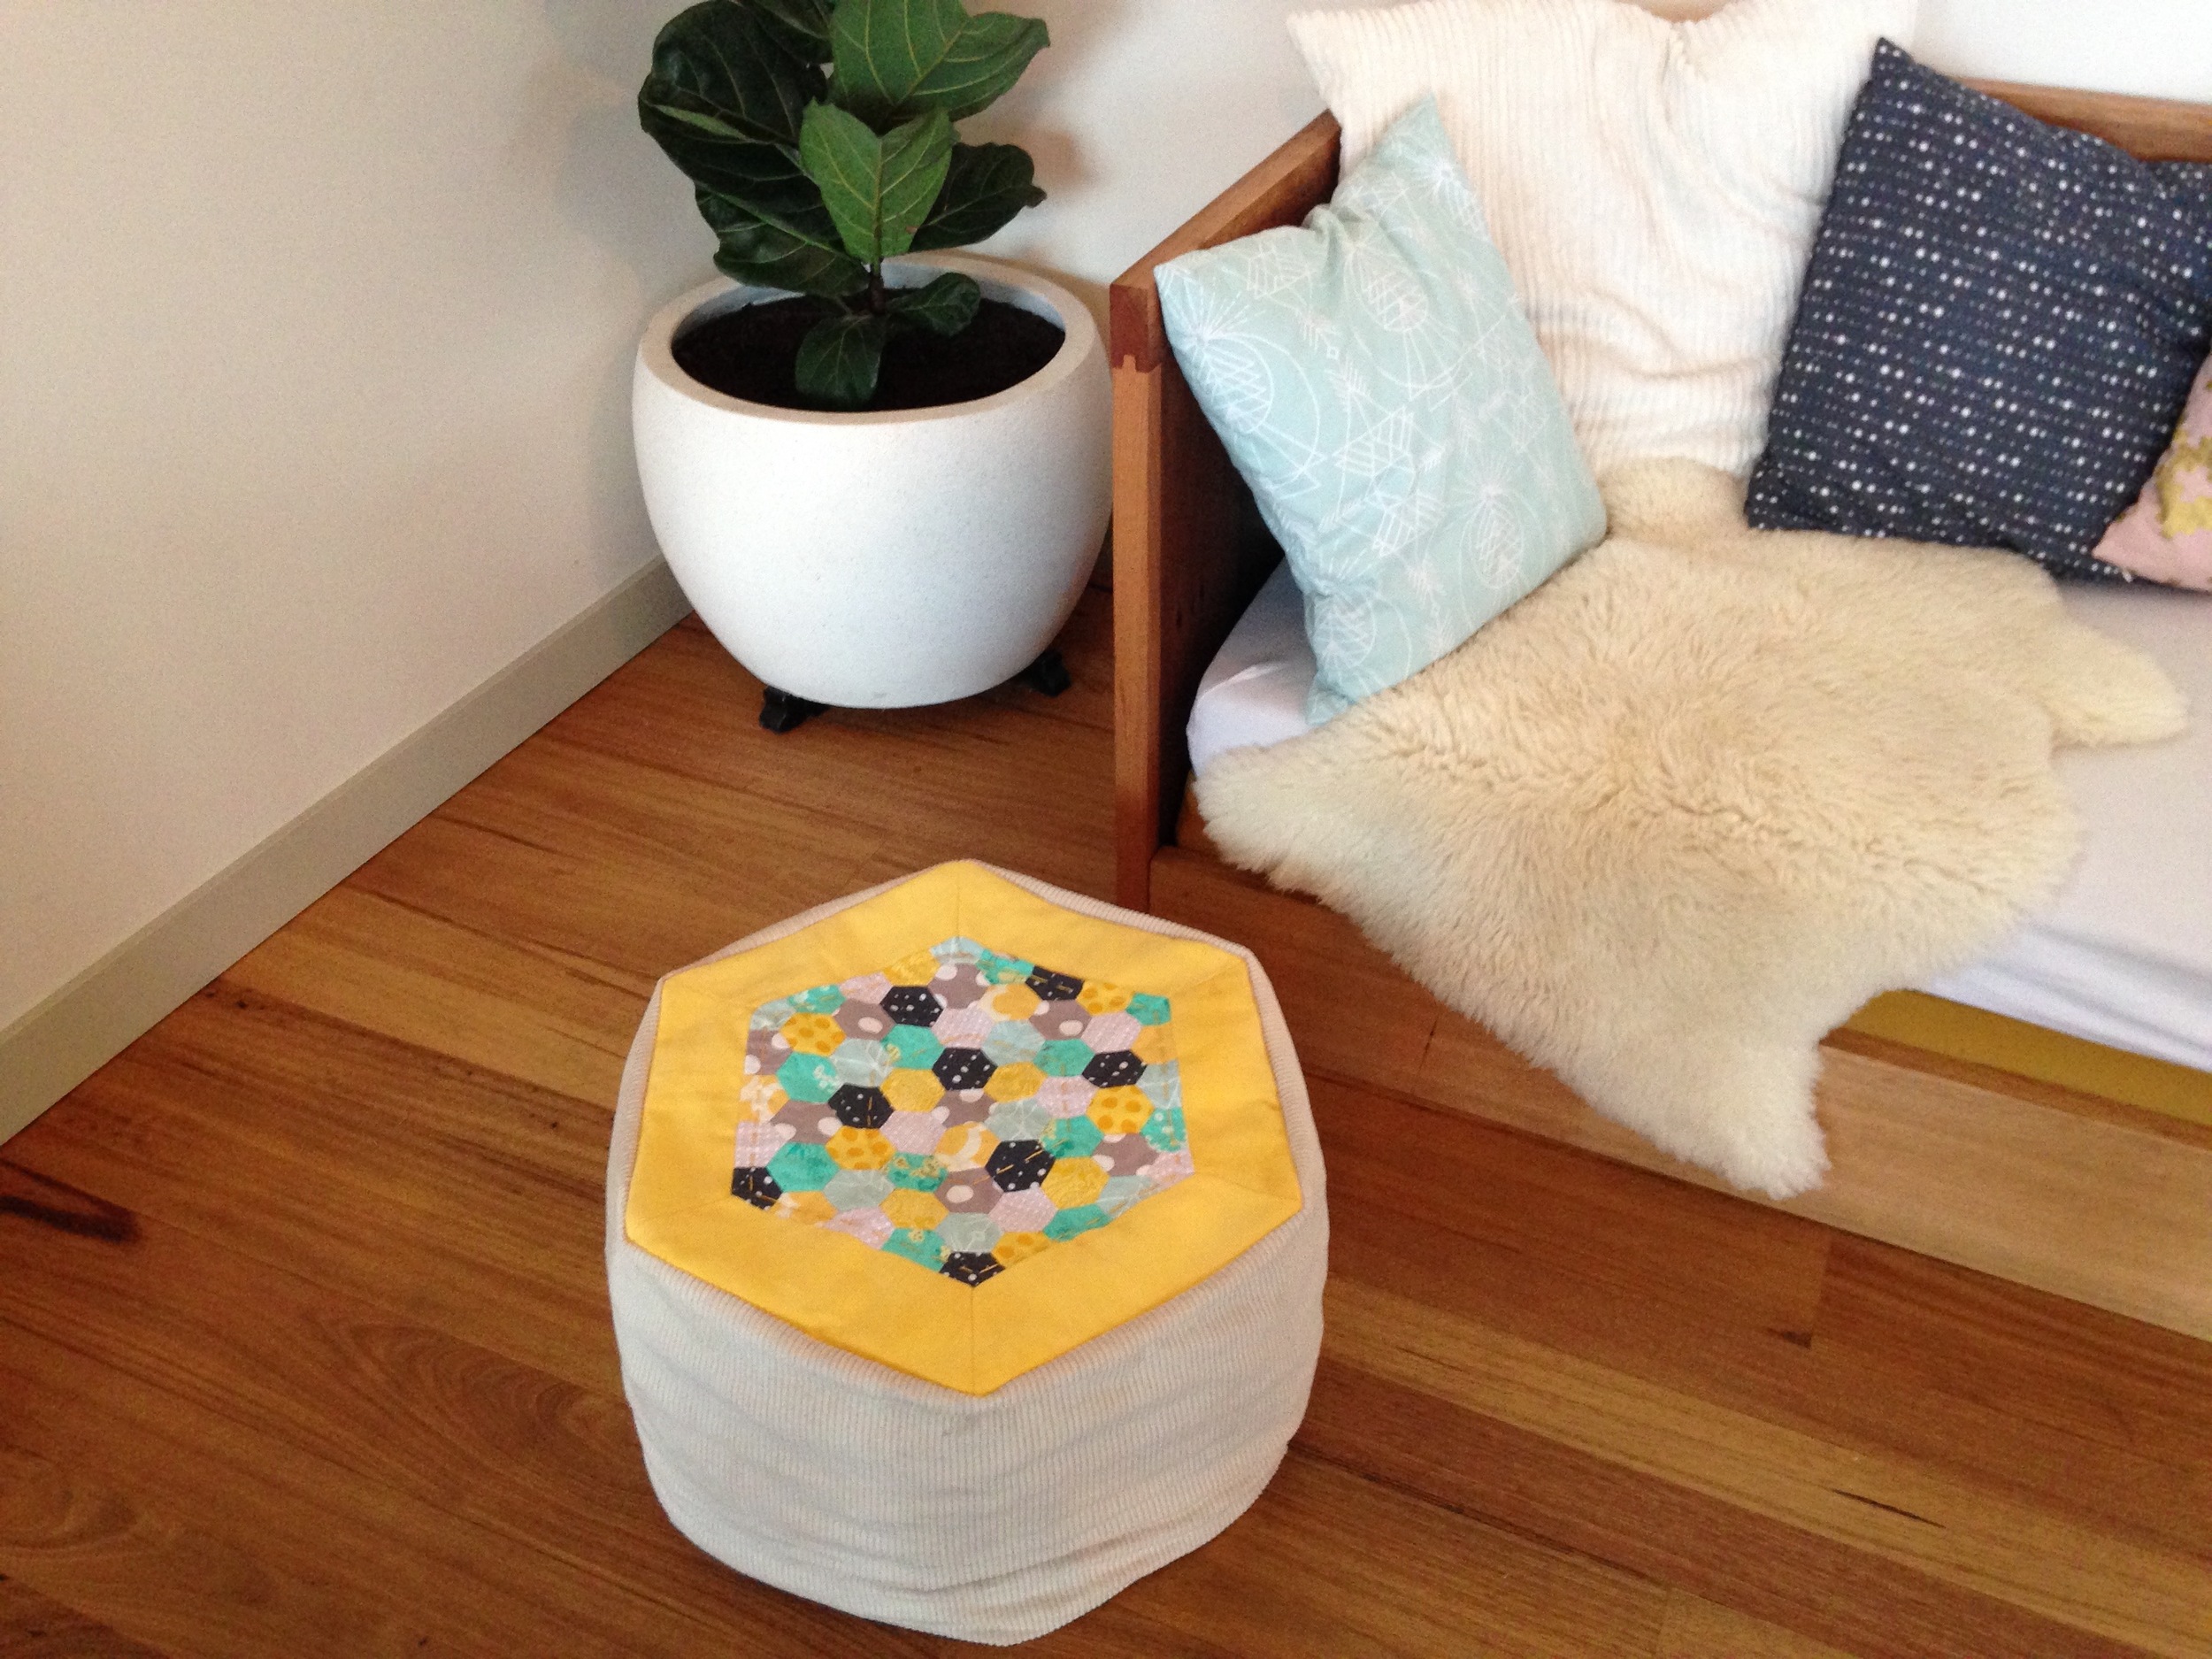
I was pretty pleased with my final patchwork, but it still wasn't nearly big enough and I didn't fancy taking the rest of the year to complete this so I went and sewed a big yellow boarder around it before hand quilting the top sewing it into a footstool. 

English Paper Piecing - A scrap busting Try Something New Every Month Project

Just don't look too closely at my hexies please or you'll see the wonky joins and gaps.  You know how you hear quilting people say 'nice points!'? No one is ever going to say that to me.....

English Paper Piecing - A scrap busting Try Something New Every Month Project

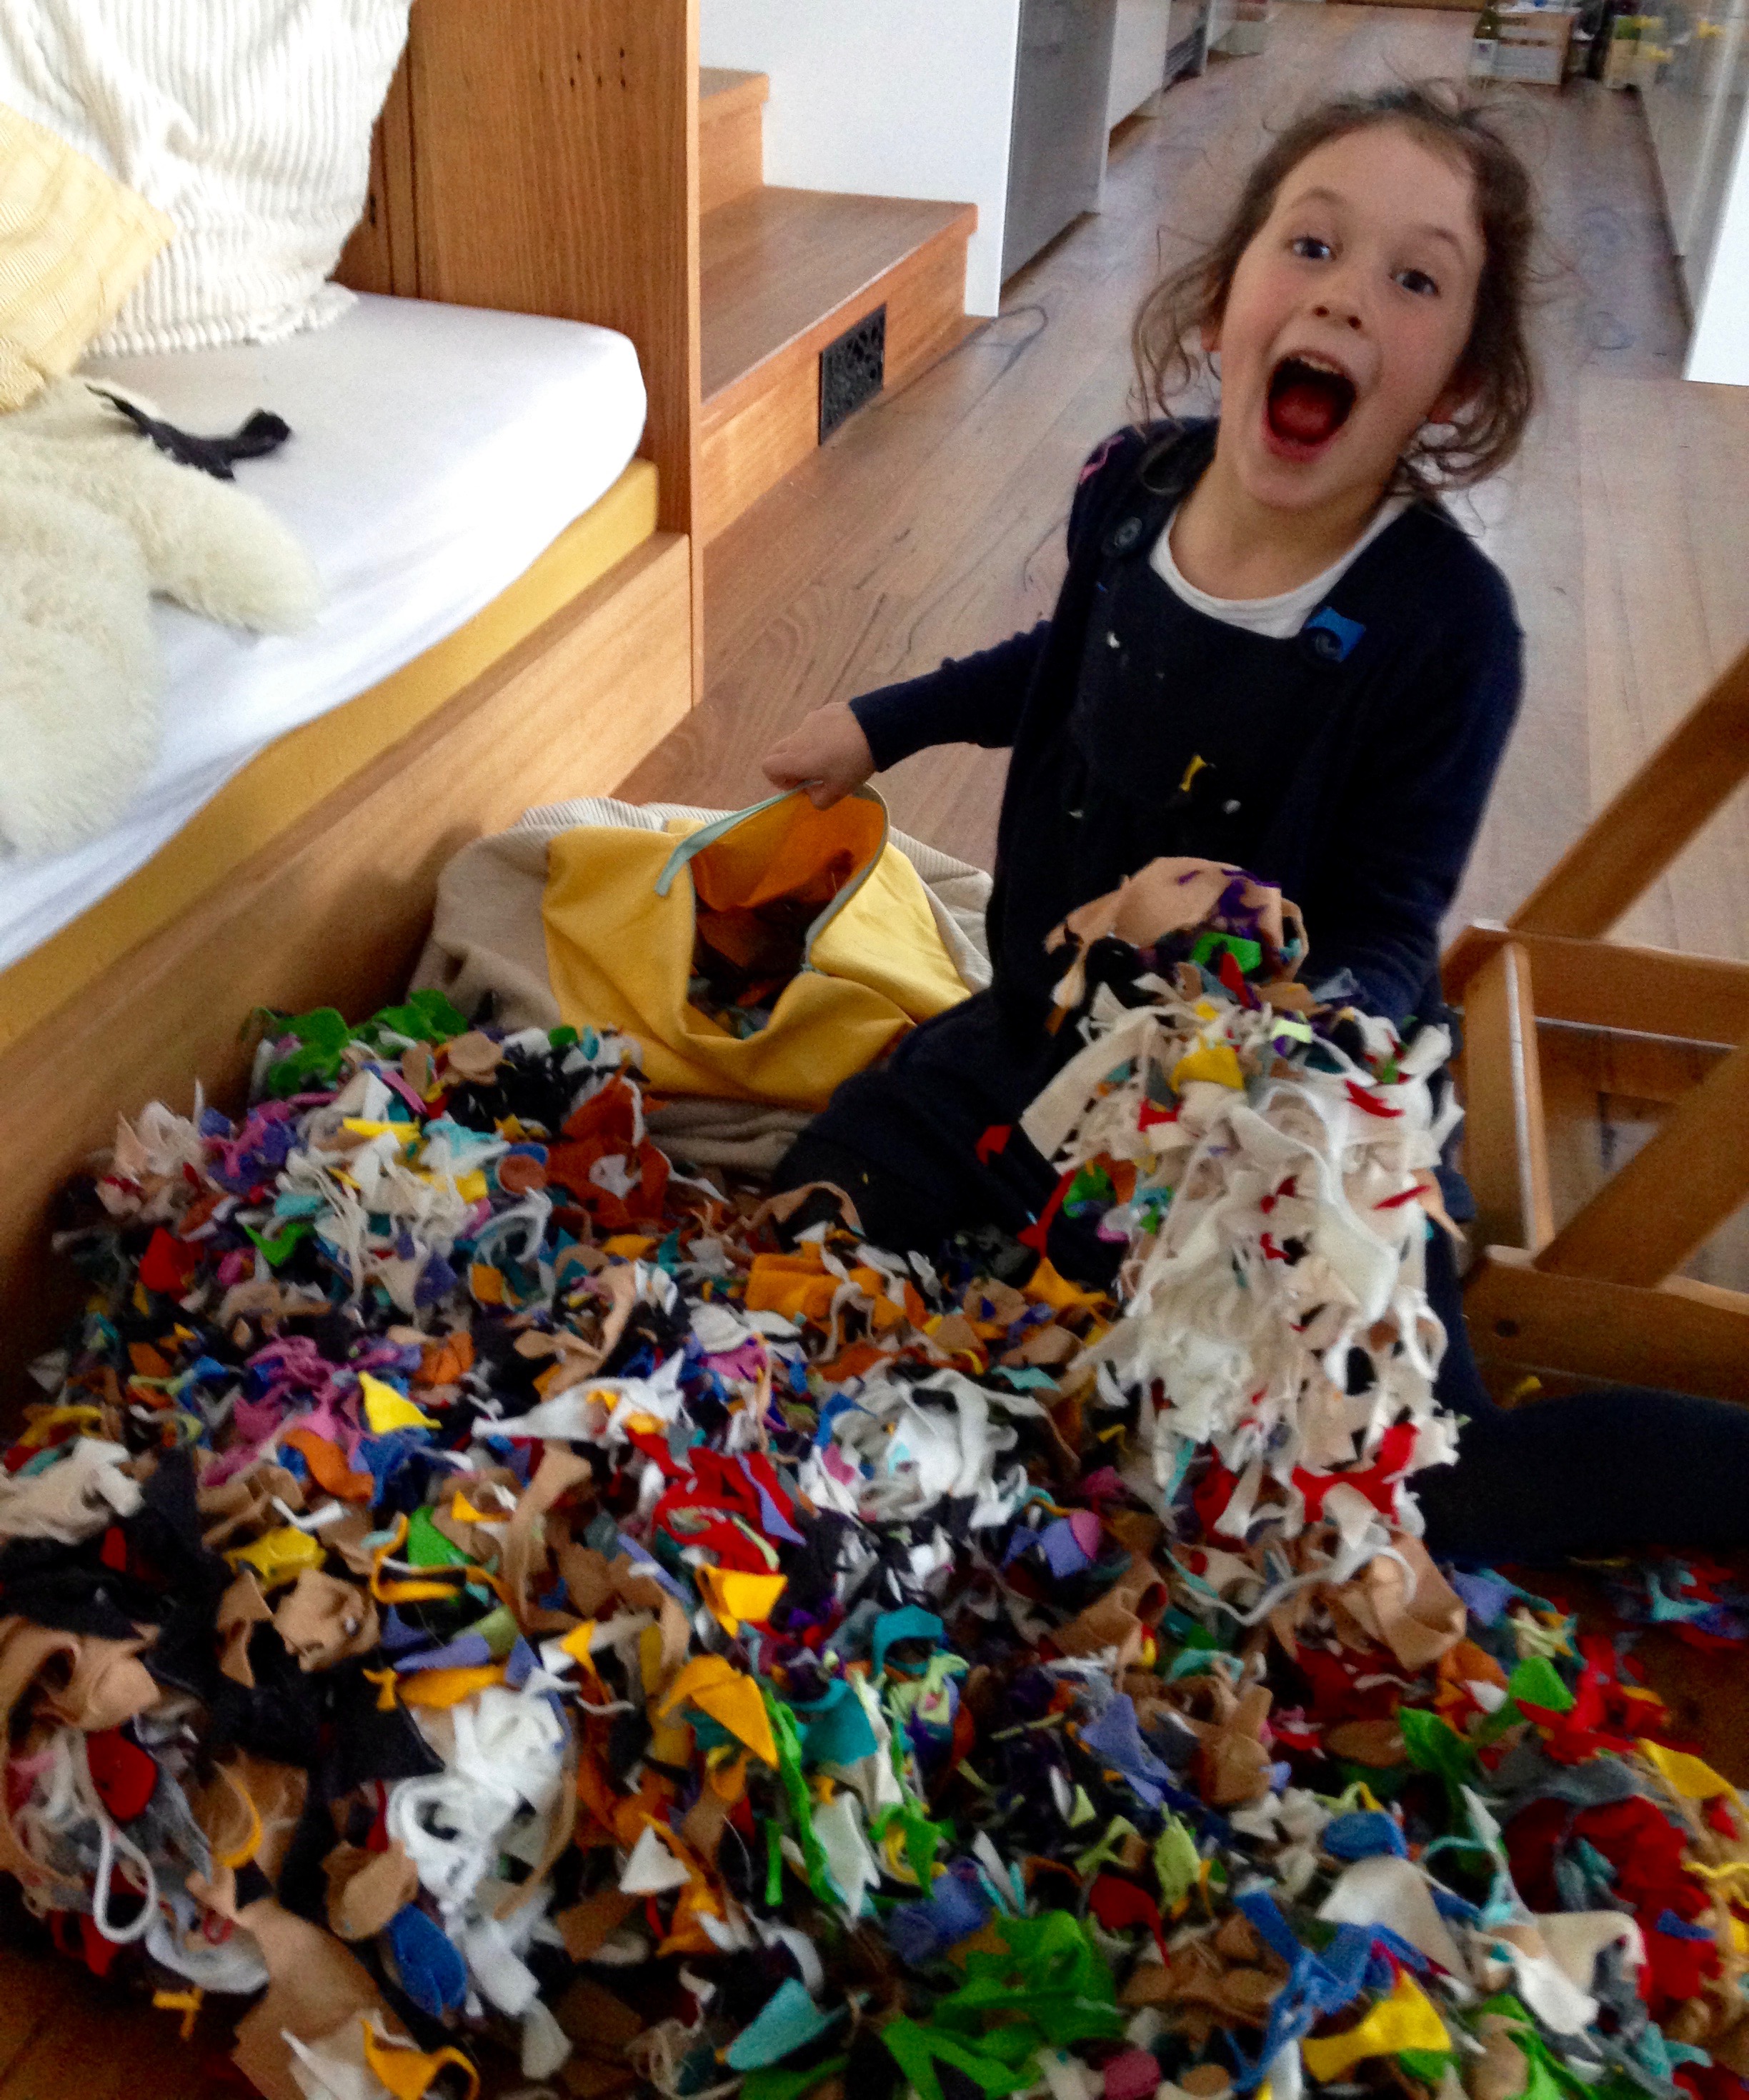
Once I had my footstool cover it needed stuffing (and this is the really brilliant scrap busting part) it's also the part where you begin to think that I might actually be crazy.. BUT.  If you've been here before, or follow me on Instagram, you'll know that I spend a lot of my 'free' time sewing up felt dress up masks which I sell on Etsy and at local handmade markets in Melbourne.  Anyway, the point is that cutting out all of those felt masks results in lots of tiny scraps which I don't seem to be able to throw away.  I'm honestly not sure why I didn't just put them in the bin except for that I had vague, half-formed ideas about using them to stuff a pillow or something at some point.  So; this is what a year's worth of scraps looks like (and how a 5 year old looks when you let her tip them all over the dining room floor and roll around in them):

https://www.etsy.com/au/shop/Stitchandwillow?ref=hdr_shop_menu&section_id=16893907

And this is how my paper pieced, felt scrap filled, labour of love footstool looks when finished. I'll admit to feeling a little smug, If only because I actually finished the thing!  I'm not sure I'll do any more English Paper Piecing, at least not in the near future, but despite all my grumbling I did rather enjoy this (possibly because I gave me an excuse to sit on the sofa and plow through another season of Mad Men!)

English Paper Piecing - A scrap busting Try Something New Every Month Project

Right.  Time to get cracking with June's TSNEM project!

You May Also Like...

I made a leather bag!!

Leather bag making workshop with April Rhodes | Willow & Stitch

Ok, Let me just get this out of the way first of all:

I MADE A LEATHER BAG!

I MADE A LEATHER BAG!

I MADE A LEATHER BAG!

Sorry.  Just a tiny bit excited about this new skill that I’ve learnt!  

If you follow me on Instagram you will have seen that this month I was lucky enough to fly up to Sydney to spend a weekend sewing with the very lovely April Rhodes.  It was such a great weekend - so good to spend the weekend being creative, sewing and hanging out with some beautiful ladies.  

While I thoroughly enjoyed all of the workshops, (we made the Staple Dress and the Pop Over Poncho and also drafted our own skirts), I have to say that the leather bag making session was my favourite.  I’ve never done anything remotely close to sewing with leather before so it definitely fits into the category of ‘Trying Something New’!  

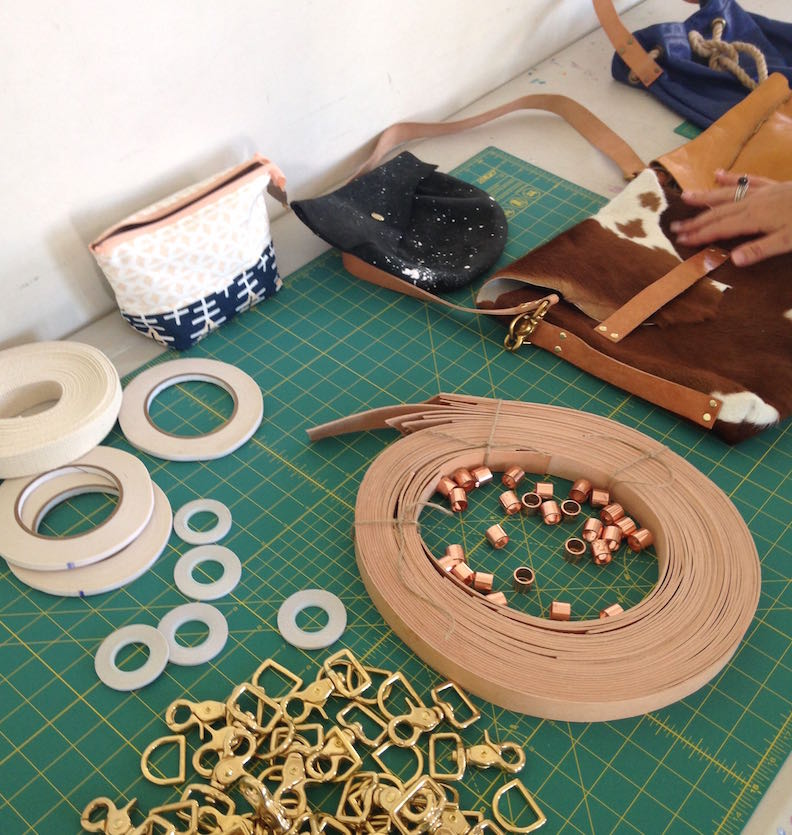
Some of the hardware we used.

Some of the hardware we used.

The beautiful selection of leather to choose from.

The beautiful selection of leather to choose from.

Using clips to pin the leather in place.

Using clips to pin the leather in place.

Some of the many weird and wonderful tools...

Some of the many weird and wonderful tools...

My starting materials.

My starting materials.

There were a lot of new techniques to learn but once you’ve got your head around those the leather was surprisingly easy and satisfying to work with.  The fact that you can leave all the edges raw makes constructing the bag actually pretty easy.  

Probably the trickiest (and most expensive) thing about it was all the hardware required - I’ve already put all the tools on my birthday wish list, although sadly it’s not my birthday until October - I may have to come up with another plan…. I had started to do a little research to find out where I could buy the tools from - until an announcement popped up in my IG feed saying that April Rhodes was going to open her own supply shop which will sell all the materials needed! Excellent - that’s that problem solved then...

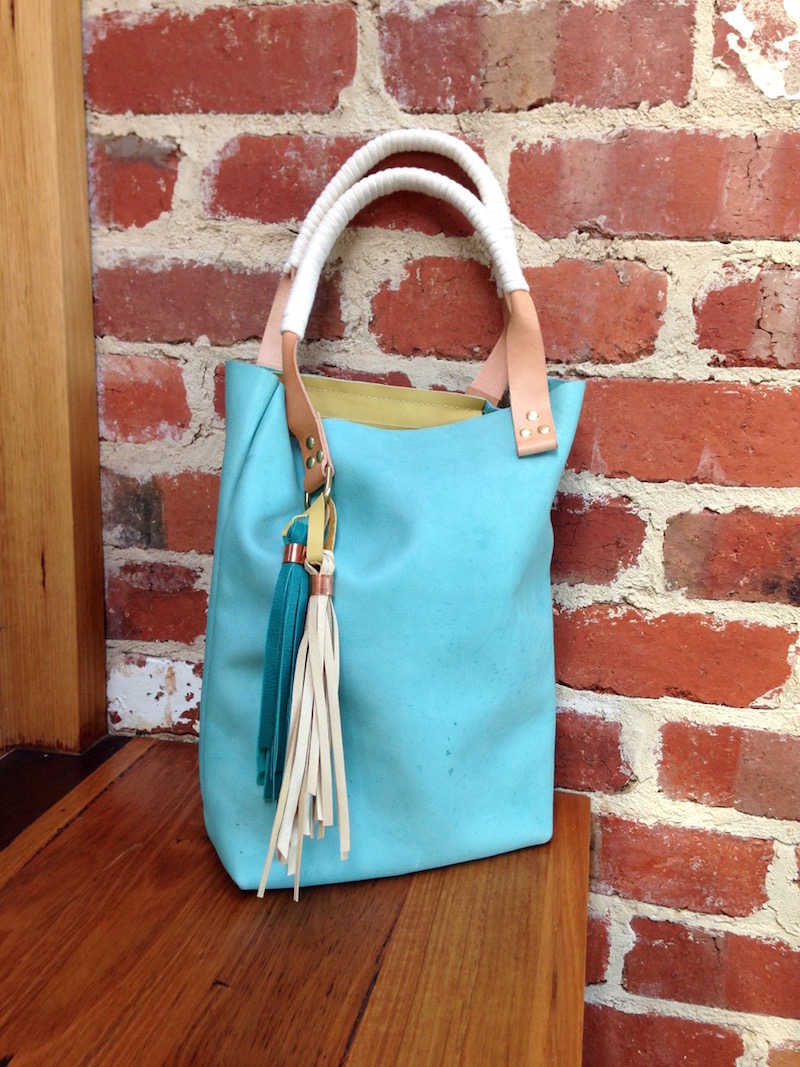
Leather Bag Making Workshop with April Rhodes | Willow & Stitch

I’m so pleased with my bag (just in case you haven't guessed that already!). I sewed a little inside pocket to hold my phone and a pen, and we added these fabulous handmade tassels (I can see another obsession developing around tassels but that’s a story for another day…)  I also decided that I would wrap my handles with rope (just to add a little continuity from last month!)  

Leather Bag Making Workshop with April Rhodes | Willow & Stitch

The bag also has a detachable shoulder strap so that I can wear it like a messenger bag if I choose. I won’t tell you how much we struggled to work out exactly how we needed to thread the strap through the fittings to make it adjustable - I think our heads nearly exploded but we got there in the end, and had a lot of fun trying to work it out!

Once again, I have so enjoyed this month’s Try Something New project - and once again I can see it turning into an expensive habit if i’m not careful!  At least I haven’t rushed out and spent hundreds of dollars on leather yet, although that’s not for lack of wanting to!  I have a feeling that all of my nearest and dearest are going to be receiving leather bags for christmas - whether they want one or not!

Leather Bag Making Workshop with April Rhodes | Willow & Stitch


You May Also Like....

Sewing Rope Baskets | Try Something New Every Month

Sewing Rope Baskets | Try something new every month by Willow & Stitch

I had SO much fun with this month's project.  I've been dying to try my hand at making these lovely rope bowls for months so TSNEM was just the nudge I needed to get started.  

I can't begin to explain just how satisfying these are to make.  Once I'd got the hang of it I found that the small / medium sized baskets only took around 20 minutes each to make.  There's something very meditative about sewing them, I think it's partly because you're going round and round in circles, and partly because they're so simple that there's really not much thinking involved.  So fun, but goodness me - you wouldn't believe how much thread you'll go through - I've never wound so many bobbins in my life!

Sewing Rope Baskets | Try something new every month by Willow & Stitch

But the thing that I really loved about sewing these baskets is that it isn't really like sewing at all. To me it feels more like sculpting; the angle that you hold the bowl at, the tension on the rope, the variations between different types of rope all contribute to the shape. No two baskets turn out the same (no matter how hard I try) and when I start I often have no idea what the finished thing is going to look like.  It's always lovely surprise to see what comes out the other end.

Sewing Rope Baskets | Try something new every month by Willow & Stitch

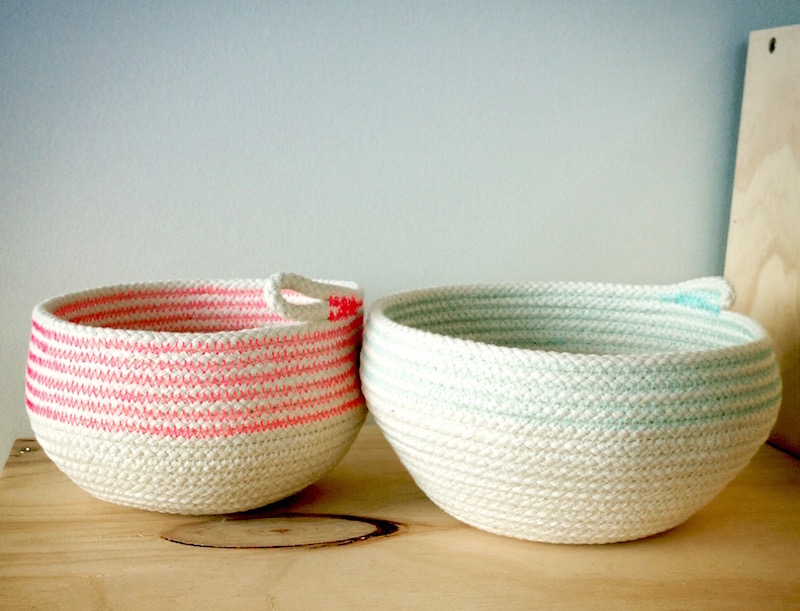
I made several baskets using coloured thread to add interest and also had a lot of fun experimenting with paint - both painting the finished baskets and painting the rope before sewing - a la Gemma Patford who has a wonderful little instructional video in case you want to have a go at making some of these beauties yourself!

Sewing Rope Baskets | Try something new every month by Willow & Stitch

I had enormously high hopes for this huge rope market basket, but despite it taking me hours and hours to sew I couldn't help but be a little disappointed with the end result, it turned out pretty wonky and misshapen.  I was all ready to pull it apart and begin again (there must be 30 metres of rope in there!) but actually it's beginning to grow on me and I'm starting to love it despite (or perhaps because of) it's wonkiness. 

Sewing Rope Baskets | Try something new every month by Willow & Stitch

It would be remiss of me not to mention that making these baskets is insanely addictive! Seriously; do not try this if you're not prepared to go out and buy a giant 250 metre roll of rope once you're finished your first basket!  It isn't just me who loves them either - the whole family is obsessed.  Hubby was making requests for baskets to prove his bread in, the kids keep nagging me to make more for them / commandeering my finished baskets.  I found this one full of Jacob's treasures.

Consider yourself warned!

Sewing Rope Baskets | Try something new every month by Willow & Stitch

Have you had a go at making baskets like these? Did you get as addicted as I did?  Want to share any top tips or your favourite uses for them?

You May Also Like...

Try Something New Every Month

Try Something New Every Month

The end of last year was a whirlwind of crazy felt mask making.  While I had a lot of fun making them, and heaps of fun selling them at the markets and actually meeting and talking with my customers - I did begin to feel like I would never have time to make anything else ever again.  

So, in order to keep a healthy craft / work balance I’ve decided that this year I’m going to join in with the Try Something New Every Month project that Stephanie from Swoodson Says and Rebecca from Hugs are Fun have created.  


Every month I’m going to be trying my hand at a new craft and the best thing about this project is that anyone can join in.  If you blog you can link up to the roundups at Swoodson Says or Hugs are Fun, otherwise you can just share your projects on Instagram with #TSNWM or join the Facebook group here.


I’m a little late to the party, having missed January altogether but this is a rough guide to what i’m going to try this year, in no particular order:

Rope baskets, Dyeing (glad I checked the spelling on that one!), Pottery, English Paper Piecing (I actually have no idea what this involves but it looks fun…), Leather, Knitting, Crochet, Print Making, Macrame, Painting and Weaving.. Phew!  I probably won’t manage to get to all that this year, but it’s good to aim high right?

Anyway, I’m very excited to be beginning the year with rope baskets.  It’s only been 2 weeks and I’m already addicted (I just bought a 250 metre / 820 ft spool of rope….)  Check back in a week or so to see how I'm getting on!

You May Also Like...