English Paper Piecing - A Scrap Busting TSNEM Project

English Paper Piecing - A scrap busting Try Something New Every Month Project

Ok, so it might be halfway through June but here is my May 'Try Something New Every Month' project.  The theme for this month was 'handwork' and in a rare fit of compliance I decided to go with it and have a go at English Paper Piecing.  

I'm going to blame my tardiness on a combination of technical issues (my cloud is full which apparently doesn't make it rain but does make it hard to get photos off your phone and onto your computer.... I know - Yawn! Sorry!...), the glacially slow progress of my hand sewing and the fact that I had lots of other (frankly more interesting and instantly gratifying) projects to sew.

English Paper Piecing - A scrap busting Try Something New Every Month Project

This was, first and foremost, a scrap busting project.  I seem to be incapable of throwing away even small scraps fabric and thought that this would be a great way to use some of them up.  I genuinely thought that I was starting small with this project - it was the first time that I'd tried English Paper Piecing so it made sense to keep it small and simple right?  The theory was good, but unfortunately it takes a LOT of 1" hexies to make even a rather small piece - I mean just LOOK at that pile of cardboard templates! 

English Paper Piecing - A scrap busting Try Something New Every Month Project

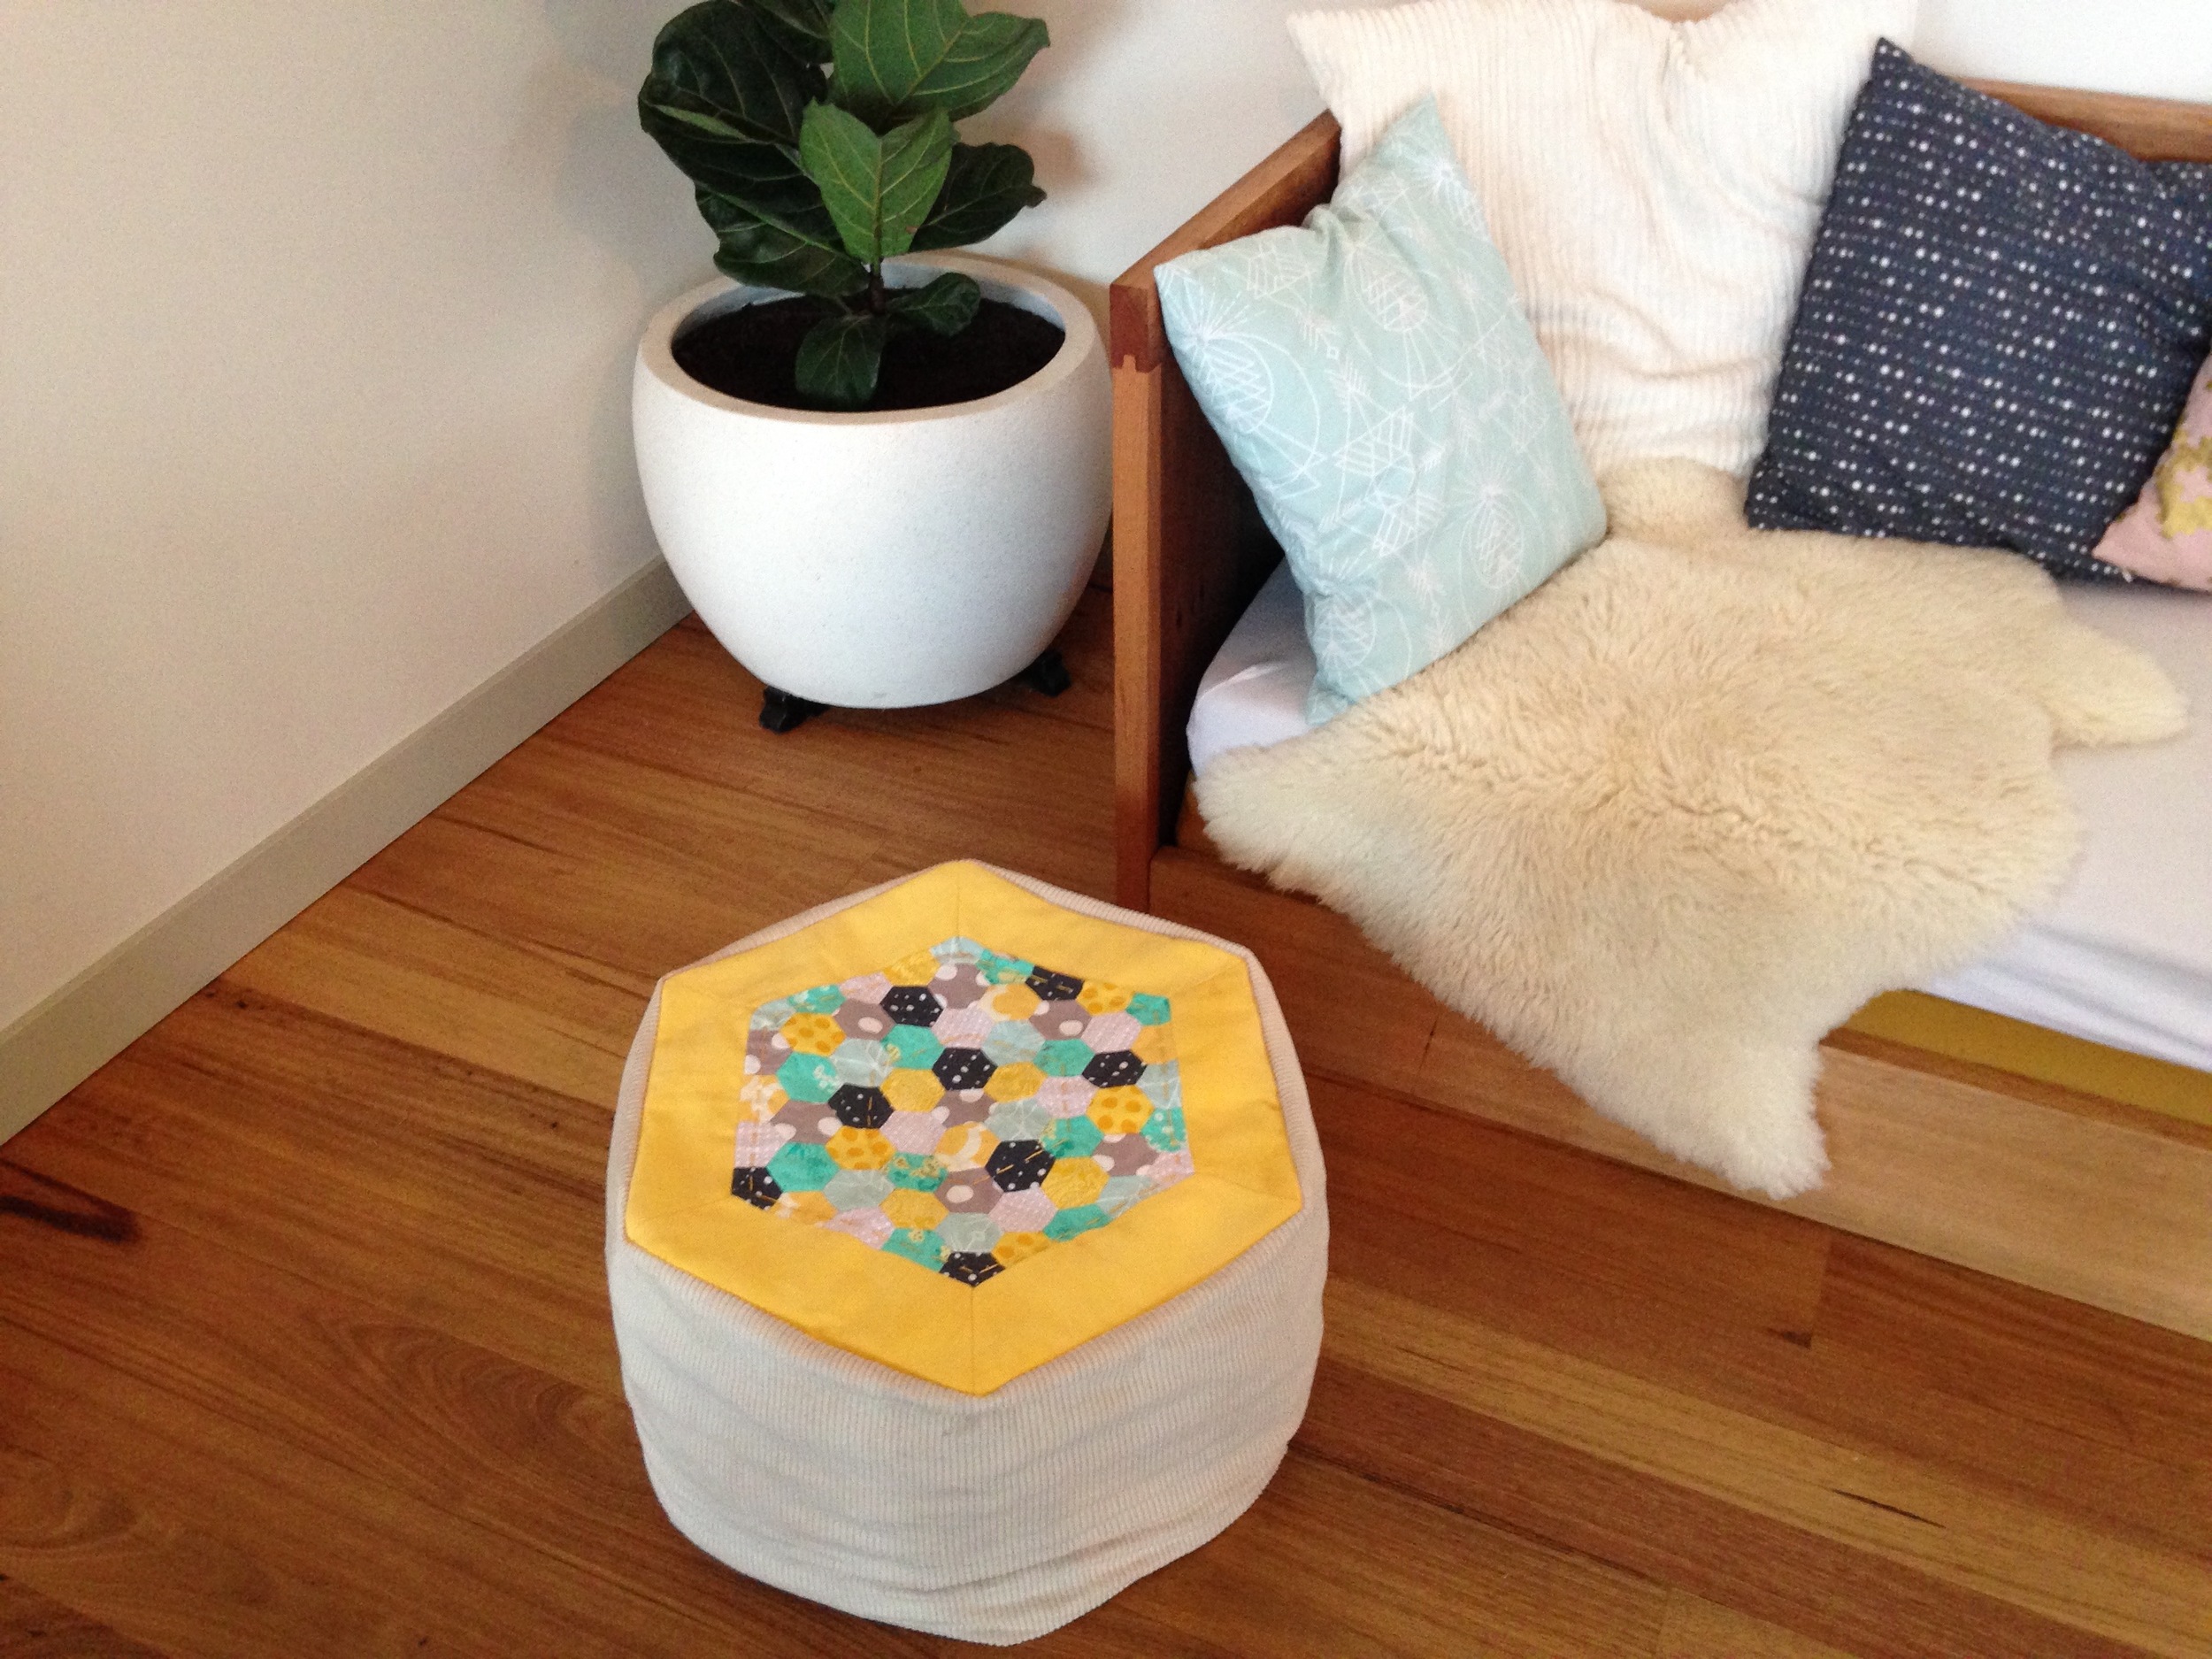
I was pretty pleased with my final patchwork, but it still wasn't nearly big enough and I didn't fancy taking the rest of the year to complete this so I went and sewed a big yellow boarder around it before hand quilting the top sewing it into a footstool. 

English Paper Piecing - A scrap busting Try Something New Every Month Project

Just don't look too closely at my hexies please or you'll see the wonky joins and gaps.  You know how you hear quilting people say 'nice points!'? No one is ever going to say that to me.....

English Paper Piecing - A scrap busting Try Something New Every Month Project

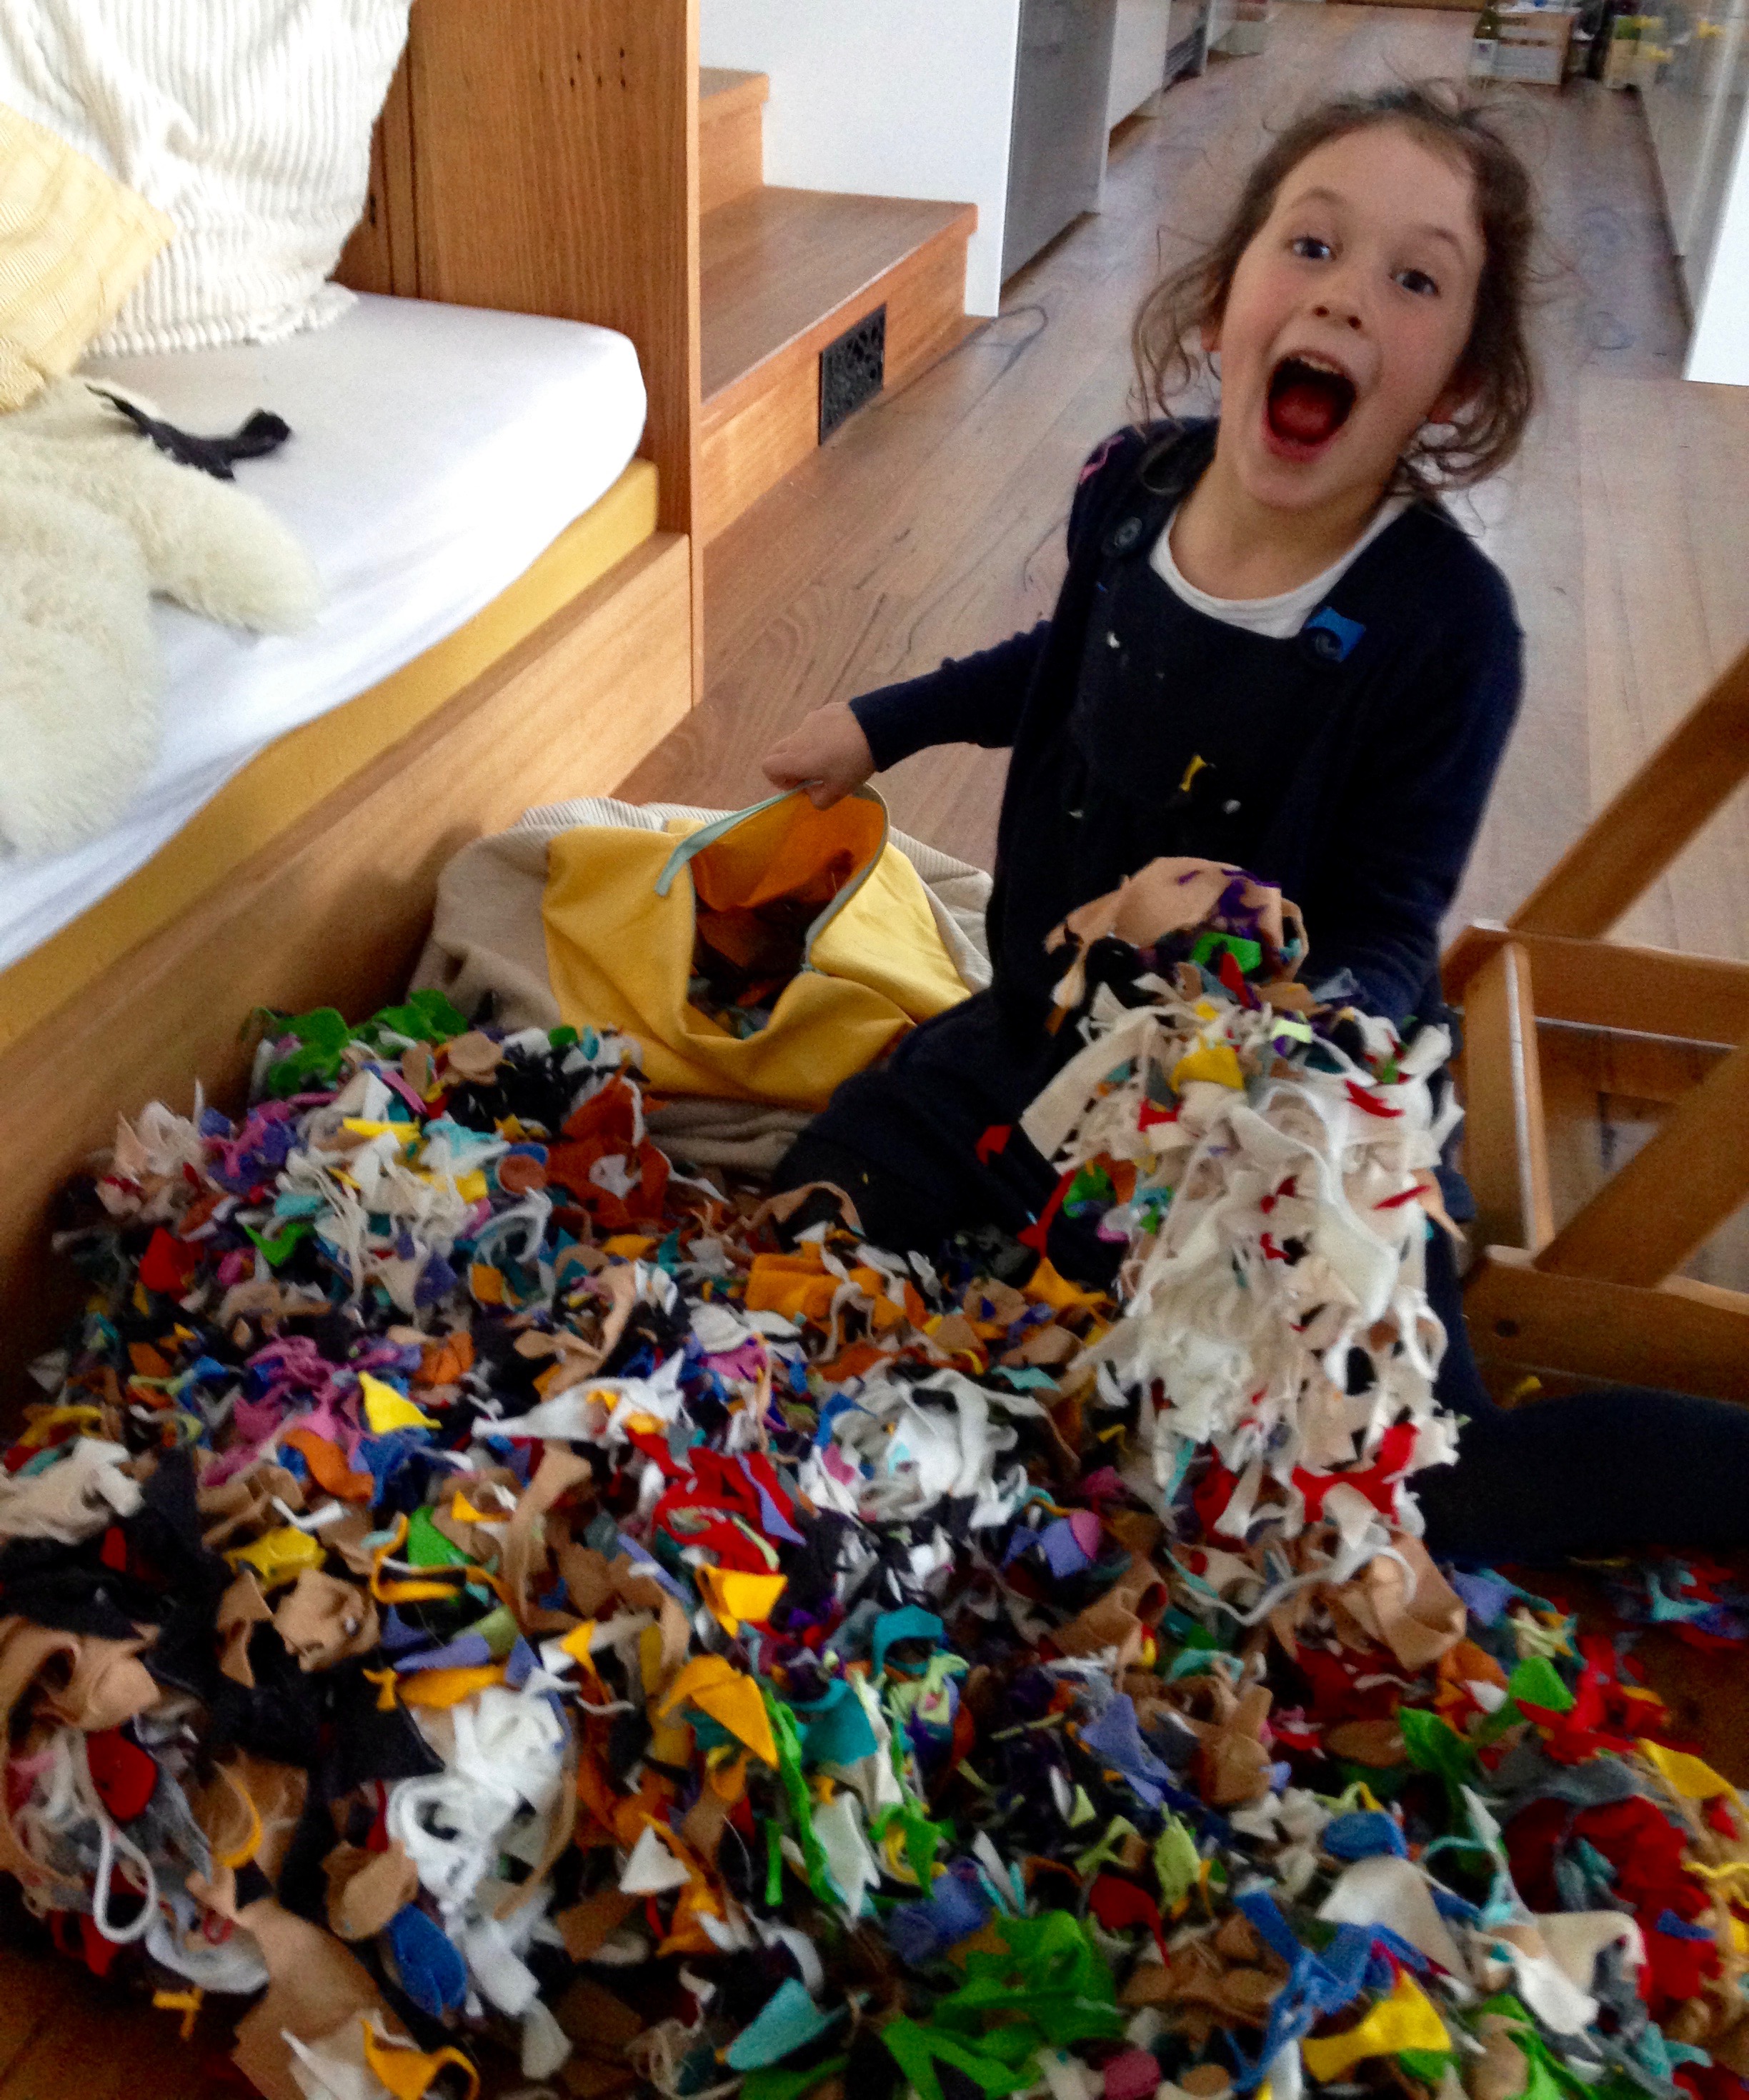
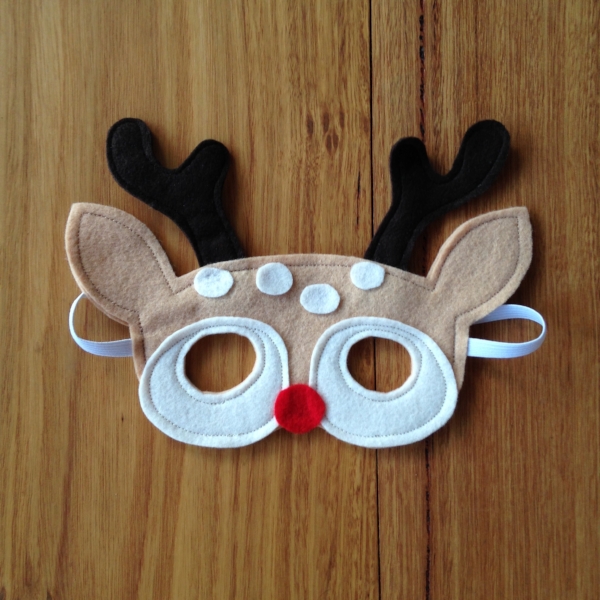
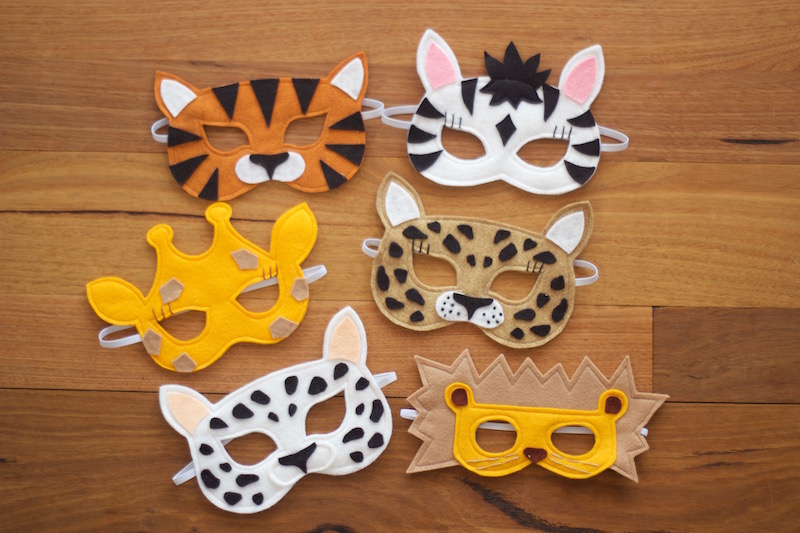
Once I had my footstool cover it needed stuffing (and this is the really brilliant scrap busting part) it's also the part where you begin to think that I might actually be crazy.. BUT.  If you've been here before, or follow me on Instagram, you'll know that I spend a lot of my 'free' time sewing up felt dress up masks which I sell on Etsy and at local handmade markets in Melbourne.  Anyway, the point is that cutting out all of those felt masks results in lots of tiny scraps which I don't seem to be able to throw away.  I'm honestly not sure why I didn't just put them in the bin except for that I had vague, half-formed ideas about using them to stuff a pillow or something at some point.  So; this is what a year's worth of scraps looks like (and how a 5 year old looks when you let her tip them all over the dining room floor and roll around in them):

https://www.etsy.com/au/shop/Stitchandwillow?ref=hdr_shop_menu&section_id=16893907

And this is how my paper pieced, felt scrap filled, labour of love footstool looks when finished. I'll admit to feeling a little smug, If only because I actually finished the thing!  I'm not sure I'll do any more English Paper Piecing, at least not in the near future, but despite all my grumbling I did rather enjoy this (possibly because I gave me an excuse to sit on the sofa and plow through another season of Mad Men!)

English Paper Piecing - A scrap busting Try Something New Every Month Project

Right.  Time to get cracking with June's TSNEM project!

You May Also Like...

An Eco Friendly Fabric Lunch Bag Tutorial (and Happy New Year!)

Eco Friendly Reusable Fabric Lunch / Snack bags | Free Tutorial from Willow & Stitch

Happy New Year!  It's been such a long time since I wrote anything here that it feels like I may have forgotten how!  I rather wore myself out at the end of last year sewing (what felt like) 1000's of dress up masks for Christmas markets. So; I've been taking a well earned break to relax and enjoy the summer, enjoy a visit from my Mum and get myself physically and emotionally prepared for my big girl starting school this week!  I can hardly believe she's starting school and I definitely can't believe the amount of things there are to do to get ready for it! There's uniform shopping, shoe shopping, choosing a bag, choosing a lunch box, labelling clothes, filling in forms, gathering paperwork, attending orientations, information evenings, play dates, etc etc etc... It's overwhelming and we haven't even started school yet!

Eco Friendly Reusable Fabric Lunch / Snack bags | Free Tutorial from Willow and Stitch

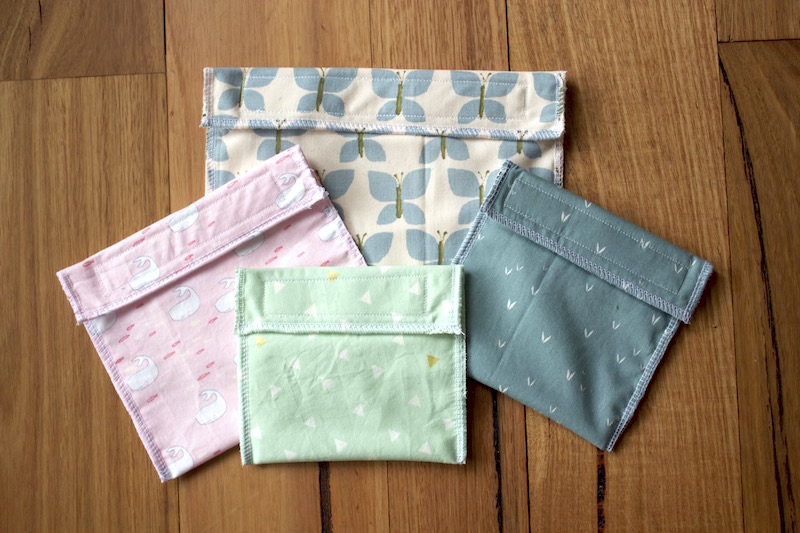
Since my world is so fully consumed with this 'starting school' business at the moment, it will probably come as no surprise that my first blog post and first tutorial of this year is a school related one.  I've been sewing up a big pile of these reusable fabric lunch bags to pop into Ella's lunchbox.  I thought they'd work really well for carrot and cucumber sticks. cheese and crackers. biscuits, grapes, apple slices etc.   I even made a couple of larger ones which will fit a sandwich so that I don't need to wrap it in cling film!

Eco Friendly Reusable Fabric Lunch / Snack bags | Free Tutorial from Willow and Stitch

Ella was really thrilled with her new snack bags - particularly the one with the Narwhale fabric - I think it would be fair to say that the thing she's looking forward to most about school is her lunch box (just like her mama that one - always thinking about what's to eat!)

These lunch bags are super quick and easy to sew and are perfect for using up small pieces of your favourite fabrics.  I lined them with some PUL which I had left over from my (failed) attempt to sew Modern Cloth Nappies - I'm glad it finally came in handy for something!  

Eco-Friendly Reusable Fabric Lunch bags - a free tutorial from Willow & Stitch

You will need: (for a medium sides snack bag)

18 x 37 cm (7 x 14.5") Cotton fabric

18 x 37 cm (7 x 14.5") Polyurethane Laminate (PUL) or similar waterproof fabric

12 cm (5") velcro

A Serger / Overlocker


How to make:

Decide on the size that you want your finished lunch bag to be.  Mine is going to be 16 x 16 cm. Calculate the sizes of the rectangles that you need for you bag:

The width of your fabric will need to be Width + 2cm,

The length will be (Length x 2) + 5cm. 

i.e for a 16 x 16 lunch bag:  Width = 16 + 2 = 18cm,  Length = (16 x 2) + 5 = 37cm

Cut one piece each of your cotton and your PUL and lay them on top of one another with the wrong side of the cotton and the right (non shiny) side of the PUL together.

Eco Friendly Reusable Fabric Lunch / Snack bags | Free Tutorial from Willow and Stitch

Serge along each of the short ends, sewing with a 1 cm seam allowance.

Eco Friendly Reusable Fabric Lunch / Snack bags | Free Tutorial from Willow and Stitch

Cut a piece of velcro which is 2 cm shorter than the finished width of the bag. Centre the loop (soft) side of the velcro 1 cm from the top (front) of the fabric, on the cotton side.  Sew right around the velcro twice for strength.

Centre the hook (rough) side of the velcro 1 cm from the bottom of your fabric, on the PUL side.  This will be folded up over the top to form the closure / flap.  Sew right around the edge of the velcro twice, remembering that this stitching will be visible from the front so use a coordinating thread and try to sew as neatly as you can!

Eco Friendly Reusable Fabric Lunch / Snack bags | Free Tutorial from Willow and Stitch

Fold the fabric so that the PUL is on the inside, and the front of the bag sits just under the velcro on the lining, like this:

Eco Friendly Reusable Fabric Lunch / Snack bags | Free Tutorial from Willow and Stitch

Serge along both side seams, beginning at the folded edge and continuing to the edge of the fold over flap.  Leave long tails on your cotton so that you can thread it into the seams to secure the ends like so:

Eco Friendly Reusable Fabric Lunch / Snack bags | Free Tutorial from Willow and Stitch

Hopefully your bags will be a little straighter than mine.  I guess that's what happens when you mix wine and sewing....!

Eco Friendly Reusable Fabric Lunch / Snack bags | Free Tutorial from Willow and Stitch
IMG_0994.jpg

Trim the loose threads and you're all done! 

You can make these in any size at all, make them tiny for a cute little snack of sultanas or make them huge as a wet bag for swimming things.  I always put one in my son's playschool bag to seal away soggy undies if he has an accident, or wet clothes after waterplay.  Use them instead of plastic bags to contain wet or dirty nappies which can then be disposed of when you get home.  

Eco Friendly Reusable Fabric Lunch / Snack bags | Free Tutorial from Willow and Stitch

I hope you found this tutorial useful.  What would you use your bags for?

You May Also Like..

Awesome Knee Patch Tutorial

Knee Patches

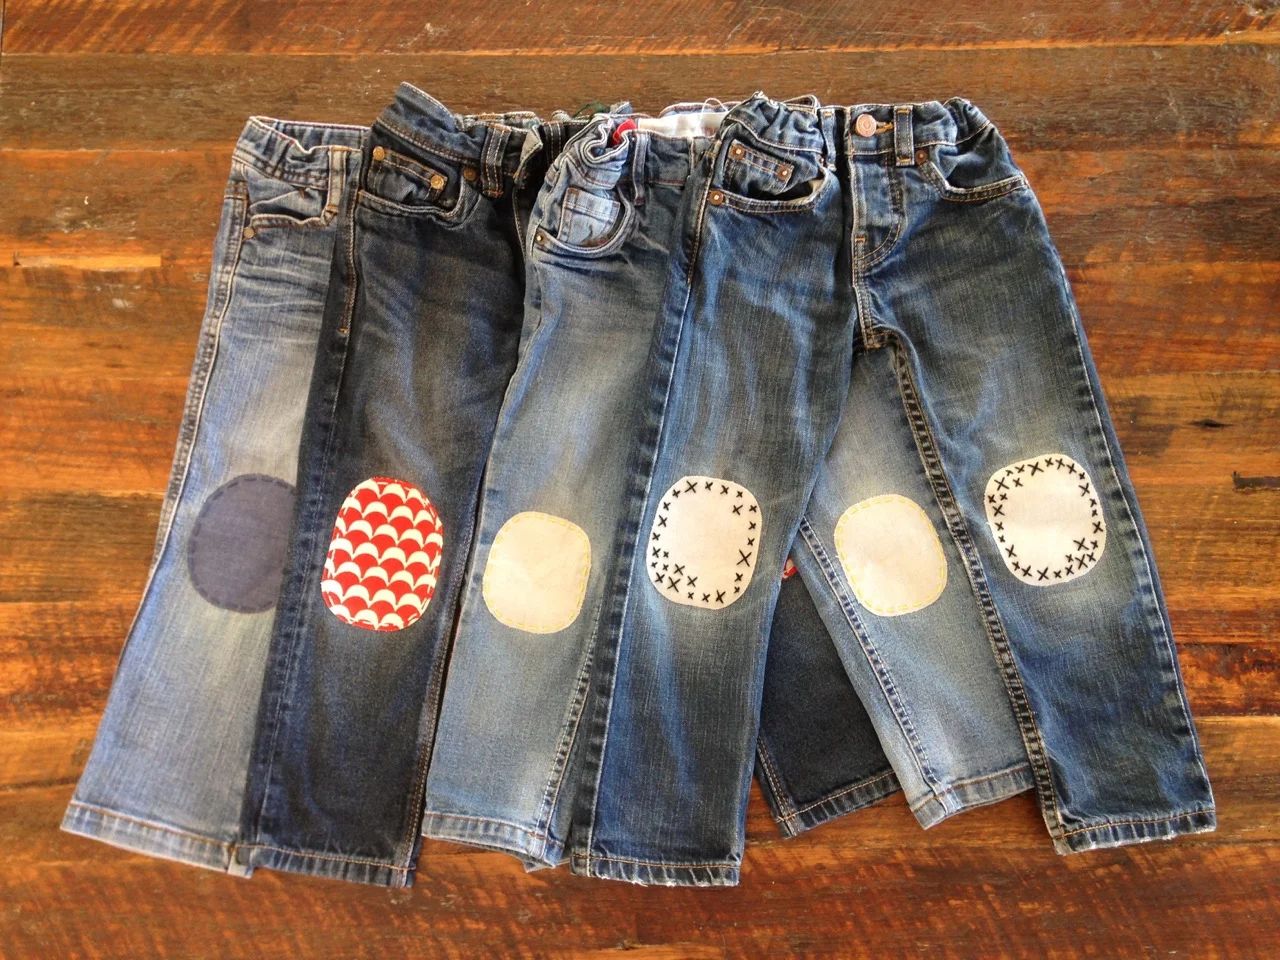
Little boys.  They are amazing in so many ways.  I love their enthusiasm and their exhuberance.  It has it's downsides though.  Like bruises, bumped heads and worn knees and ALL their pants.  I've had a huge stack of jeans sitting in my mending pile for weeks now and today I finally got around to patching them.  

This is my favourite patching method for pants.  It's quick, it's easy, there's lots of room for being creative and best of all you don't even need a sewing machine.  I don't know if you've ever tried, but it's actually really difficult to use a sewing machine to patch little boy's pants.  The legs of them are so slim that they often won't fit over the arm of your sewing machine and even if they do, there certainly isn't room for turning corners.  

This method uses double sided fusible interfacing and a bit of good old fashioned hand stitching.

You will need:

Approx 6 x 4" fabric

Approx 6 x 4" double sided fusible interfacing

Embroidery thread and needle

Iron


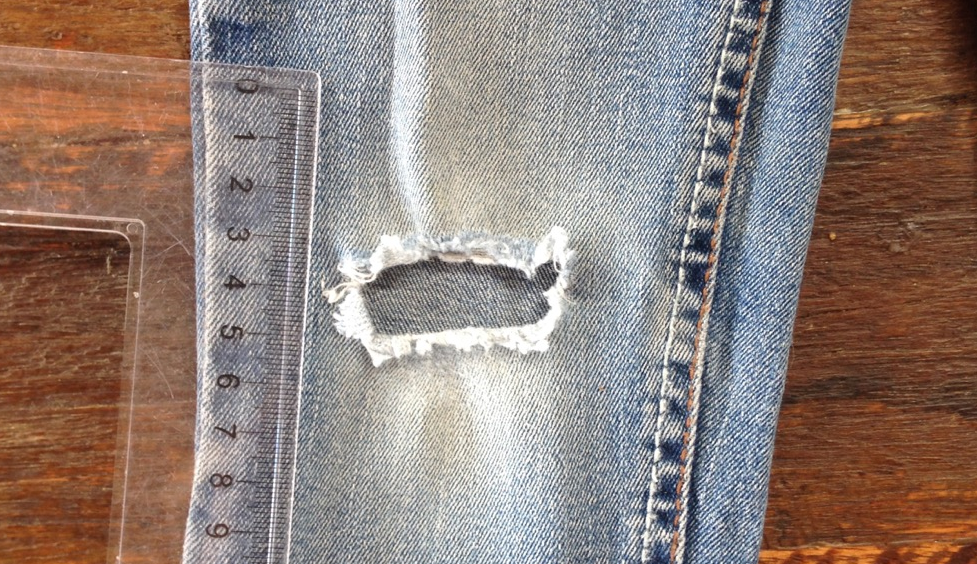
Start by measuring the size of the area that you want to patch.  

Knee Patch Tutorial

Cut 2 rectangles of fabric to size and lay them onto one side of the fusible interfacing.  Press using a hot, dry iron to fuse.  Leave the paper backing on the interfacing and draw the shape of your patch on the paper.  Trim to shape and repeat for the second patch.

Knee Patch Tutorial

Remove the paper from the second side of the fusible interfacing and position on the pants over the hole.  Iron the pants before doing this so that you don't get a lumpy finish.

TIP: Slide the paper from the fusible interfacing inside the pants leg so that the interfacing will not bond to the back of the knee at the site of the hole.

Iron the patches to fuse them in place.

Knee Patch Tutorial

Take a needle and embroidery thread in complementary or contrasting colour and sew right around the edges of the patch to secure it in place.  

Knee Patch Tutorial
Knee Patch Tutorial
Knee Patch Tutorial

If you don't do this step you will find that after a few washes the patch begins to peel away from the pants. Also it's a lovely way to add detail.  The quickest way to do this is with a simple running stitch but you can get creative and try something different.  This version with embroidered crosses is one of my favourite.

Knee Patch Tutorial
Knee Patch Tutorial

Don't be put off by the hand stitching.  I know lots of people hate it, but it an be a lovely, relaxing thing to do. Get yourself a cup of tea and put your feet up.  Find your happy place.

Knee Patch Tutorial

Even the cats can get involved.. I really don't know what it is with this one.  She just has to be wherever my focus is.  It's very cute but makes life a little difficult sometimes...!

Knee Patch Tutorial

Do your kids wear out their clothes?  Do you have a favourite method for patching pants?

You May Also Like...

5 tips for getting the most wear out of your handmade clothes.

Make do and Mend

Happy Wednesday people! 

Today I'm guest blogging over at Sew Thrifty as part of the 'Savings by Sewing' series. I'll be sharing my thoughts on the philosophy of 'Make do and Mend' and my top 5 tips for getting the most wear out of your handmade clothes.  

If you haven't seen this series yet make sure you look through the other posts - there are heaps of really great ideas in there and I'm definitely going to be making use of some of them!

You May Also Like...

Tutorial: How to lengthen pants by adding a cuff.

How to add a cuff to pants

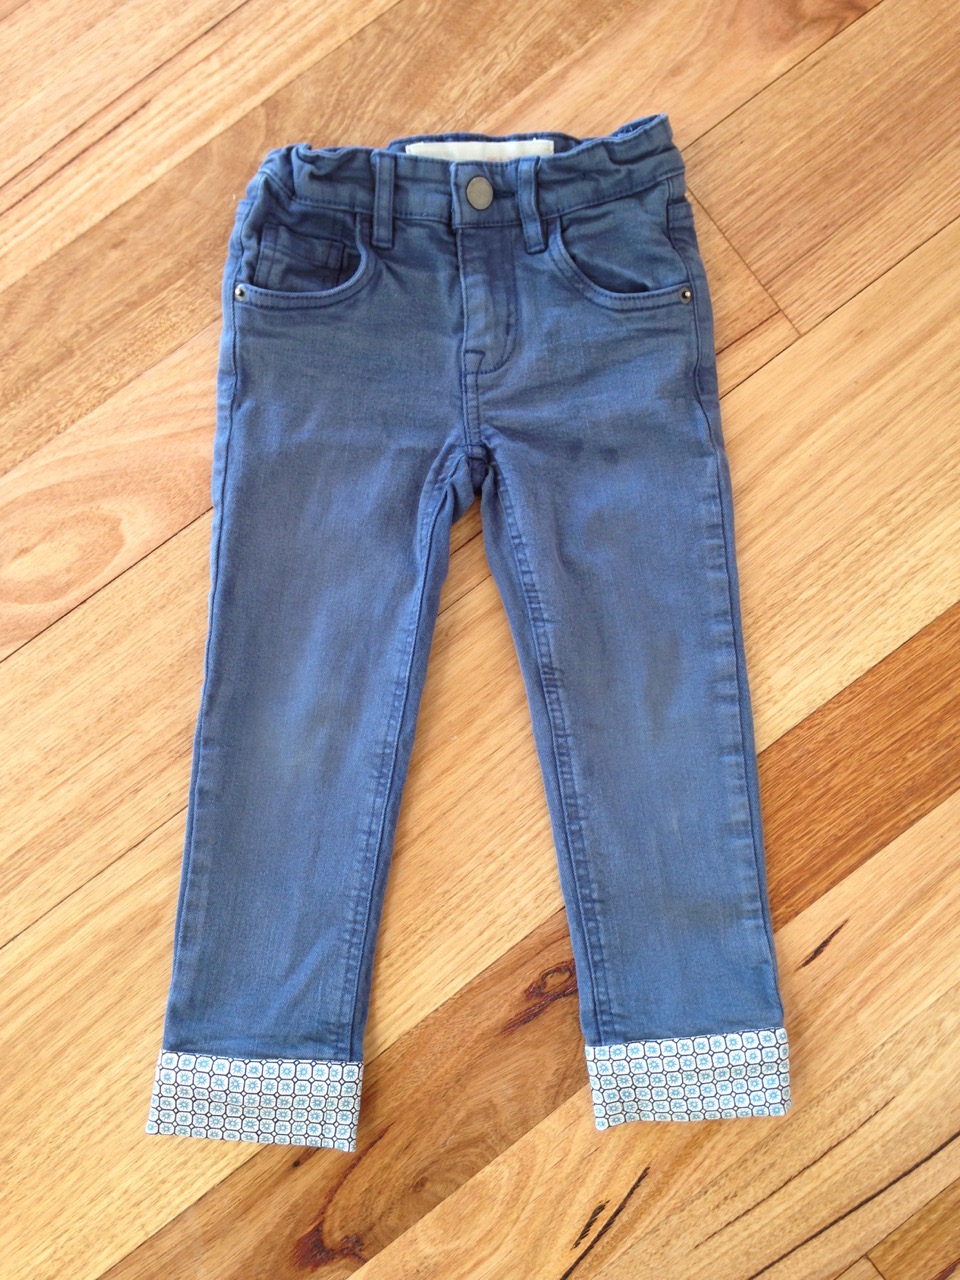
This is a great way to get a little more wear out of pants which have become too short.

1.  Measure the width of the pant leg.  Multiply by 2 and then add 2 cm (or 1") for the seam allowances.

e.g. Width is 10 cm:  (10 x 2) + 2 = 22cm

OR Width is 4": (4 x 2) + 1 = 9"

2.  Decide on the length of the cuff that you want to add.  5 cm (2") is a good size if you are unsure.  Multiply by 2 and then add 2.5 cm (1 1/4") for the seam allowances.

e.g. Cuff length will be 5cm:  (5 x 2) + 2.5 = 12.5 cm

OR Cuff length will be 2":  (2 x 2) + 1 1/4 = 5 1/4"

3. Cut 2 pieces of fabric in your required size.  For the example above you will need to cut 2 pieces which are 22 cm wide and 12.5 cm high. (OR 9" wide and 5 1/4" high)

4. With wrong sides together, fold each cuff along it's width, bringing long edges together. Press, then open up again.

How to add a cuff to pants

5. If your fabric has a directional print then take the bottom edge and press 1 cm (1/2") to the wrong side. Once pressed, open up again.

How to add a cuff to pants

6. Fold each of the cuff pieces in half along the length, bringing short edges and right sides together.  Sew along the short edges with a 1 cm (1/2") seam allowance to form 2 tubes.  Press seams open.

How to add a cuff to pants

7. Re-fold and re-press the 1cm (1/2") which you pressed to the wrong side along the bottom edge in step 5.

How to add a cuff to pants

8. Take one of your cuff tubes and, with right sides together, slide it over one of the pant legs, aligning one of the raw edges of the cuff tube with the base of the pant leg.  Align the side seam of the cuff with the in-leg seam of the pants. 

How to add a cuff to pants

9. Sew right around the bottom of the pants, joining the two pieces with a 1.5 cm (3/4") seam.  You should be sewing just above the original hem of the pants.  If your pant legs are too skinny to fit over the arm of your sewing machine, try sewing from the inside, like this:

How to add a cuff to pants

10. Fold the cuff down to the right side and press the seam allowance towards the bottom of the pants.

How to add a cuff to pants

11. Turning the pants to the wrong side, fold the pants cuff up along the pressed fold.  Pin in place, ensuring that the folded edge of the cuff extends about 0.5 cm (1/4") past the seam joining the cuff to the pants.

How to add a cuff to pants

12.  From the right side of the pants, 'stitch in the ditch' of the join between the cuff and the pants, making sure that you catch the inner edge of the cuff in the underside of your stitches.  I have done this in white so that you can see what's going on but you will want to match the fabric of your pants legs.  Again, if the leg of the pants won't fit over your sewing machine arm, you may need to do this by turning the pants to the wrong side and sewing from the 'inside' of the leg.

How to add a cuff to pants

This is also a really nice technique if you simply want to add some interest to a pair of plain pants.  Even if the pants don't need to be lengthened, sew exactly as above and turn up the cuffs so that when your child grows you can simply fold them down for extra length.

I hope you have found this tutorial useful.  Do you have any favourite tips for getting a little more wear out of your clothes?

You May Also Like...

Sewing and Saving

Savings made by sewing

I'm very excited to say that I'm going to be participating in Sew Thrifty's 'Savings Made By Sewing' Series. Throughout July, sewing bloggers will be sharing their favourite tips for saving money on patterns, fabric, supplies and more.  

We've all bought fabric before (for no other reason than that we love it) and justified it to ourselves (and our partners) by claiming (but never really believing) that we did it because "sewing saves money". Well guess what - we may just have been right all along! Head on over to Sew Thrifty and find out exactly how.  We're going to lay the debate to rest and prove, once and for all, that sewing is not only a fantastic way to save money, but that sewing to save money can be fun; That it inspires creativity and resourcefulness, and rewards our efforts with a feeling of accomplishment, a light heart and a pretty new dress!

That handmade scarf may just save the world after all (OR why I love to sew)

We love handmade

Thank you so much to everyone who entered my Sew Mama Sew giveaway day.  I had such fun reading all of your comments.  It was great to hear all of the reasons that everyone gave for why they love to sew.  One of the comments that has got me thinking was regarding sewing to save money.

If I'm being totally honest I would have to tell you that, for me, sewing isn't really about saving money.  I have a little too much of a fabric obsession for that. Although that doesn't stop me from using 'saving money' as a justification for my fabric purchases (particularly when talking to my husband!) And it doesn't mean that I don't love a bargain and get enormous pleasure from making 3 T-shirts from a $5 remnant (take that Kmart!) but it isn't really my main motivation. When you can shop online and buy a (very cute) mass produced dress for around $5 without ever leaving your sofa; when it takes you no more than 5 minutes to search, choose and buy; sewing to save money alone simply isn't enough.

I read an interesting article this morning entitled "Sorry, Etsy.  That Handmade Scarf won't Save the World."  The author makes the point that buying handmade has, in some circles, come to "connote moral virtue, signifying an interest in sustainability and a commitment to social justice.... but thinking of it as a social good is problematic".  I have to disagree.  She suggests that we can't expect people to spend $50 on a handmade scarf when they can get one for $5 from Kmart.  That the Kmart scarf is good value and that is why people choose it. Well; yes and no.  On the face of it the $5 Kmart scarf is good value.  But therein lies the problem. It's such good value (or at least, so cheap) that many of us wouldn't think twice about spending $5 on it.  We see it. We like it. We buy it. We wear it for a while, but then next month we see another scarf in Kmart that we like better.  It's a nicer colour. It's only $5, we buy that too. The scarf gets a hole in it, or it goes bobbly.  Doesn't matter; It was only $5 - it'd be easier to buy a new one than to mend it.  Into the bin goes the scarf, off to join all the other $5 Kmart purchases in landfill.

Compare this to the $50 handmade scarf.  Would you buy it without thinking very carefully about it in the first place? No, because $50 is a lot to spend. Would you look after it - treat it gently, wash it by hand, mend any holes in it?  Of course you would. Because handmade things are special, they were made with love and we treat them accordingly.  And therein lies the true 'value'. When it comes to handmade we don't buy something unless we need it and / or truly love it.  We are more considered in our purchases and much less likely to impulse buy. 

But perhaps talking about BUYING handmade is missing the point somewhat.  An overwhelming majority of you said that you loved sewing because you found it relaxing, because it was a way to unwind and de-stress. There certainly is something wonderfully therapeutic about sewing (or knitting, or any other sort of handcraft).  It’s the perfect antidote to our usually busy, fast paced, consumer driven lives.  Using our hands to create something is a wonderful opportunity to slow down, to escape the everyday, to indulge our creativity and to make something that can’t be undone. 

So; what if we stopped talking about buying handmade and started talking about making our own instead. I consider myself very fortunate to have spent my childhood with my mum always digging in the vegetable garden, making play-dough on the stove, sewing many of our clothes and mending our favourite toys.  I grew up knowing that things can, and should, be mended, that food and clothes don’t just materialise from the supermarket or the mall; that I can make these things by hand and that if I don’t know how to do this then I can learn.  A belief in your ability to do just that is a very special thing.  My 4 year old, Ella, seems to already be absorbing this lesson.  She often tells her friends that she likes their dress, or their soft toy and then asks if their mama made it for them. This fills my heart with happiness, not because I am proud of having made things for her, but because I am proud to have taught her that such things can be handmade.

Handmade things are always loved the best!

Handmade things are always loved the best!

We live in a throwaway society, the amount of waste that we produce is unbelievable, and I believe that the handmade movement encourages people to get back to the ‘make-do and mend’ attitude that our grand parents held.  If we can make things by hand then we can begin to comprehend the true value of them; our eyes are opened to the resources required to make everyday objects and the effort involved in creating them and we begin to understand that they have a value far beyond the $5 price tag assigned to them by Kmart.

If we can begin to consume less. If we can begin to discard less, If we can change the way we think about the things we buy and use, then we may find that we can make a very real difference to the world.  Even if I’m wrong and all our efforts are nothing more than a drop in the ocean, even if the actions of a few can do nothing to counteract the overwhelming majority, it doesn’t matter in a way, because it’s a start.  It’s a step in the right direction and, along with trying to spread the word, it’s all we can do for now. And every day that we spend working on our quiet revolution we find ourselves becoming happier, calmer and more fulfilled.

That handmade scarf may not save the world, but it might just save me.