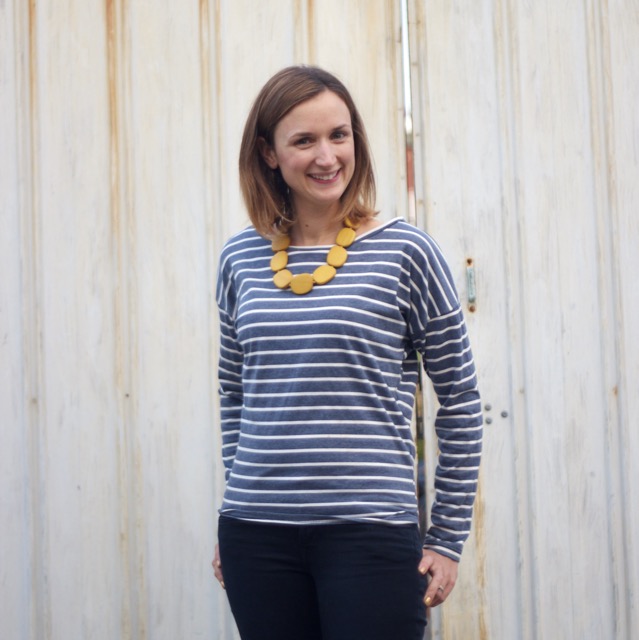
Wednesday Tee

Wednesday Tee

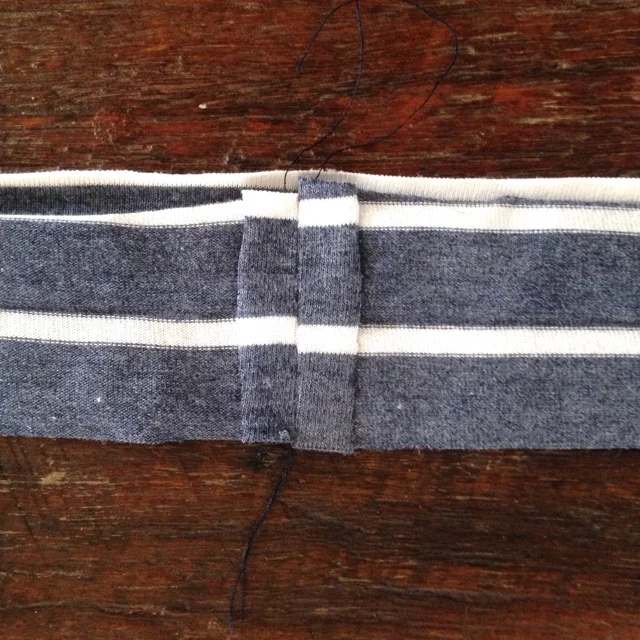
Another day, another Tee.  This is Wednesday's offering.  A symmetrical hem line, simple sleeves, loose fit and wide neckline that slips off the shoulder.

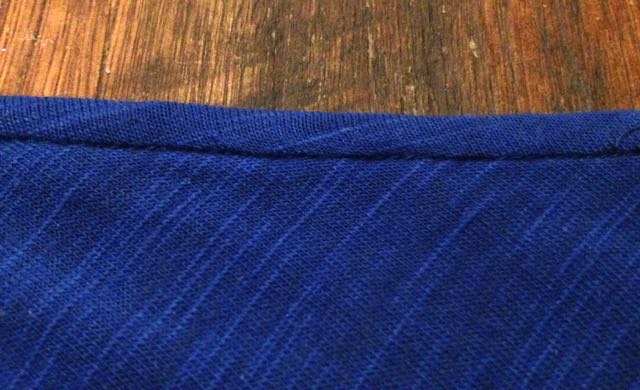
I'm pretty pleased with this one.  The fabric (a Gorman designer remnant) is soooo soft and so comfy that wearing this tee actually feels like wearing pyjamas!  On the down side i think the fabric is a little light weight for this style - It seems to cling a bit and doesn't quite hang properly - It was clinging a little when we took these photos (although that could just have been because I was wearing a tank top under it..) Either way, I'm pretty sure that I'm going to be wearing this one a LOT especially as the days get cooler over here on the other side of the world.

I also have a pattern for this Tee but didn't manage to get the photos taken for a tutorial so I'll add that this weekend if I can manage it.  It does mean i'll have to make another... shucks! 

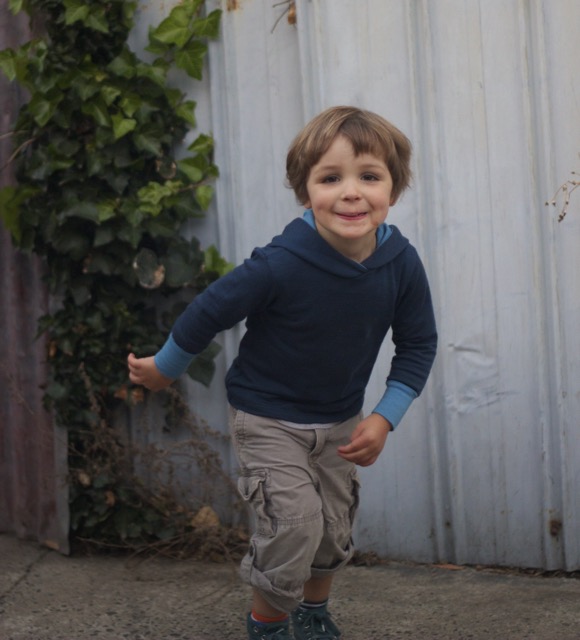
It wouldn't be right not to leave you with a couple of photos of one of my cheeky little photo bombers!

Tuesday Tee

Tuesday Tee
Tuesday Tee
Tuesday Tee
Tuesday Tee Back

This is a lovely relaxed fit tee.  It is a dolman tee with fitted elbow length sleeves and it tapers towards the waist.  The fabric is cut on the bias and the back is blocked to make a nice seam detail across the back.

 You will need:

  • 1.4m of 140cm wide knit fabric
  • Matching thread
  • Twin Needle (optional)
  • Rotary Cutter and Cutting Mat (optional)

I have used my overlocker to sew this Tee but you can easily sew this using your sewing machine.  See my ‘Beginners Guide to Sewing with Knits’ if you need more guidance. It has a lovely scooped neckline, just wide enough to fall off the shoulder occasionally but not wide enough to gape.

As before please note that this pattern is completely untested by anyone except for me and the pattern pieces are in one size only (small).  Click on the image below to download the pattern pieces.

Sewing Instructions:

Print and Cut Pattern Pieces.

Click the image above to download the pattern pieces.  When printing be sure to print at 100% or set scaling to 'None'.  There is a 1" test square on page 1 which you can measure to check that your pattern has printed at the correct size.  Pattern pieces can be printed on A4 or US letter paper.  Once printed they will need to be trimmed along the dotted lines and taped together.  Do this following the diagram on page 3 and matching notches.

Pattern pieces are to be cut on the bias.  Take your 1.4m by 1.4m piece of fabric and bring 2 diagonal corners towards each other, folding the fabric to form a triangle.  The fold will run along the longest edge of the triangle.  Place your pattern pieces on this fold, pin in place and cut (ideally with a rotary cutter and cutting mat to prevent stretching of the fabric as you cut.)

Join Back pieces:

Take the upper and lower back pieces and place right sides together, matching notches.  Pin together along the long edge and join with a 1cm seam. Press seam towards neckline.  There is no need to use a zigzag stitch here, a simple straight stitch will do as the fit here is loose.

Tuesday Tee
Tuesday Tee
Tuesday Tee

Join Shoulders:

Lay tee front and back on top of one another, with right sides together.  Match and pin shoulder seams and then join with a 1cm seam.  Once again, straight seams will do.  Press seams towards the Tee back.

Hem Sleeves and bottom of Tee.

Press 1cm to the wrong side, then fold over again, pressing another 2cm to the wrong side.  Pin in place.  Sew hems using a twin needle or a zigzag stitch, sewing 1.5cm from the hemline.

IMG_2518.jpg
Tuesday Tee

Sew Side Seams:

With right sides together, align side and underarm seams, matching hems.  Pin in place and join, using a single seam.  Begin at the ends of the arms and sew towards the bottom hem.

Tuesday Tee

Finish the neckline.

I'm afraid that the method i've used for finishing the neckline is very unscientific, which bothers me greatly - being an actual real life scientist.  I'll come up with better instructions and update this soon.  But, for the time being, cut a strip 4 cm wide and approximately 100cm long. 

With right sides together and matching raw edges, position one end of your binding approximately 5cm past the mid point of the centre back of the neckline. Join with a 1cm seam sewing right around the neckline, stretching the neck binding slightly as you go. Stop 5 - 10 cm from where you started your line of stitching.

IMG_2523.jpg

Lay the ends of the neck binding flat and trim them so that they overlap by 2cm.

Align the ends of the binding so that the right sides are together and join with a 1cm seam.  Take care to keep the rest of the Tee out of the way of your stitches.

Press seam open, pressing binding flat against the neckline as you do.  Complete the seam that joins the binding to the neckline, sewing across the seam and the seam allowance and backstitching at the start and end of your stitches to secure them.

Press the binding to the right side.

Using a steam iron, press 0.5cm of the raw edge of the neck binding to the wrong side.  Press another 1.5cm to the wrong side and pin in place.  The neck binding should extend slightly past the seamline.  Take extra care to make sure that you have done this accurately.  You will be glad you did! Pin in place.

Working from the right side of your Tee, 'stitch in the ditch' right around the neckline.  Your stitching should be almost invisible from the front and should catch the neck binding on the back:

And that's it!  We're done.  That's 2 of 7 Tees complete and i'm already beginning to feel that i might have bitten off more than I can chew with this challenge I've set myself! Oh well, I do love a challenge, but right now I'm off to have a long, hot shower, put on my PJs and snuggle up on the sofa to watch GAME OF THRONES!!! Whoop!

Goodnight. x

Monday Tee Tutorial

I'm really pleased with this tee.  It's such a simple style, but I do love the shape.  It has a lovely neckline, dropped shoulder seams, tapered waist and perfectly cosy long sleeves.

First of all, let me please state that this pattern is untested by anyone except for me!  It is also a single size pattern, approximately size Small.  The bottom is quite tightly fitted and will fit those with a high hip measurement of approximately 92cm / 36".  The rest of the pattern is quite a relaxed fit however so if you wanted to have a go and just increase the width at the bottom a little to fit then I think it would probably work pretty well.

Download the pattern pieces by clicking on the image above. Printing Instructions can be found on page 12.

For tips on sewing with knits click here

Sorry for some of the poorly lit diagrams below - the only time I really get a chance to sew is once the kids are in bed!

You will need:

  • 1.4m of knit fabric
  • Coordinating Thread
  • Twin needle (optional)
  • Rotary cutter and mat (optional)

Monday Tee Sewing Instructions:

Hem Pieces:

Hem the sleeves and the bottom edge of the front and back pieces.  Fold 1cm to the wrong side and press.  Fold another 1.5cm to the wrong side and press again.  Pin in place.  Stitch the hem with a zig-zag stitch or with a twin needle, sewing 1.2cm from the edge. 

IMG_2621.jpg

 Join the front and back:

Lay the Tee main front and back pieces on top of one another, with right sides together and align shoulder seams.  Join with a 1cm seam.  Press seam open, or if you have serged your seam, press it towards the back of the Tee.

Join the sleeves:

Pin sleeves in place, placing sleeve and body of tee right sides together and aligning centre notches of sleeves with shoulder seams.  Join with a 1cm seam. Repeat to join second sleeve.

Sew Underarm Seams:

Fold tee so that right sides are together and join the underarms and sleeves in one long continuous seam.  Pin in place first and make sure that the wrists, hem and underarm seams all match.  Begin stitching at the wrists and sew towards the bottom hem. 

Finish Neckline.

To finish the neckline, cut a piece 67cm long and 4cm wide.  Fold along it’s width, aligning short edges and placing right sides together. Join the ends with a 1cm seam. Press seam open.

Fold the neck binding in half along it’s length this time with wrong sides together. Press.

IMG_2624.jpg

Pin the neck binding to the neck of the Tee, right sides together and placing the seam of the binding at the centre back of the neck.  You will need to stretch the neck binding slightly as you pin to make it fit.  This helps the neckline to sit nicely without puckering.

Join (sew or serge) the binding to the neck of the tee, sewing with a 1 cm seam.  Fold binding over to the right side and press. 

And you're finished!

I hope you have had fun with this tutorial and that you love this tee as much as I do.  Please feel free to get in touch if you have any questions - I always love to hear from you!

A Week of Tees

So the birthday presents are finally all made - having taken waaay longer than I expected they would, and before I turn my attention to the gorgeous stack of fabrics sitting patiently in my cupboard, just crying out to be turned into Geranium Dresses, Junebug Dresses and Gumnut Dresses, I am going to do something for myself.  Something just for me.  

My wardrobe is pitifully depleated of T-shirts and I have a huge stack of lovely knits begging to be used.  So, I am going to put everything else to one side and declare this to be Selfish Sewing Week.   Who's with me on this one?

I'm going to try to make a top every day for the next week (yikes!) I have a couple of patterns that I want to use, but I think mostly I'm going to be designing them myself so I should have a few more projects to add to my Patterns and Tutorials page by the end of the week as an added bonus.

I'm really looking forward to the chance to make some things for myself and to make a dent in my stash.  I don't often sew for myself and I feel like committing to a whole week of selfish sewing is pretty much the only way to make sure I don't get distracted with other projects. 

So.  First up:

Monday Tee.jpg

Sorry but making and blogging about a Tee every day this week, on top of work, housework and general kiddy wrangling is pretty much going to stretch me to my limit as it is. I'm afraid there is simply nothing left for imaginative pattern naming! So, the 'Monday Tee' it is.

Monday Tee
Monday Tee photobomb
Monday Tee
Monday Tee photobomb

Cheeky little photobomber!

I'm really pleased with this tee.  It's such a simple style, but I do love the shape.  It has a lovely neckline, dropped shoulder seams, tapered waist and perfectly cosy long sleeves.  Stay tuned for the Pattern and Tutorial; Coming up next!

A Handmade Birthday

My little boy, my baby, turns 3 on Saturday.  I almost literally cannot believe it. So I have been trying to distract myself this week by pouring my love for this little man into some handmade birthday presents for him.

I've been meaning to make a duffel coat ever since I found these amazing wool remnants in the bargain bin at my favourite fabric store on Brunswick Street.  I struggled to find a pattern for a while but settled on this Oliver & S one in the end.  It's their Schooldays Jacket / Coat.  I'm pretty pleased with how it turned out.  It's going to be much too big of course - as everything I make generally is - I seem to live in fear of spending lots of time and effort making something only to find that it's too small.  I'd much rather it was too big and could be grown into.  In this case I had to make a size 4 because the pattern is sold in 2 sizes and I opted for the 4+ size so that I would be able to make more in the future.  

I originally had my heart set on lining it with a brown fabric with big white polka dots, but of course I couldn't find exactly what I had imagined so went with this Rupert Bear fabric which is actually really cute and Jacob will probably love it more than he would have liked brown anyway!

The Elephant is from a RicRac pattern that I spotted in my local fabric store.  I think he's rather lovely don't you?

Free Feeding Bib Pattern

I'm still working on getting my e-book ready for download, but I thought that in the meantime I would put up some of the projects in it as free tutorials.  This feeding bib is one of my favourites; It's such a lovely way to use up scraps of your favourite fabrics and is really quick and easy to make, even for a beginner.  The pocket at the bottom is very handy for catching spills and when you're finished you can take it off and use the towelled backing for a quick face wipe!

Feeding Bib with Pocket - A free Tutorial and Pattern from Willow and Stitch

Click the link in the image below to download your free copy.

I hope you enjoy this tutorial, I'd love to hear your feedback and if you've made a bib then why not upload a picture to the Willow and Stitch Flickr pool or use the hash tag #willowandstitch on instagram, it'd be great to see what you've made.  

If you liked this pattern then sign up to my newsletter to get notifications of new pattern releases and special offers.  I'll only email when something new and exciting is available.  I hate having my inbox filled with unnecessary emails!  Having said that, feel free to email me if you have any questions about this or other patterns - I never get sick of emails from readers!

willowandstitchdesign@gmail.com

My new Etsy Store is open! Roaaarrrr!

I'm still working on setting up the pattern shop for this website, but in the meantime, I'm very excited to say that I've got an Etsy store up and running!

https://www.etsy.com/au/shop/Stitchandwillow

These super cute little animal masks are up for sale and I hope to soon have the patterns for them up too so that you can make them yourself if you would like to. I'm also planning to have instructions on how they can be made without a sewing machine so that you really will have no excuse!

I'm starting small (literally) while I get the hang of this new software for pattern making, not to mention all the other things that I need to learn about, but I've got some very big ideas so I hope you'll hang in there and keep coming back to see what I'm up to.

I can't tell you how happy I am, to feel like I'm finally on my way to doing what I love, on my way to living my dream and doing the thing that I've been wanting to do since Ella was born 4 years ago.  There have been a lot of late nights recently, and a lot of anxiety and insecurity of course, but more than anything else just an overwhelming feeling of excitement and satisfaction.  I have spent way too long wishing for a change but not making the effort required to enact that change. Of course there is always the fear of failure, but really, when it comes to things like this the only failure is to not try.  Perhaps I won't succeed, perhaps I'll decide that this isn't what I want to do after all, but at least I'll know that I gave it my best shot. There will be no regrets and I will be free to follow another dream.

The strangest thing is that I've discovered that I actually LIKE the fear which has been holding me back all this time, I really do like it - it's exhilarating - it's like jumping off a cliff - because it really is true that you can't experience one extreme without the other; yes there is fear but there is also elation, and it's wonderful!

Thank you for stopping by.  Go and do something that you're afraid of!

Fabric Basket Tutorial

Happy New Year!

Before Christmas fades into distant memory I thought it'd be nice to share a tutorial for one of my favourite handmade gifts this year; these lovely little fabric baskets.  They are very quick and easy to make and there is no pattern needed.  The baskets can be made any size - I like them with a 16cm diameter, but the hubby was asking if I could make some which were waste paper basket sized, which of course you could.

I think they are also really nice as a little nested set of 2 or 3, with each one a few centimetres bigger than the one before it.  The tops can be folded down once or twice depending on the contents of the basket.

Don't you love this fabric combination?  These are actually some bits that I had left over from the Sew Liberated 'Gathering Apron' which I made a few weeks ago for myself - I'll take some pictures and post that soon too.

For the baskets, you will need:

Linen or hessian fabric for the outer

Printed cotton for the lining

Heavy weight fusible interfacing


Step 1: Calculate measurements and cut pattern pieces:

Choose a bowl or plate which is roughly the diameter which you want for your baskets and use it as a template for the base of the basket. Cut one each from the outer, lining and interfacing.

As we will be working with 1cm seam allowances, the base of your basket will eventually have a diameter which is 2cm less than the circle you have cut. Calculate the circumference of your basket by multiplying the the diameter (minus 2) by Pi (3.14). Then add 2cm for the side seam allowance. If only my high school maths teacher could have pointed out that maths would be useful for sewing patterns I might have paid more attention…

For example, I drew around a bowl which had a diameter of 18cm.

My basket diameter is 18 - 2 = 16cm.

The circumference of my basket will need to be 16 x 3.14 = 50cm approx

Add 2cm seam allowances: 50 + 2 = 52cm

So I need to cut a side piece with a length of 52 cm.

The height of the sides will be 1.5 x diameter of finished base; 1.5 x 16 = 24cm. This gives the basket a nice height and allows for the sides to be folded over at the top.

So, for the sides cut 3 pieces measuring 52 x 24, one each from the outer, lining and interfacing.

Step 2: Affix the interfacing and sew the outer and lining baskets.

Using a hot iron with no steam, fuse the interfacing to the outer basket pieces. The linen / hessian tends to stretch significantly on the bias so the interfacing stabilises it as well as adding structure to the basket.

Working first with the basket outer pieces, fold the edge piece along its length to bring both short edges together with right sides facing. Sew along the short edges with a 1 cm seam to form a tube. Press seam open.

Join base to edges.  With right sides together, place the base inside the tube, aligning the edge of the circle with the edge of the tube. Join the base to the sides with a 1cm seam. Work slowly, pulling the base around to match the edge of the sides. Lift the presser foot frequently (leave the needle down to keep your work in place) to allow the fabric to relax back into place. Sew all the way around the base.

Watch out for stray crocodiles while doing this...

Trim seams to a few mm then repeat to form the basket lining.


Step 3; Join the lining and outer pieces.

Turn the basket lining to the right side and place it inside the outer piece, with right sides together.  Push the lining right into the outer, ensuring that the bottom seams align. The outer edges should match up. Sew around the top of the basket leaving a 5cm hole for turning. Backstitch at either side of the turning.  

Pull the basket to the right side, through the turning hole.  Push the lining into the outer and press the sides, folding the fabric at the turning hole to the inside.  Topstitch right around the top of the basket, sealing the hole.

Fold the top of the basket down to show the lining on the outside. 

I have deliberately left them un-ironed (which may or may not be a real word) because I love the way they almost look like crumpled paper bags.   What do you think?  Would you have a go at making these? I'd love to see how you got on.  What was your favourite handmade gift this year? 

Wrapping up an exciting project...

Literally.  I'm so excited to finally have this finished and ready to post.  This is the book that I wrote (quite a while ago now) while I was on maternity leave with little Jacob.  It's a book for new mums and it's full of little sewing projects and ideas on how to get the most out of your first year with your new baby.  I did approach some editors to see if they would be interested in publishing it but they mostly told me that they wouldn't publish craft books unless the author already had a big online following. Which I don't. So that was that. I was all too ready to believe that my book wasn't good enough (my interpretation of their kind rejections) so feeling slightly embarrassed about having tried at all, I put it on the shelf and mostly forgot about it for a while.

Then, last May during a trip back to the UK to visit my family, my little sister discovered that she was pregnant with her first baby. It was so wonderful to be there with her at that exciting time and to share her joy.  One of the first things that she said to me was 'You'll have to email me a copy of your book. I'd love to start sewing once I'm on maternity leave and have a little more time.'  I was simultaneously filled with pleasure that she wanted to read what I'd written and with dread in case she thought it was no good.  I've never been a 'good writer' (unlike my sister) and nearly always feel embarrassed and awkward about letting people read what i've written (I feel rather as if they were reading my diary) .  You may well be wondering what on earth I'm doing writing a blog if that's the case - it's a good question, one I ask myself a lot, but more on that later...

I can't say no to one of the people I love most in the world, particularly not when she was showing such faith in my ability, but all the same I can't pretend that i'm not afraid of failing to live up to her expectations.  I decided that the best thing to do was to turn my half finished word document and rough sketches into a proper book.  Something that I could (try to) feel proud of and something that my sister could treasure, so that she could see the time and effort and love that I'd put into something just for her.  

So here it is. This was the result. It certainly was a labour of love, but do you know what? Despite the many mistakes I really am proud of it.  I feel like I have really accomplished something.  I still feel anxious and self conscious about sharing it but those insecurities are tempered by a feeling of achievement, and the knowledge that it will give her a lot of pleasure.  And if it gives my sister pleasure then maybe it would give other people pleasure too. So, once I've had a chance to upload all the pattern pieces into .pdf files that you can download, I'll make it available as a free e-book.  It's not perfect but i'm coming to terms with that.