A Problem.. and a Solution

IMG_1149.jpg

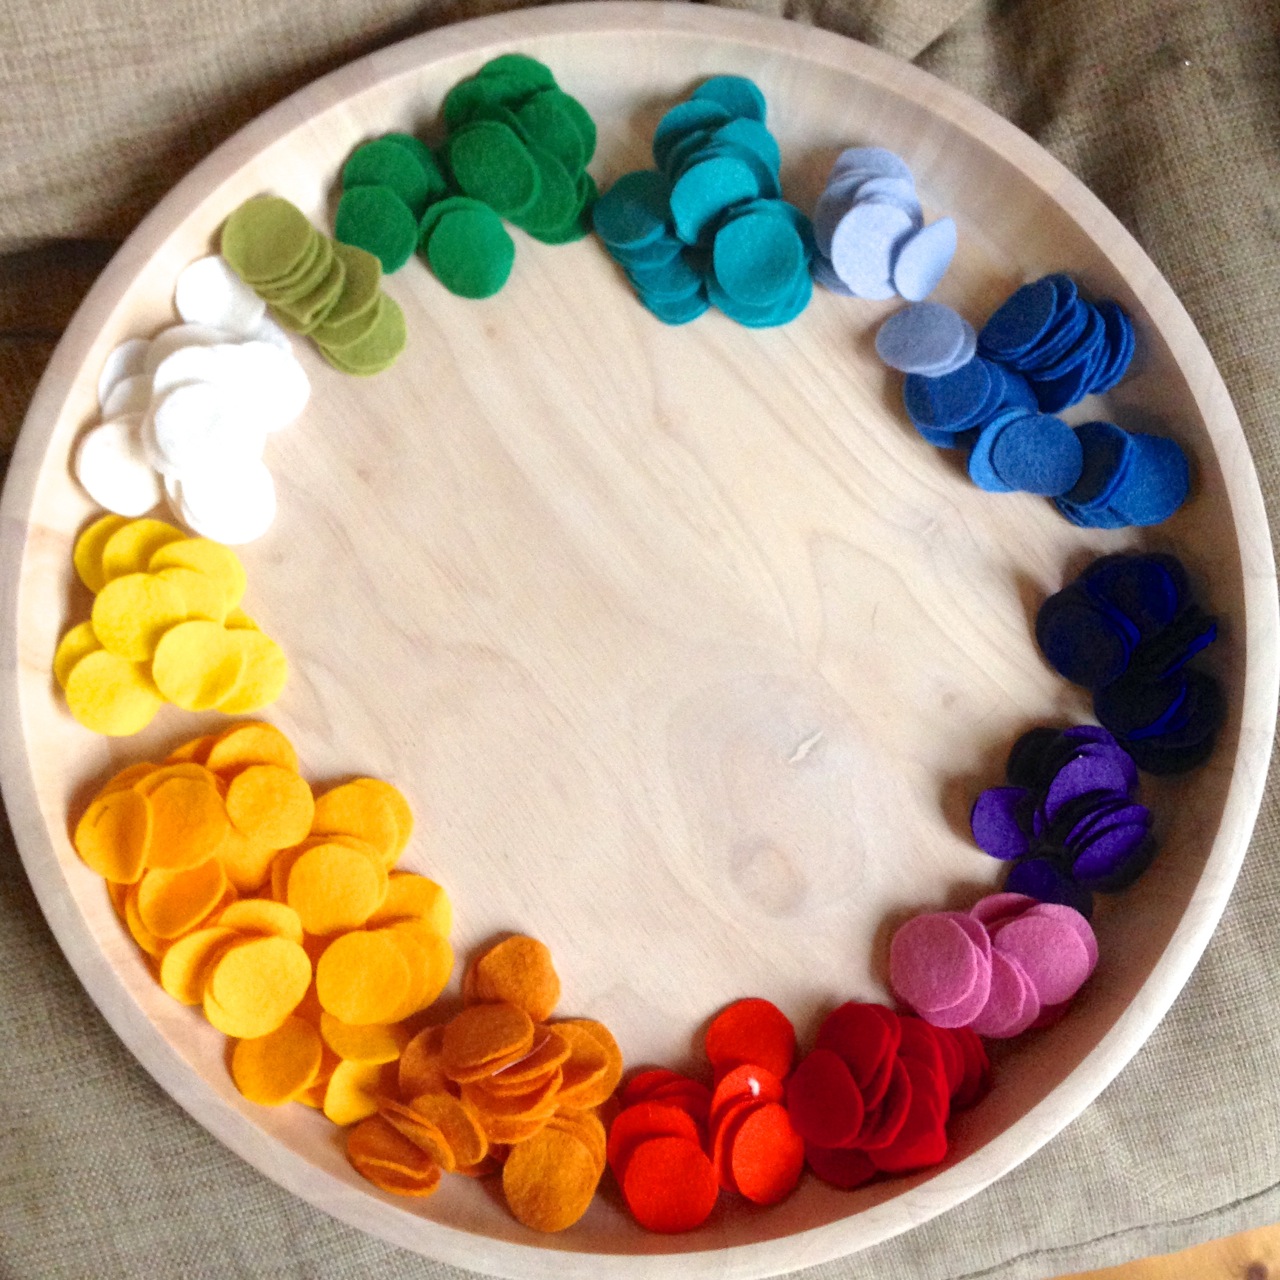
So, this is my problem.  You all know the score.  You make dozens of felt masks and end up with a massive pile of offcuts that are too small to do anything with because you're incapable of throwing stuff away. Right?  No? Just me then… Oh well, that's fine because I've come up with a very nifty and frankly awesome way of using them up!

felt confetti

Cut them into small circles and use them to make gorgeous confetti garlands!  I know.. I'm a genius! And so modest too… *ahem!

Anyway; To celebrate this wonderful discovery and all of the new masks in my Etsy store, I'm going to give away one of these fantastic Rainbow Confetti Garlands! All you have to do is share my page and sign up for the Willow and Stitch newsletter (see sidebar).  The winner will be selected on Sunday 8th February. I promise not to bombard you with emails and will only send out a newsletter when something really exciting is happening (I'm anticipating every couple of months). Plus, if I start to bore you then you can, of course, unsubscribe at any time.

The Garlands measure approximately 2.5 metres in length and have extra long cotton at each end for fastening.  They make beautiful nursery decorations or hang them over a window, mirror or mantle piece, or anywhere really that could do with a splash of fun and colour.  If you don't happen to win this one then they are for sale in my Etsy shop for $19.95 AUD.

Link to my Etsy Store here and in the sidebar.

Thanks for visiting!

rainbow confetti garland

Interstellar Top

Interstellar Knit Fabric

I LOVE this knit fabric.  It makes me think of the night sky.  I made this slouchy top this week, it could do with a couple of adjustments but I really like it already.  It's modelled on a top that a friend of mine has and It's essentially just a rectangle with sleeves and a slit for the neck.  

The placement of the sleeves means that it slips off the shoulder or I can gather it up and wear it like a cowl neck.  The sleeves are skinny (a bit too skinny really) and extra long which I always think makes things feel extra cozy.  I really like the way the fabric drapes. I've left the bottom edge raw for now - thinking that I'll finish it later but I will probably never get around to it!  It could do with being a bit bigger really but I was limited by the width of my fabric, not wanting to put a seam along the gathered shoulder which I thought would spoil the drape a little. 

I've got more of this fabric so perhaps i'll have a second try at it and make all the improvements that I want to. Or maybe I'll just save it for another project.

My new Etsy Store is open! Roaaarrrr!

I'm still working on setting up the pattern shop for this website, but in the meantime, I'm very excited to say that I've got an Etsy store up and running!

https://www.etsy.com/au/shop/Stitchandwillow

These super cute little animal masks are up for sale and I hope to soon have the patterns for them up too so that you can make them yourself if you would like to. I'm also planning to have instructions on how they can be made without a sewing machine so that you really will have no excuse!
I'm starting small (literally) while I get the hang of this new software for pattern making, not to mention all the other things that I need to learn about, but I've got some very big ideas so I hope you'll hang in there and keep coming back to see what I'm up to.

I can't tell you how happy I am, to feel like I'm finally on my way to doing what I love, on my way to living my dream and doing the thing that I've been wanting to do since Ella was born 4 years ago.  There have been a lot of late nights recently, and a lot of anxiety and insecurity of course, but more than anything else just an overwhelming feeling of excitement and satisfaction.  I have spent way too long wishing for a change but not making the effort required to enact that change. Of course there is always the fear of failure, but really, when it comes to things like this the only failure is to not try.  Perhaps I won't succeed, perhaps I'll decide that this isn't what I want to do after all, but at least I'll know that I gave it my best shot. There will be no regrets and I will be free to follow another dream.

The strangest thing is that I've discovered that I actually LIKE the fear which has been holding me back all this time, I really do like it - it's exhilarating - it's like jumping off a cliff - because it really is true that you can't experience one extreme without the other; yes there is fear but there is also elation, and it's wonderful!

Thank you for stopping by.  Go and do something that you're afraid of!

Fabric Basket Tutorial

Happy New Year!

Before Christmas fades into distant memory I thought it'd be nice to share a tutorial for one of my favourite handmade gifts this year; these lovely little fabric baskets.  They are very quick and easy to make and there is no pattern needed.  The baskets can be made any size - I like them with a 16cm diameter, but the hubby was asking if I could make some which were waste paper basket sized, which of course you could.

I think they are also really nice as a little nested set of 2 or 3, with each one a few centimetres bigger than the one before it.  The tops can be folded down once or twice depending on the contents of the basket.

Don't you love this fabric combination?  These are actually some bits that I had left over from the Sew Liberated 'Gathering Apron' which I made a few weeks ago for myself - I'll take some pictures and post that soon too.

For the baskets, you will need:

Linen or hessian fabric for the outer

Printed cotton for the lining

Heavy weight fusible interfacing


Step 1: Calculate measurements and cut pattern pieces:

Choose a bowl or plate which is roughly the diameter which you want for your baskets and use it as a template for the base of the basket. Cut one each from the outer, lining and interfacing.

As we will be working with 1cm seam allowances, the base of your basket will eventually have a diameter which is 2cm less than the circle you have cut. Calculate the circumference of your basket by multiplying the the diameter (minus 2) by Pi (3.14). Then add 2cm for the side seam allowance. If only my high school maths teacher could have pointed out that maths would be useful for sewing patterns I might have paid more attention…

For example, I drew around a bowl which had a diameter of 18cm.

My basket diameter is 18 - 2 = 16cm.

The circumference of my basket will need to be 16 x 3.14 = 50cm approx

Add 2cm seam allowances: 50 + 2 = 52cm

So I need to cut a side piece with a length of 52 cm.

The height of the sides will be 1.5 x diameter of finished base; 1.5 x 16 = 24cm. This gives the basket a nice height and allows for the sides to be folded over at the top.

So, for the sides cut 3 pieces measuring 52 x 24, one each from the outer, lining and interfacing.

Step 2: Affix the interfacing and sew the outer and lining baskets.

Using a hot iron with no steam, fuse the interfacing to the outer basket pieces. The linen / hessian tends to stretch significantly on the bias so the interfacing stabilises it as well as adding structure to the basket.

Working first with the basket outer pieces, fold the edge piece along its length to bring both short edges together with right sides facing. Sew along the short edges with a 1 cm seam to form a tube. Press seam open.

Join base to edges.  With right sides together, place the base inside the tube, aligning the edge of the circle with the edge of the tube. Join the base to the sides with a 1cm seam. Work slowly, pulling the base around to match the edge of the sides. Lift the presser foot frequently (leave the needle down to keep your work in place) to allow the fabric to relax back into place. Sew all the way around the base.

Watch out for stray crocodiles while doing this...

Trim seams to a few mm then repeat to form the basket lining.


Step 3; Join the lining and outer pieces.

Turn the basket lining to the right side and place it inside the outer piece, with right sides together.  Push the lining right into the outer, ensuring that the bottom seams align. The outer edges should match up. Sew around the top of the basket leaving a 5cm hole for turning. Backstitch at either side of the turning.  

Pull the basket to the right side, through the turning hole.  Push the lining into the outer and press the sides, folding the fabric at the turning hole to the inside.  Topstitch right around the top of the basket, sealing the hole.

Fold the top of the basket down to show the lining on the outside. 

I have deliberately left them un-ironed (which may or may not be a real word) because I love the way they almost look like crumpled paper bags.   What do you think?  Would you have a go at making these? I'd love to see how you got on.  What was your favourite handmade gift this year? 

Wrapping up an exciting project...

Literally.  I'm so excited to finally have this finished and ready to post.  This is the book that I wrote (quite a while ago now) while I was on maternity leave with little Jacob.  It's a book for new mums and it's full of little sewing projects and ideas on how to get the most out of your first year with your new baby.  I did approach some editors to see if they would be interested in publishing it but they mostly told me that they wouldn't publish craft books unless the author already had a big online following. Which I don't. So that was that. I was all too ready to believe that my book wasn't good enough (my interpretation of their kind rejections) so feeling slightly embarrassed about having tried at all, I put it on the shelf and mostly forgot about it for a while.

Then, last May during a trip back to the UK to visit my family, my little sister discovered that she was pregnant with her first baby. It was so wonderful to be there with her at that exciting time and to share her joy.  One of the first things that she said to me was 'You'll have to email me a copy of your book. I'd love to start sewing once I'm on maternity leave and have a little more time.'  I was simultaneously filled with pleasure that she wanted to read what I'd written and with dread in case she thought it was no good.  I've never been a 'good writer' (unlike my sister) and nearly always feel embarrassed and awkward about letting people read what i've written (I feel rather as if they were reading my diary) .  You may well be wondering what on earth I'm doing writing a blog if that's the case - it's a good question, one I ask myself a lot, but more on that later...

I can't say no to one of the people I love most in the world, particularly not when she was showing such faith in my ability, but all the same I can't pretend that i'm not afraid of failing to live up to her expectations.  I decided that the best thing to do was to turn my half finished word document and rough sketches into a proper book.  Something that I could (try to) feel proud of and something that my sister could treasure, so that she could see the time and effort and love that I'd put into something just for her.  

So here it is. This was the result. It certainly was a labour of love, but do you know what? Despite the many mistakes I really am proud of it.  I feel like I have really accomplished something.  I still feel anxious and self conscious about sharing it but those insecurities are tempered by a feeling of achievement, and the knowledge that it will give her a lot of pleasure.  And if it gives my sister pleasure then maybe it would give other people pleasure too. So, once I've had a chance to upload all the pattern pieces into .pdf files that you can download, I'll make it available as a free e-book.  It's not perfect but i'm coming to terms with that. 

Leaving..

I’m off on a little adventure all on my lonesome. Off to New Zealand for the first time in my life to visit one of my dearest friends who moved there a few years ago.  My original crafternoon buddy to whom I am very grateful for her nurturing of my crafty / sewing instincts and who taught me lots of things – about sewing and more.

This was my birthday present from Nick this year – 5 days away from my mummy duties! I have to admit I’m ready for it; after a very busy week of work and a couple of days with at least 1 very grumpy child, I have been really looking forward to my escape.  Until it came to time to say goodbye to the little ones anyway.  Why is it that they drive me crazy all week and then this morning, despite us waking them before 6 so that we could get me to the airport on time, they were perfect angels in the car – chattering away to us, laughing with each other and cracking us up with the hilarious things they say!  Is it just my mindset? Is it just that I know that I’m going to miss them so I appreciate them all the more? Maybe it’s just pure chance, but it does always seem to happen that way.  When I have endless time with them I find myself wishing they would just leave me alone occasionally and then when I’m sitting here at the start of 5 child free days, I regret those thoughts. I miss them already, I feel a little incomplete without them. My excitement is muted because I can’t see it reflected in their faces, they are my little mirrors.  I wish I didn’t have to be away from them to be able to full appreciate how beautiful life with them is. That’s not to say that I don’t appreciate how lucky I am to have them, it’s just that that appreciation is so often tempered by little irks and annoyances.  Imagine how wonderful life would be if we could let those every day annoyances simply wash over us and only hold onto the joyful feelings.

Ok, I think that’s enough reflection for now – I’m starting to feel quite miserable about being away from my little ones and it’s only been 2 hours! I think it’s time that I close the computer, open my book and start to relax into my holiday. Otherwise I may find myself walking out of the airport and hopping into a Taxi to head home!

A Geranium Dress for Ella

I made my first Geranium Dress for Ella this week and I just love it! More importantly so does she. The garden probably wasn't the best place to take the photos - she's rather well camouflaged!  It was just too far nice a day to be inside.  

Such a great pattern from Rae Hoekstra, I have a feeling I'll be making lots more. Next stop a Washi Dress for me I think...

www.made-by-rae.com

Daddy's-Old-Shirt Dress

IMG_4895.jpg
IMG_4887.jpg
IMG_4894.jpg

We're getting into the spirit of buy nothing new month a little early here. Nick and I had a clear out of our wardrobes and I decided to turn this old shirt of his into a little sundress for Ella. 

I made the front by cutting a dart along the bottom of the gold, with the yolk the right width and the skirt with extra width which I gathered before sewing the dart back together. This meant I could leave the original buttons and button band and not have to cut through it. 

Ella loves this dress - mostly because she knows it used to be Daddy's shirt and she thinks that must mean she's as big as Daddy! She's very keen on growing up my little girl. Would that I could be so pleased - while I love watching her grow and learn, I'm still really struggling to come to terms with the fact that my firstborn is 3 already (where did that time go?)