English Paper Piecing - A Scrap Busting TSNEM Project

English Paper Piecing - A scrap busting Try Something New Every Month Project

Ok, so it might be halfway through June but here is my May 'Try Something New Every Month' project.  The theme for this month was 'handwork' and in a rare fit of compliance I decided to go with it and have a go at English Paper Piecing.  

I'm going to blame my tardiness on a combination of technical issues (my cloud is full which apparently doesn't make it rain but does make it hard to get photos off your phone and onto your computer.... I know - Yawn! Sorry!...), the glacially slow progress of my hand sewing and the fact that I had lots of other (frankly more interesting and instantly gratifying) projects to sew.

English Paper Piecing - A scrap busting Try Something New Every Month Project

This was, first and foremost, a scrap busting project.  I seem to be incapable of throwing away even small scraps fabric and thought that this would be a great way to use some of them up.  I genuinely thought that I was starting small with this project - it was the first time that I'd tried English Paper Piecing so it made sense to keep it small and simple right?  The theory was good, but unfortunately it takes a LOT of 1" hexies to make even a rather small piece - I mean just LOOK at that pile of cardboard templates! 

English Paper Piecing - A scrap busting Try Something New Every Month Project

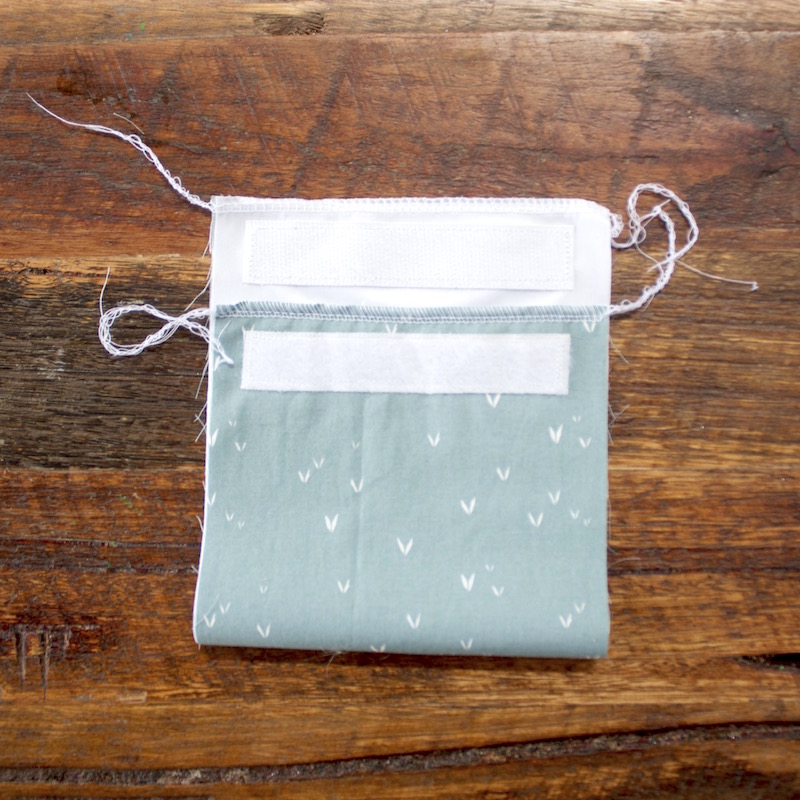
I was pretty pleased with my final patchwork, but it still wasn't nearly big enough and I didn't fancy taking the rest of the year to complete this so I went and sewed a big yellow boarder around it before hand quilting the top sewing it into a footstool. 

English Paper Piecing - A scrap busting Try Something New Every Month Project

Just don't look too closely at my hexies please or you'll see the wonky joins and gaps.  You know how you hear quilting people say 'nice points!'? No one is ever going to say that to me.....

English Paper Piecing - A scrap busting Try Something New Every Month Project

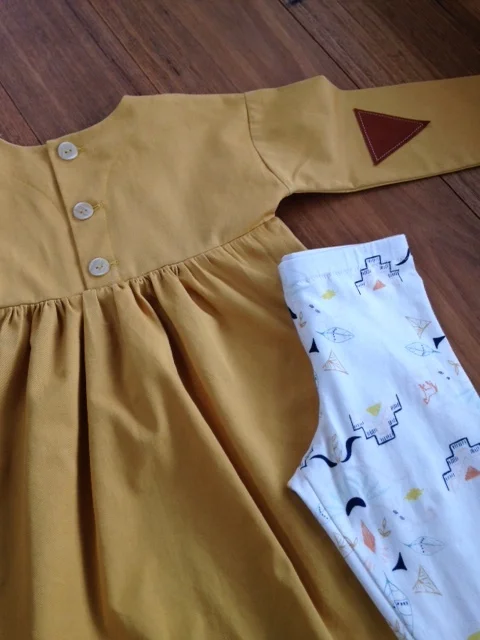
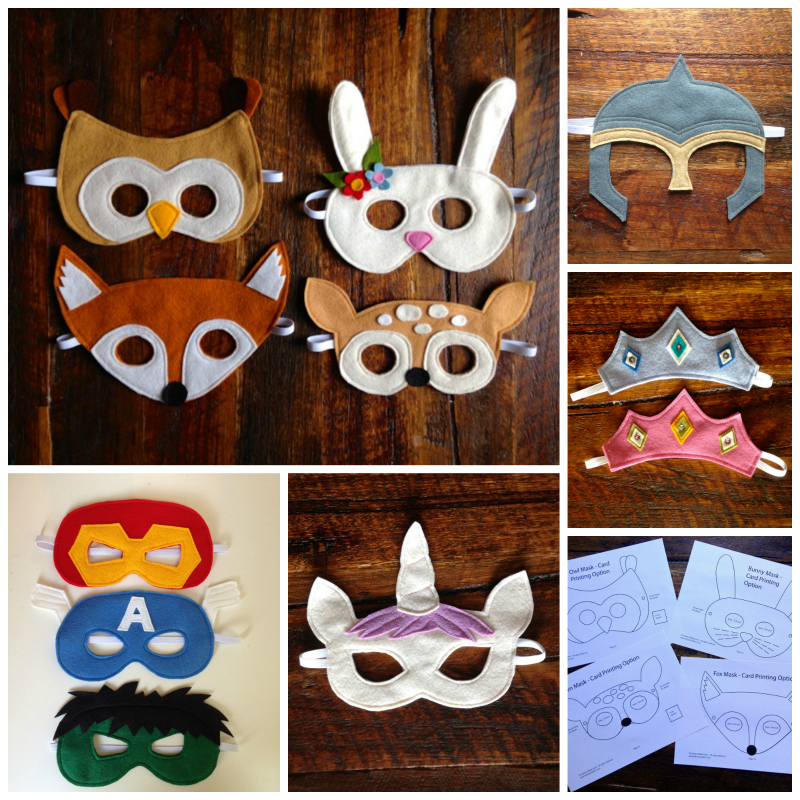
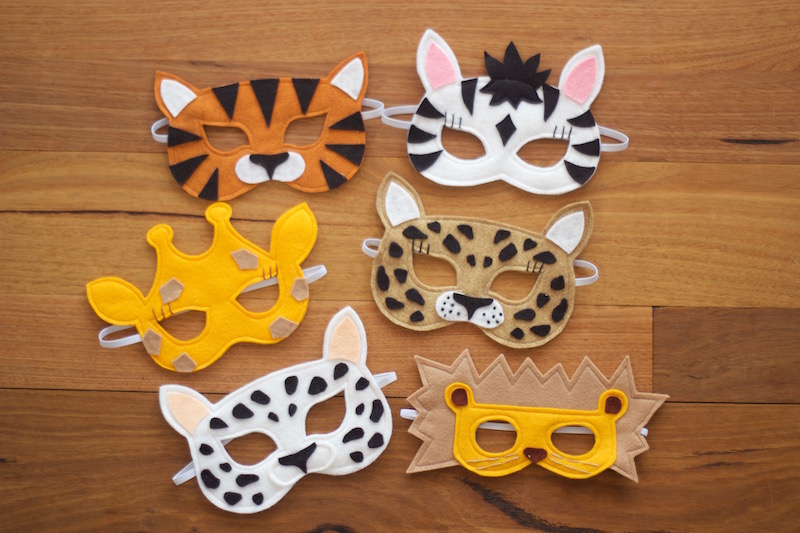
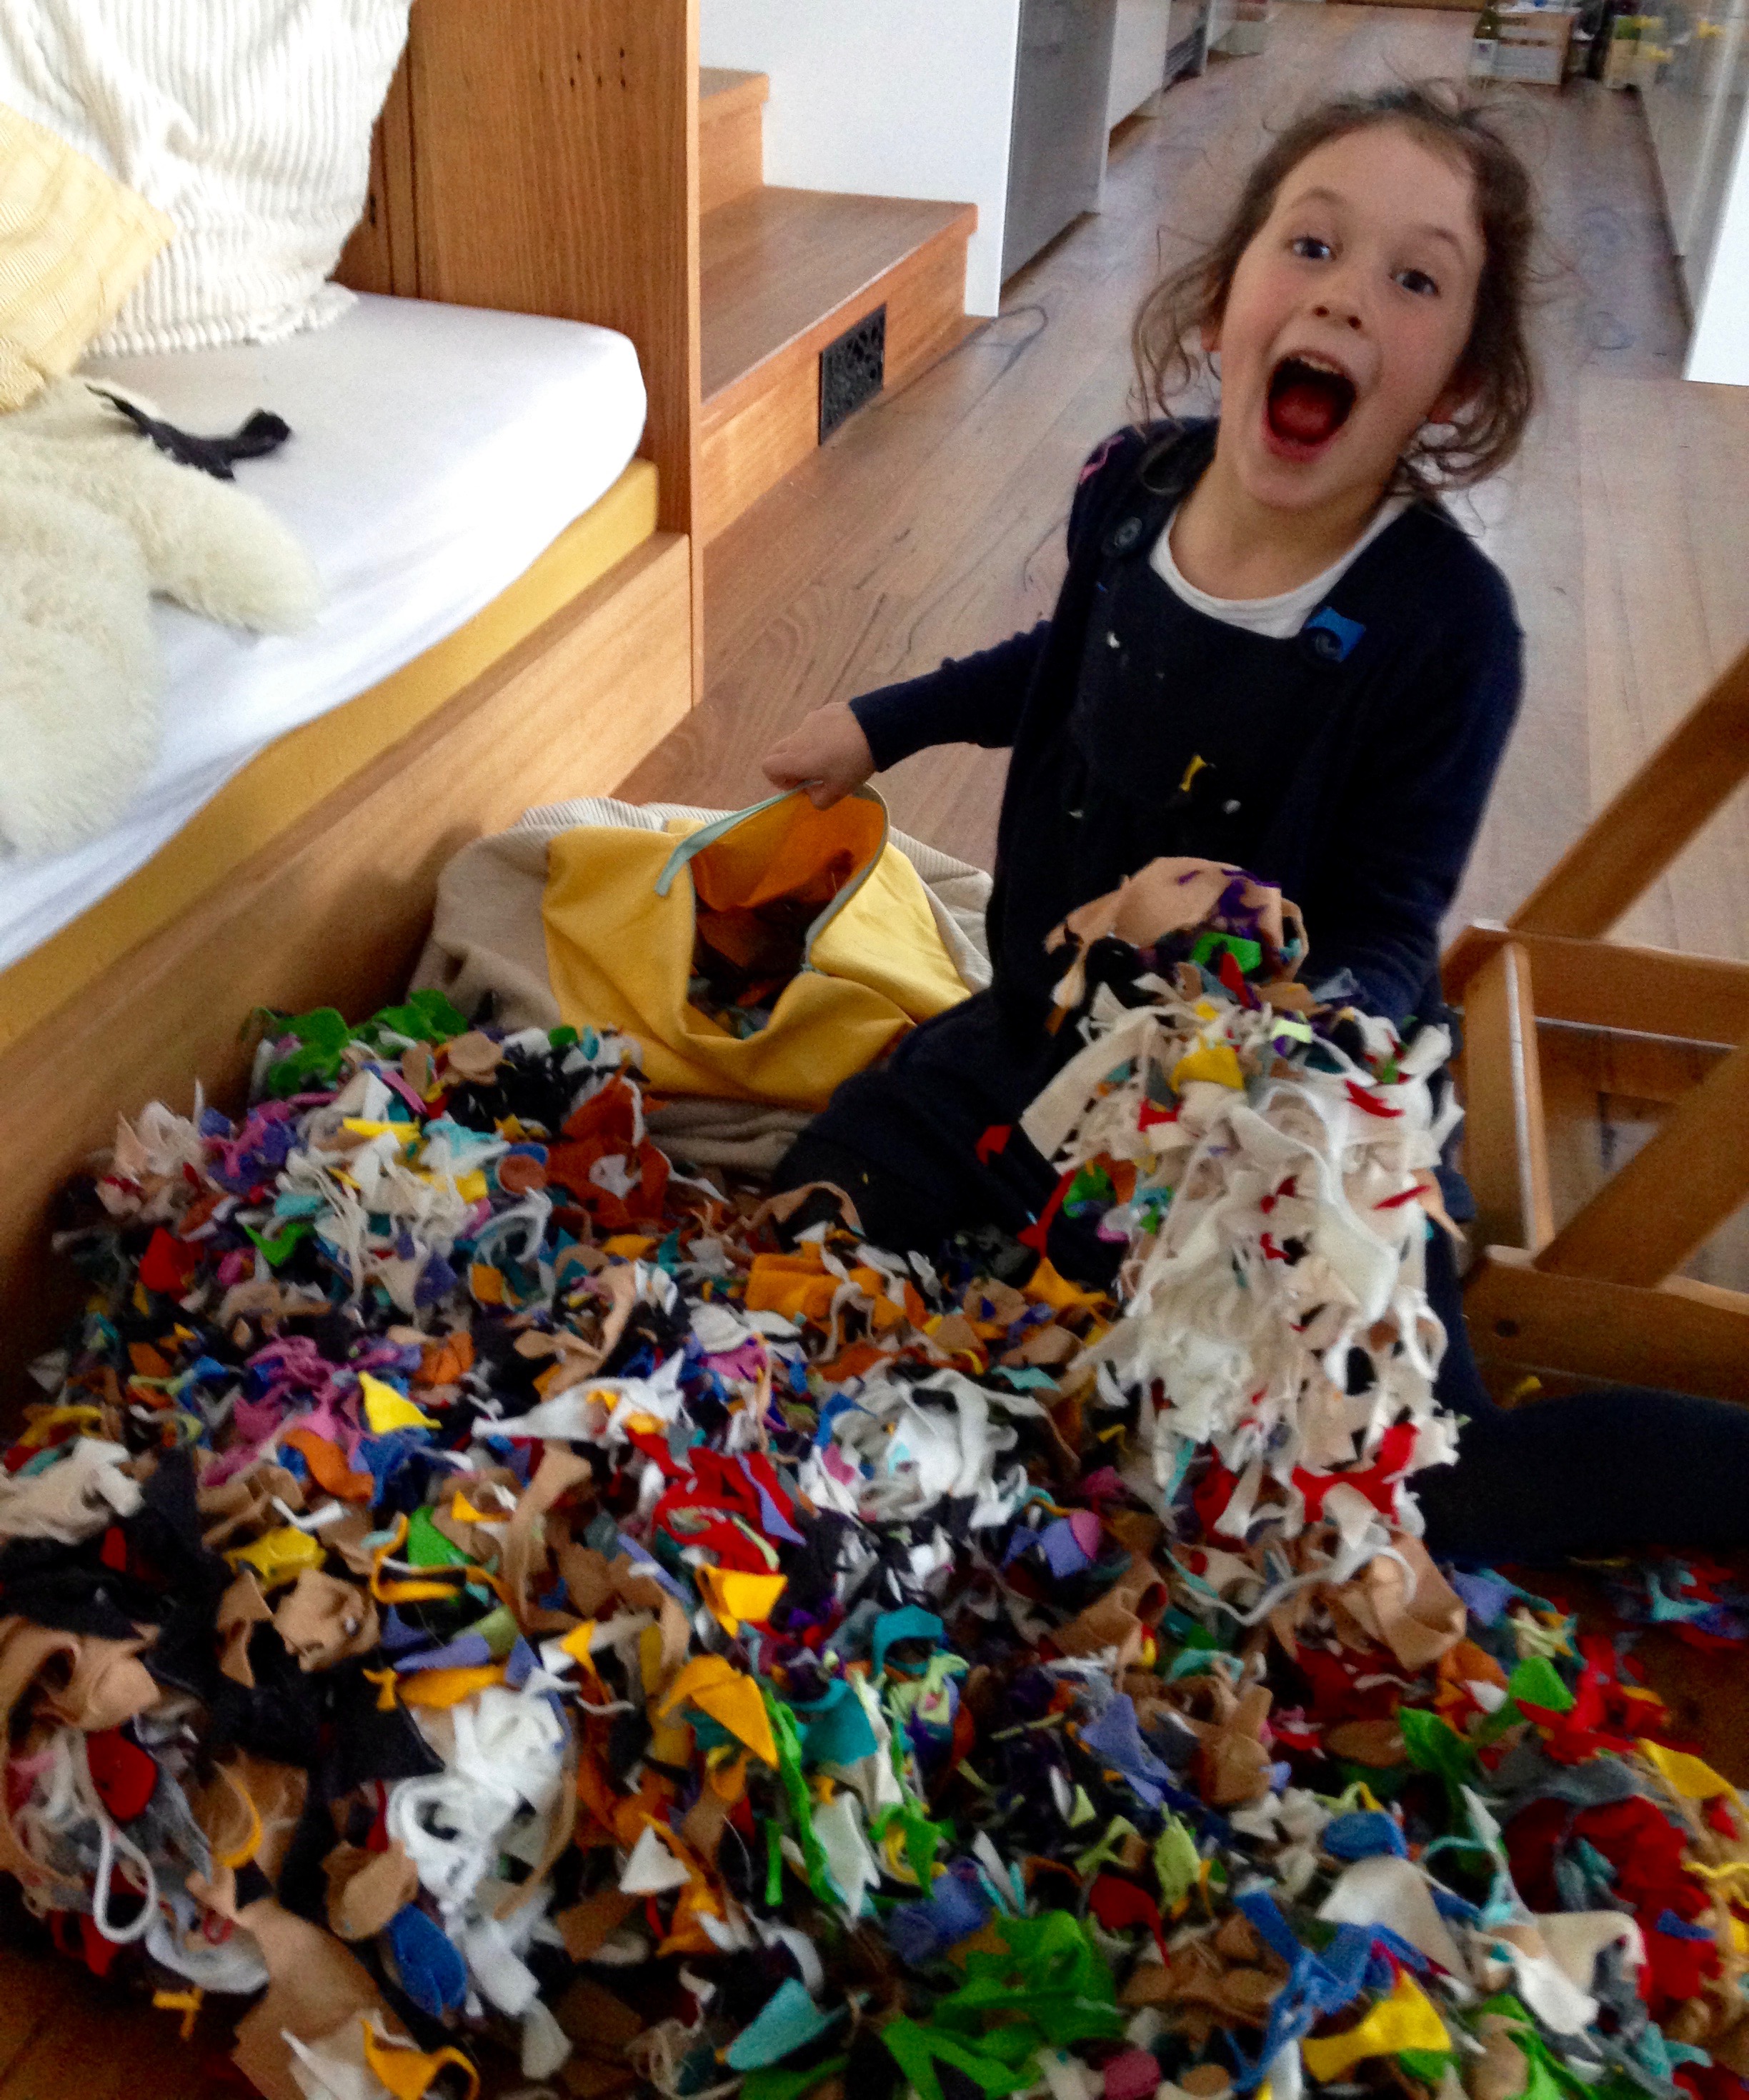
Once I had my footstool cover it needed stuffing (and this is the really brilliant scrap busting part) it's also the part where you begin to think that I might actually be crazy.. BUT.  If you've been here before, or follow me on Instagram, you'll know that I spend a lot of my 'free' time sewing up felt dress up masks which I sell on Etsy and at local handmade markets in Melbourne.  Anyway, the point is that cutting out all of those felt masks results in lots of tiny scraps which I don't seem to be able to throw away.  I'm honestly not sure why I didn't just put them in the bin except for that I had vague, half-formed ideas about using them to stuff a pillow or something at some point.  So; this is what a year's worth of scraps looks like (and how a 5 year old looks when you let her tip them all over the dining room floor and roll around in them):

https://www.etsy.com/au/shop/Stitchandwillow?ref=hdr_shop_menu&section_id=16893907

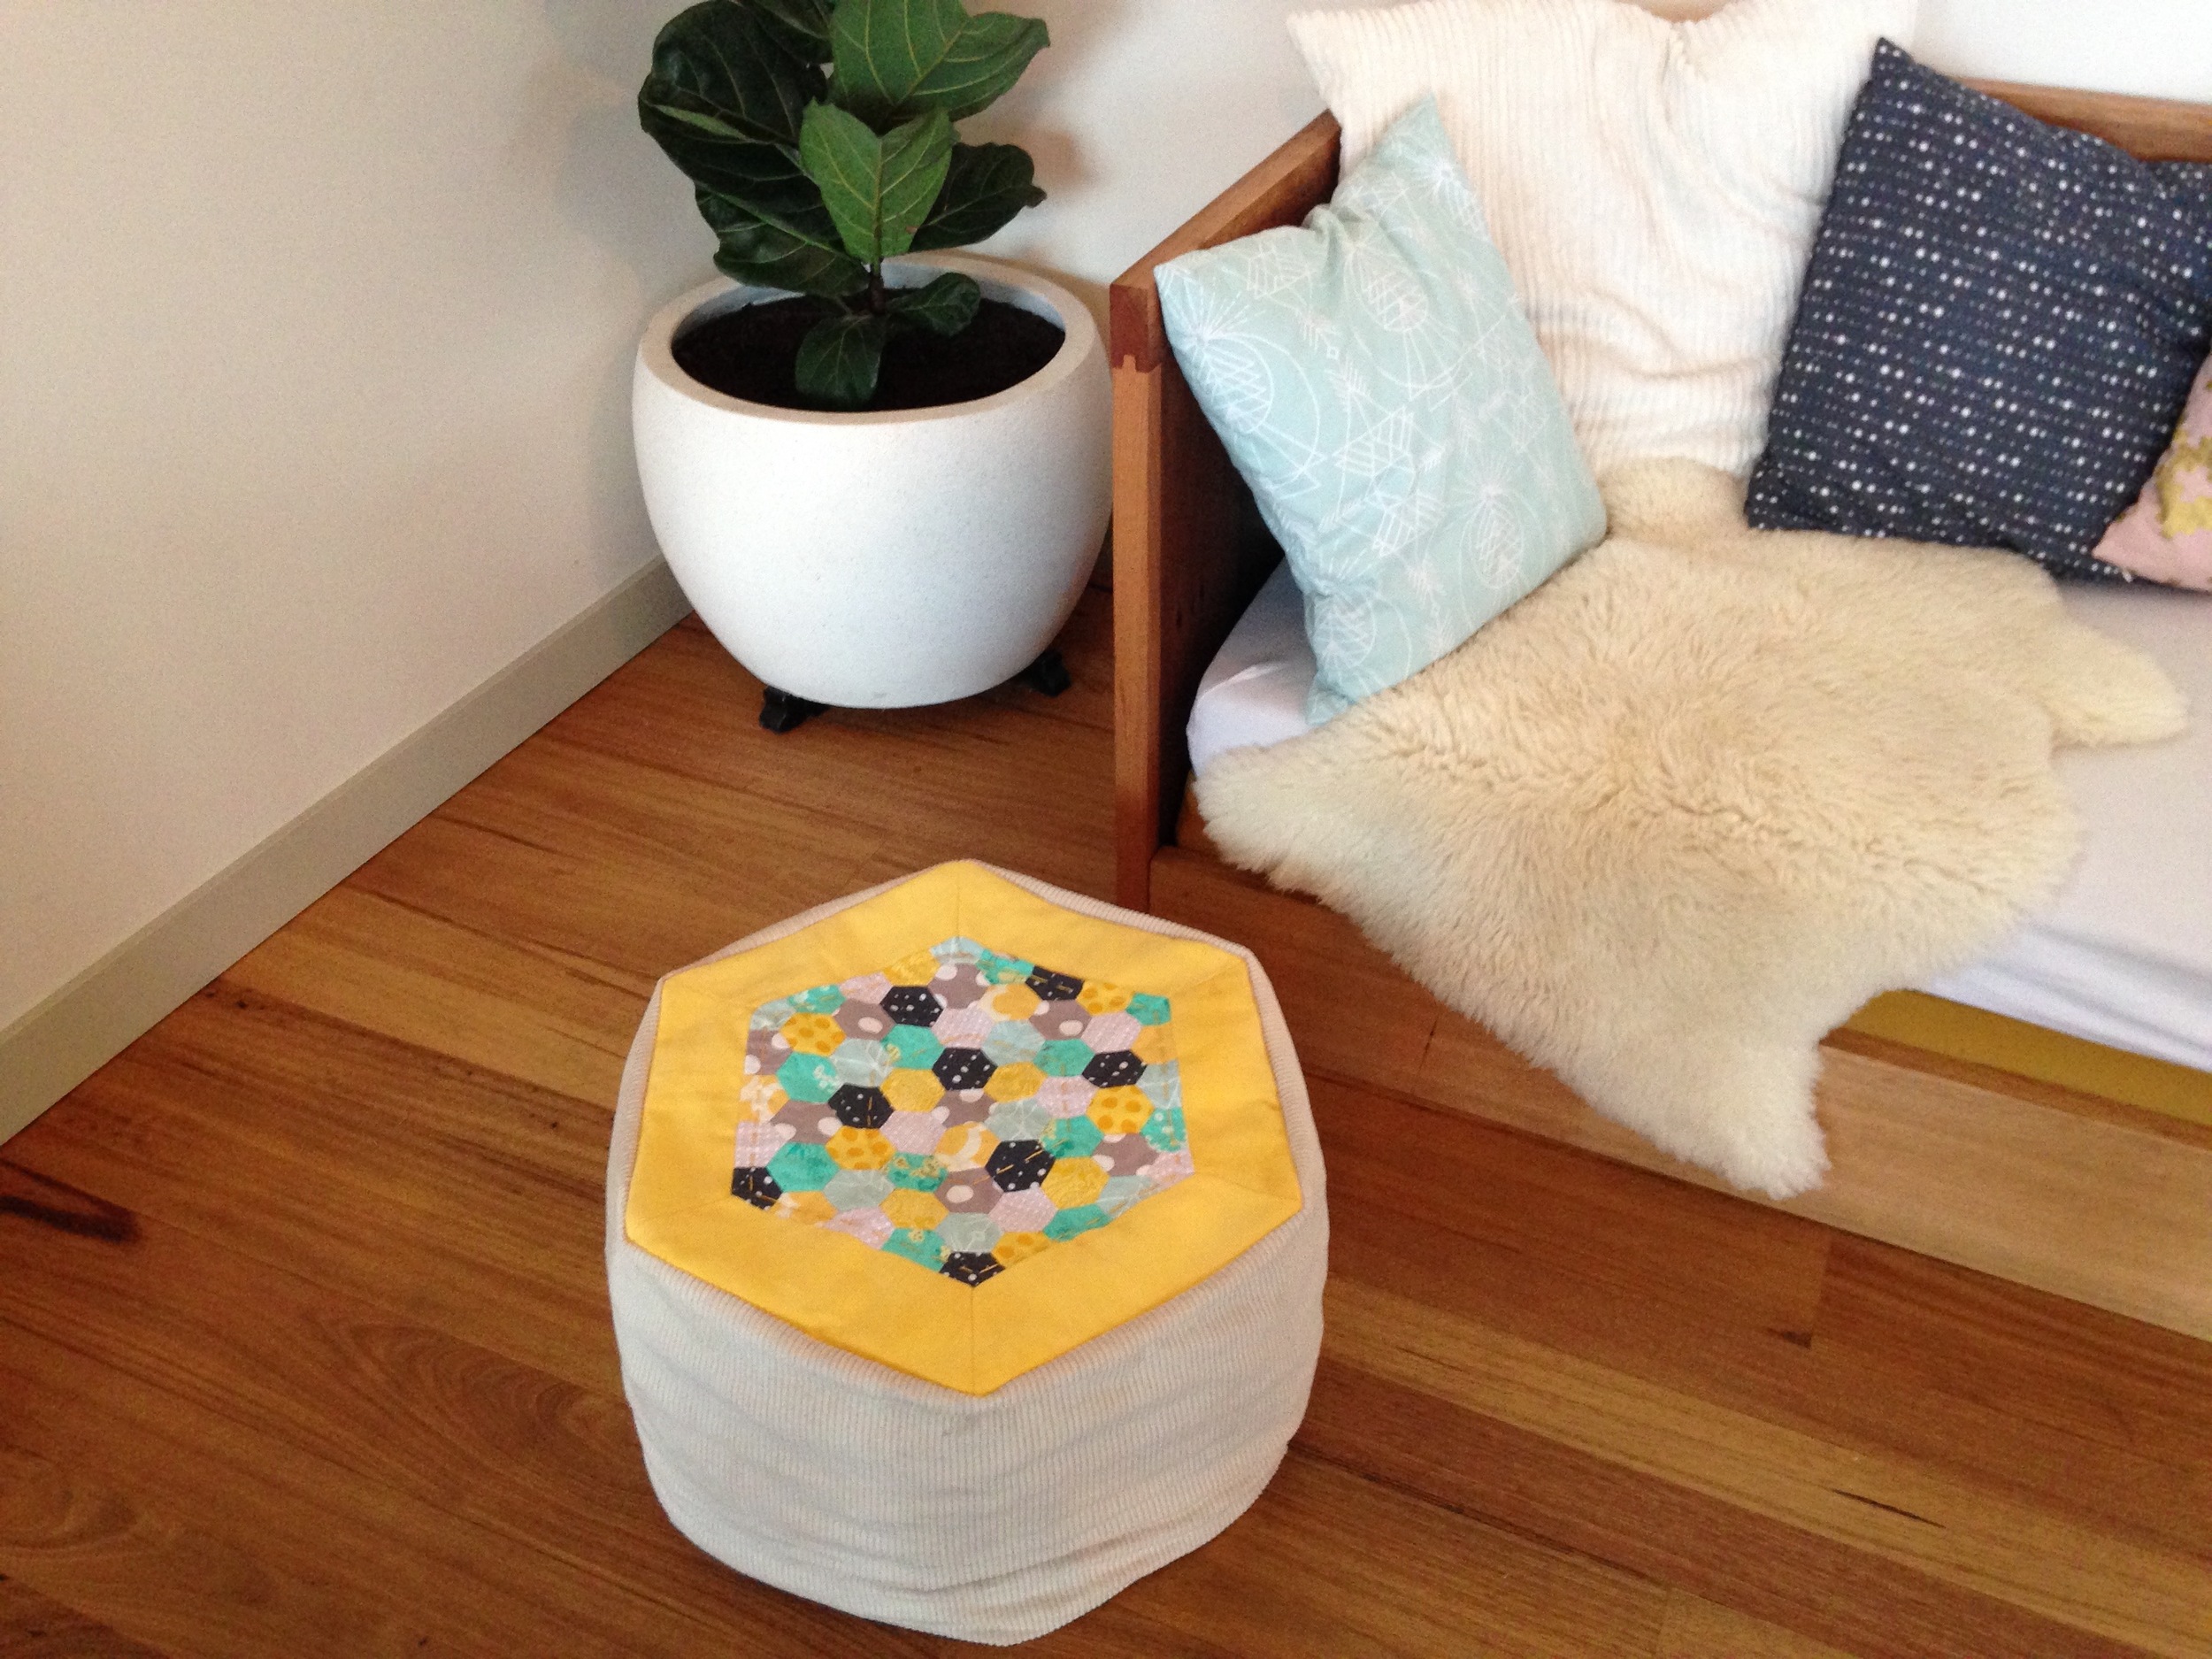
And this is how my paper pieced, felt scrap filled, labour of love footstool looks when finished. I'll admit to feeling a little smug, If only because I actually finished the thing!  I'm not sure I'll do any more English Paper Piecing, at least not in the near future, but despite all my grumbling I did rather enjoy this (possibly because I gave me an excuse to sit on the sofa and plow through another season of Mad Men!)

English Paper Piecing - A scrap busting Try Something New Every Month Project

Right.  Time to get cracking with June's TSNEM project!

You May Also Like...

Paying it forward

Acrylic painted rope bowl.

Acrylic painted rope bowl.

I’ve been busy making recently (too busy making to blog anything apparently!) and it’s been all about sharing the love around here at the moment.  

I’ve been working on some gifts for a pay it forward initiative.  I agreed to do this months and months ago with the idea that the 5 people who volunteered would get a gift from me in return for paying it forward to 5 others.  It was really interesting to see who responded to my message, some were dear family members, some close friends, others I haven’t seen since high school.  

The agreement was that I would send them something over the next year, when inspiration struck and I found something that I thought they would like. It’s taken me the better part of the year to get around to sending out gifts, but I had resolved that I wanted to send handmade gifts and I also struggled to decide exactly what would make a nice gift for some of the people I was supposed to be sending to. I have occasionally felt a little guilty for taking so long to get around to doing it, but mostly, unexpectedly, I have enjoyed taking my time over this. I’ve found myself thinking about my recipients a lot over the last 9 months, wondering about their lives, their challenges and what I can do or send that will make them smile.  I wonder if they have sensed it at all.  

Open wide zippered pouch - free pattern from Noodlehead

Open wide zippered pouch - free pattern from Noodlehead

The most unexpected thing has been how much I have enjoyed the whole process. It has been fun creating these things and wrapping them up - Imagining the surprise when the parcels arrive and hoping that they will brighten someone's day.  I can’t help thinking that I may have gained more from this experience than the people to whom I am sending gifts, although I hope they will disagree!

Painted Rope Bowl

I’m going to try to keep on paying it forward, to think about ways I can incorporate random (or not so random) acts of kindness into my everyday, I’m totally hooked on feeling like one of santa’s elves!  Do you have any ways that you like to pay it forward or favourite random acts of kindness?


You May Also Like...

I made a leather bag!!

Leather bag making workshop with April Rhodes | Willow & Stitch

Ok, Let me just get this out of the way first of all:

I MADE A LEATHER BAG!

I MADE A LEATHER BAG!

I MADE A LEATHER BAG!

Sorry.  Just a tiny bit excited about this new skill that I’ve learnt!  

If you follow me on Instagram you will have seen that this month I was lucky enough to fly up to Sydney to spend a weekend sewing with the very lovely April Rhodes.  It was such a great weekend - so good to spend the weekend being creative, sewing and hanging out with some beautiful ladies.  

While I thoroughly enjoyed all of the workshops, (we made the Staple Dress and the Pop Over Poncho and also drafted our own skirts), I have to say that the leather bag making session was my favourite.  I’ve never done anything remotely close to sewing with leather before so it definitely fits into the category of ‘Trying Something New’!  

Some of the hardware we used.

Some of the hardware we used.

The beautiful selection of leather to choose from.

The beautiful selection of leather to choose from.

Using clips to pin the leather in place.

Using clips to pin the leather in place.

Some of the many weird and wonderful tools...

Some of the many weird and wonderful tools...

My starting materials.

My starting materials.

There were a lot of new techniques to learn but once you’ve got your head around those the leather was surprisingly easy and satisfying to work with.  The fact that you can leave all the edges raw makes constructing the bag actually pretty easy.  

Probably the trickiest (and most expensive) thing about it was all the hardware required - I’ve already put all the tools on my birthday wish list, although sadly it’s not my birthday until October - I may have to come up with another plan…. I had started to do a little research to find out where I could buy the tools from - until an announcement popped up in my IG feed saying that April Rhodes was going to open her own supply shop which will sell all the materials needed! Excellent - that’s that problem solved then...

Leather Bag Making Workshop with April Rhodes | Willow & Stitch

I’m so pleased with my bag (just in case you haven't guessed that already!). I sewed a little inside pocket to hold my phone and a pen, and we added these fabulous handmade tassels (I can see another obsession developing around tassels but that’s a story for another day…)  I also decided that I would wrap my handles with rope (just to add a little continuity from last month!)  

Leather Bag Making Workshop with April Rhodes | Willow & Stitch

The bag also has a detachable shoulder strap so that I can wear it like a messenger bag if I choose. I won’t tell you how much we struggled to work out exactly how we needed to thread the strap through the fittings to make it adjustable - I think our heads nearly exploded but we got there in the end, and had a lot of fun trying to work it out!

Once again, I have so enjoyed this month’s Try Something New project - and once again I can see it turning into an expensive habit if i’m not careful!  At least I haven’t rushed out and spent hundreds of dollars on leather yet, although that’s not for lack of wanting to!  I have a feeling that all of my nearest and dearest are going to be receiving leather bags for christmas - whether they want one or not!

Leather Bag Making Workshop with April Rhodes | Willow & Stitch


You May Also Like....

A pom pom filled Tutu for Kids Clothes Week

A pom pom filled Tutu for Kids Clothes Week by Willow & Stitch

I wasn't sure that I was going to manage to sew anything within this season's KCW theme of 'Toys' but I think I might have accidentally nailed it with this pom pom filled tutu!

I've had this project in mind for ages.  I bought a huge bag of pom poms ages ago - honestly I have no idea why, quite possibly they were on sale or perhaps I was just attracted by the bright colours, but in any case they have been sitting on my shelf in a big glass jar for about 2 years now, looking pretty, but without my having any idea of what to do with them.  Until I saw these awesome pom pom filled tutus on Pinterest anyway...

Little girl was totally blown away by this skirt.  She kept saying 'Wow!  That's so cool!'  (smug mumma!) and bouncing around and twirling to make the pom poms fly.  I have to admit that I'm a little jealous.  I'm dying to make a tuille skirt for myself but I'm not quite sure I could pull it off.  I'm absolutely certain that I couldn't pull off a pom pom filled one.  Oh well, that's what children are for isn't it?  Living vicariously?!

A pom pom filled Tutu for Kids Clothes Week by Willow & Stitch

You May Also Like...

Sewing Rope Baskets | Try Something New Every Month

Sewing Rope Baskets | Try something new every month by Willow & Stitch

I had SO much fun with this month's project.  I've been dying to try my hand at making these lovely rope bowls for months so TSNEM was just the nudge I needed to get started.  

I can't begin to explain just how satisfying these are to make.  Once I'd got the hang of it I found that the small / medium sized baskets only took around 20 minutes each to make.  There's something very meditative about sewing them, I think it's partly because you're going round and round in circles, and partly because they're so simple that there's really not much thinking involved.  So fun, but goodness me - you wouldn't believe how much thread you'll go through - I've never wound so many bobbins in my life!

Sewing Rope Baskets | Try something new every month by Willow & Stitch

But the thing that I really loved about sewing these baskets is that it isn't really like sewing at all. To me it feels more like sculpting; the angle that you hold the bowl at, the tension on the rope, the variations between different types of rope all contribute to the shape. No two baskets turn out the same (no matter how hard I try) and when I start I often have no idea what the finished thing is going to look like.  It's always lovely surprise to see what comes out the other end.

Sewing Rope Baskets | Try something new every month by Willow & Stitch

I made several baskets using coloured thread to add interest and also had a lot of fun experimenting with paint - both painting the finished baskets and painting the rope before sewing - a la Gemma Patford who has a wonderful little instructional video in case you want to have a go at making some of these beauties yourself!

Sewing Rope Baskets | Try something new every month by Willow & Stitch

I had enormously high hopes for this huge rope market basket, but despite it taking me hours and hours to sew I couldn't help but be a little disappointed with the end result, it turned out pretty wonky and misshapen.  I was all ready to pull it apart and begin again (there must be 30 metres of rope in there!) but actually it's beginning to grow on me and I'm starting to love it despite (or perhaps because of) it's wonkiness. 

Sewing Rope Baskets | Try something new every month by Willow & Stitch

It would be remiss of me not to mention that making these baskets is insanely addictive! Seriously; do not try this if you're not prepared to go out and buy a giant 250 metre roll of rope once you're finished your first basket!  It isn't just me who loves them either - the whole family is obsessed.  Hubby was making requests for baskets to prove his bread in, the kids keep nagging me to make more for them / commandeering my finished baskets.  I found this one full of Jacob's treasures.

Consider yourself warned!

Sewing Rope Baskets | Try something new every month by Willow & Stitch

Have you had a go at making baskets like these? Did you get as addicted as I did?  Want to share any top tips or your favourite uses for them?

You May Also Like...

Oliver + S Hide and Seek Dress

Oliver + S Hide and Seek Dress by Willow & Stitch

I just finished my first Kids Clothes Week make for 2016 and I'm super happy with this Oliver + S Hide and Seek Dress.  I just love pretty much everything about the pattern, the loose fit, the gathers, the sleeves, the welt pockets...  It was a really fun sew - interesting without being too challenging!  

Olive + S Hide and Seek Dress by Willow & Stitch
http://oliverands.com/product/OLV-LC010CI-D.html

I've been wanted to make another linen and stripes dress for Ella ever since the one I made during last kids clothes week turned out to be too small and had to be gifted to a little friend! This pattern looked like it would be perfect for the linen and it turned out just as lovely as I'd hoped.  

I've actually been admiring this dress for a while and didn't realise until after I had bought the Hide and Seek Dress that it's actually a grown ups version of the same thing!  I might have to add it to my 'To Sew List'! 

Are you joining in with Kids Clothes Week this season?  What are you making?

Try Something New Every Month

Try Something New Every Month

The end of last year was a whirlwind of crazy felt mask making.  While I had a lot of fun making them, and heaps of fun selling them at the markets and actually meeting and talking with my customers - I did begin to feel like I would never have time to make anything else ever again.  

So, in order to keep a healthy craft / work balance I’ve decided that this year I’m going to join in with the Try Something New Every Month project that Stephanie from Swoodson Says and Rebecca from Hugs are Fun have created.  


Every month I’m going to be trying my hand at a new craft and the best thing about this project is that anyone can join in.  If you blog you can link up to the roundups at Swoodson Says or Hugs are Fun, otherwise you can just share your projects on Instagram with #TSNWM or join the Facebook group here.


I’m a little late to the party, having missed January altogether but this is a rough guide to what i’m going to try this year, in no particular order:

Rope baskets, Dyeing (glad I checked the spelling on that one!), Pottery, English Paper Piecing (I actually have no idea what this involves but it looks fun…), Leather, Knitting, Crochet, Print Making, Macrame, Painting and Weaving.. Phew!  I probably won’t manage to get to all that this year, but it’s good to aim high right?

Anyway, I’m very excited to be beginning the year with rope baskets.  It’s only been 2 weeks and I’m already addicted (I just bought a 250 metre / 820 ft spool of rope….)  Check back in a week or so to see how I'm getting on!

You May Also Like...

The First Day of School

I feel like this day has been coming for such a long time and yet I can’t believe that it’s here already.  We are so ready for it and yet so completely unprepared.  I feel a little like we are standing on the edge, ready to tip into a new world. It’s exciting and exhilarating and terrifying.  We have no idea of the joys and the challenges that we are going to face over the next few years.  The only thing I’m sure of is that it won’t be the ones that we expect.

Looking at this little girl, looking so grown up and so proud in her school uniform I am filled with wonder.  Where did my baby girl go?  How is it possible that this lovely little lady is the same newborn that I cradled in my arms? Wasn’t that just yesterday?

I can hardly take it all in, there are too many emotions, pride, joy, excitement, anxiety, love, grief.  The grief might be overwhelming if it weren’t for the love.  Why does no-one tell you this about mothering?  That it is a series of tiny bereavements. At the same time as we are celebrating new milestones and achievements we are mourning the loss of a newborn / baby / toddler who was here the other day and never will be again.    

It is impossible to express what I feel for this sweet girl, this amazing little person who is so full of contradictions.  Sometimes fierce and sometimes fragile, often kind and often self centred, so brave and yet so shy.  This little girl who is at once so familiar and so unknown.  Sometimes, watching her, I am reminded so strongly of the little girl that I used to be, that I’m not sure where I end and she begins.  

I wish I could stay by her side, but I know she’s going to be just fine so I’ll kiss her on the cheek, tell her that I love her and leave her to find her own way. 

An Eco Friendly Fabric Lunch Bag Tutorial (and Happy New Year!)

Eco Friendly Reusable Fabric Lunch / Snack bags | Free Tutorial from Willow & Stitch

Happy New Year!  It's been such a long time since I wrote anything here that it feels like I may have forgotten how!  I rather wore myself out at the end of last year sewing (what felt like) 1000's of dress up masks for Christmas markets. So; I've been taking a well earned break to relax and enjoy the summer, enjoy a visit from my Mum and get myself physically and emotionally prepared for my big girl starting school this week!  I can hardly believe she's starting school and I definitely can't believe the amount of things there are to do to get ready for it! There's uniform shopping, shoe shopping, choosing a bag, choosing a lunch box, labelling clothes, filling in forms, gathering paperwork, attending orientations, information evenings, play dates, etc etc etc... It's overwhelming and we haven't even started school yet!

Eco Friendly Reusable Fabric Lunch / Snack bags | Free Tutorial from Willow and Stitch

Since my world is so fully consumed with this 'starting school' business at the moment, it will probably come as no surprise that my first blog post and first tutorial of this year is a school related one.  I've been sewing up a big pile of these reusable fabric lunch bags to pop into Ella's lunchbox.  I thought they'd work really well for carrot and cucumber sticks. cheese and crackers. biscuits, grapes, apple slices etc.   I even made a couple of larger ones which will fit a sandwich so that I don't need to wrap it in cling film!

Eco Friendly Reusable Fabric Lunch / Snack bags | Free Tutorial from Willow and Stitch

Ella was really thrilled with her new snack bags - particularly the one with the Narwhale fabric - I think it would be fair to say that the thing she's looking forward to most about school is her lunch box (just like her mama that one - always thinking about what's to eat!)

These lunch bags are super quick and easy to sew and are perfect for using up small pieces of your favourite fabrics.  I lined them with some PUL which I had left over from my (failed) attempt to sew Modern Cloth Nappies - I'm glad it finally came in handy for something!  

Eco-Friendly Reusable Fabric Lunch bags - a free tutorial from Willow & Stitch

You will need: (for a medium sides snack bag)

18 x 37 cm (7 x 14.5") Cotton fabric

18 x 37 cm (7 x 14.5") Polyurethane Laminate (PUL) or similar waterproof fabric

12 cm (5") velcro

A Serger / Overlocker


How to make:

Decide on the size that you want your finished lunch bag to be.  Mine is going to be 16 x 16 cm. Calculate the sizes of the rectangles that you need for you bag:

The width of your fabric will need to be Width + 2cm,

The length will be (Length x 2) + 5cm. 

i.e for a 16 x 16 lunch bag:  Width = 16 + 2 = 18cm,  Length = (16 x 2) + 5 = 37cm

Cut one piece each of your cotton and your PUL and lay them on top of one another with the wrong side of the cotton and the right (non shiny) side of the PUL together.

Eco Friendly Reusable Fabric Lunch / Snack bags | Free Tutorial from Willow and Stitch

Serge along each of the short ends, sewing with a 1 cm seam allowance.

Eco Friendly Reusable Fabric Lunch / Snack bags | Free Tutorial from Willow and Stitch

Cut a piece of velcro which is 2 cm shorter than the finished width of the bag. Centre the loop (soft) side of the velcro 1 cm from the top (front) of the fabric, on the cotton side.  Sew right around the velcro twice for strength.

Centre the hook (rough) side of the velcro 1 cm from the bottom of your fabric, on the PUL side.  This will be folded up over the top to form the closure / flap.  Sew right around the edge of the velcro twice, remembering that this stitching will be visible from the front so use a coordinating thread and try to sew as neatly as you can!

Eco Friendly Reusable Fabric Lunch / Snack bags | Free Tutorial from Willow and Stitch

Fold the fabric so that the PUL is on the inside, and the front of the bag sits just under the velcro on the lining, like this:

Eco Friendly Reusable Fabric Lunch / Snack bags | Free Tutorial from Willow and Stitch

Serge along both side seams, beginning at the folded edge and continuing to the edge of the fold over flap.  Leave long tails on your cotton so that you can thread it into the seams to secure the ends like so:

Eco Friendly Reusable Fabric Lunch / Snack bags | Free Tutorial from Willow and Stitch

Hopefully your bags will be a little straighter than mine.  I guess that's what happens when you mix wine and sewing....!

Eco Friendly Reusable Fabric Lunch / Snack bags | Free Tutorial from Willow and Stitch
IMG_0994.jpg

Trim the loose threads and you're all done! 

You can make these in any size at all, make them tiny for a cute little snack of sultanas or make them huge as a wet bag for swimming things.  I always put one in my son's playschool bag to seal away soggy undies if he has an accident, or wet clothes after waterplay.  Use them instead of plastic bags to contain wet or dirty nappies which can then be disposed of when you get home.  

Eco Friendly Reusable Fabric Lunch / Snack bags | Free Tutorial from Willow and Stitch

I hope you found this tutorial useful.  What would you use your bags for?

You May Also Like..