Millie Dress International Blog Tour

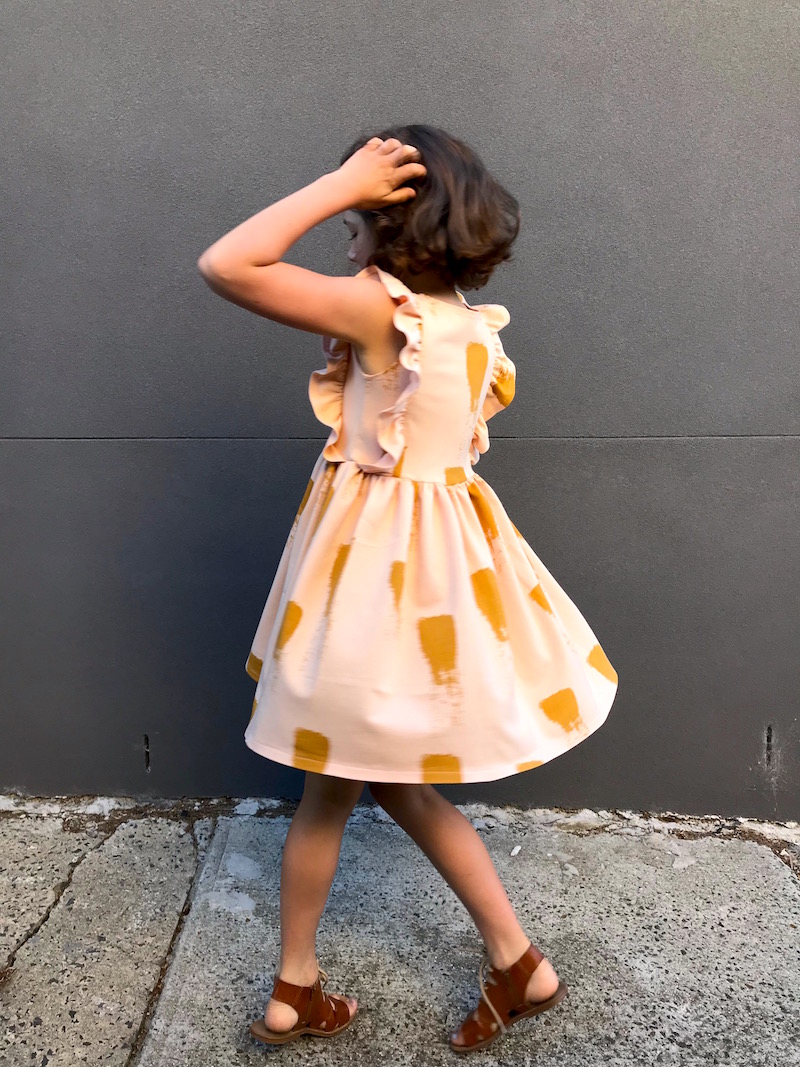
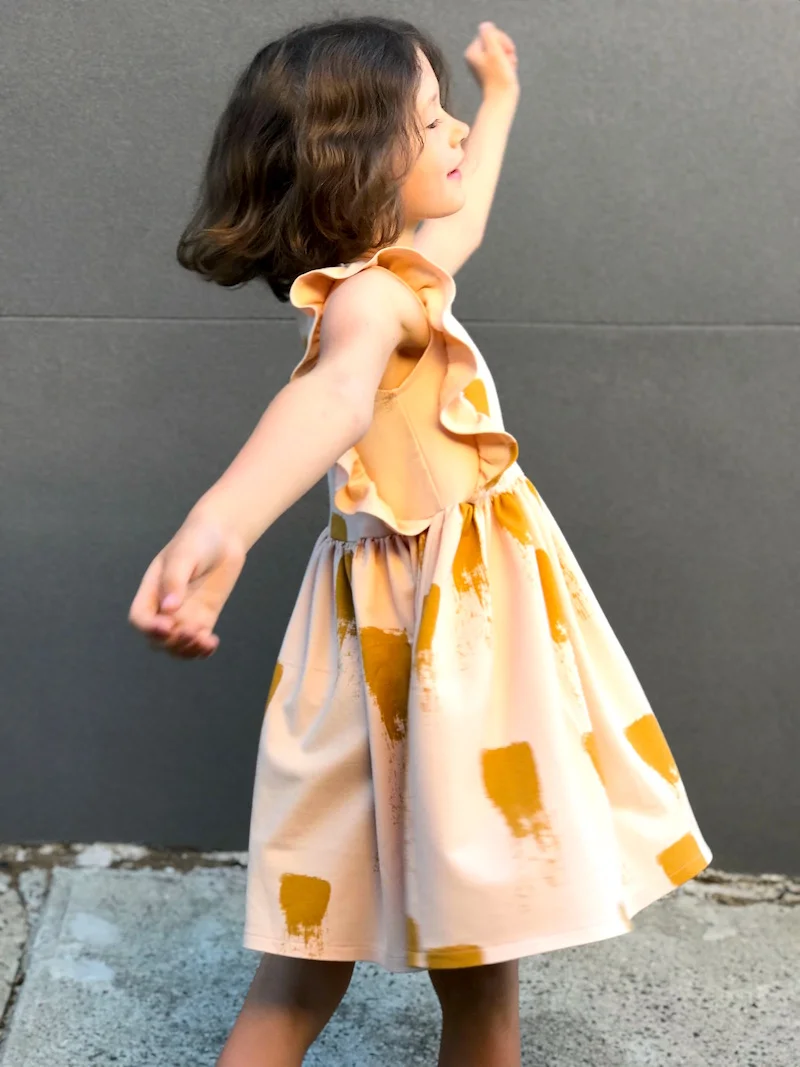
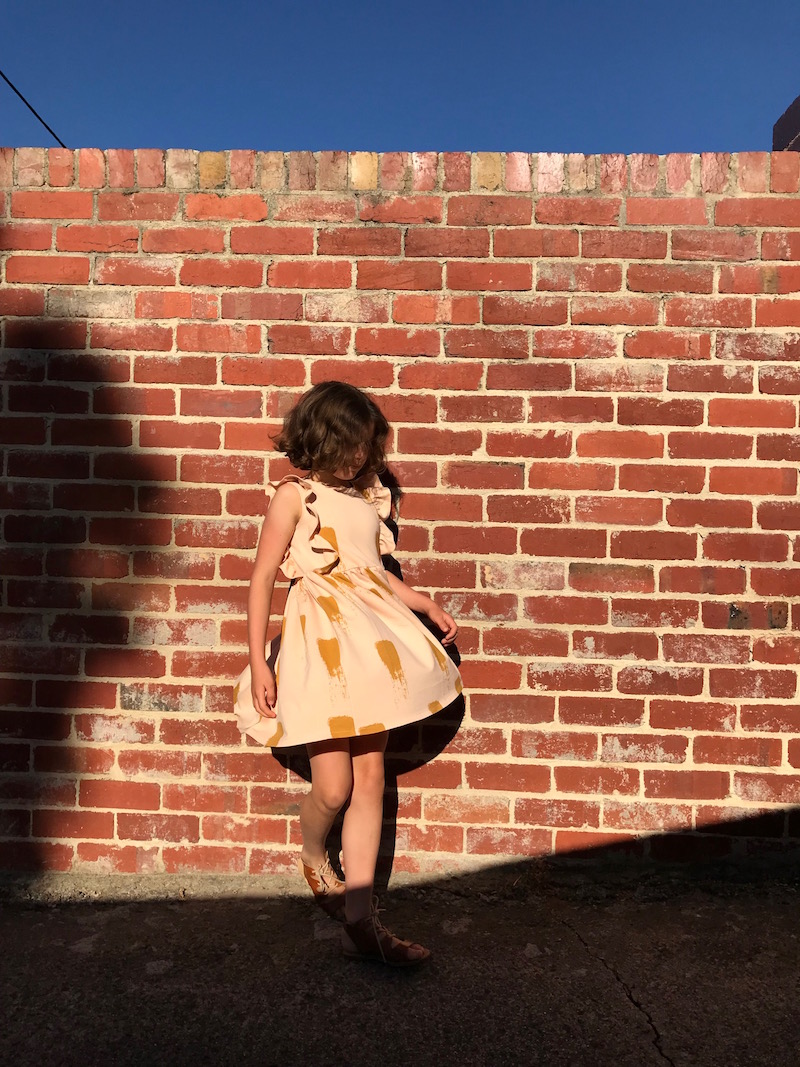
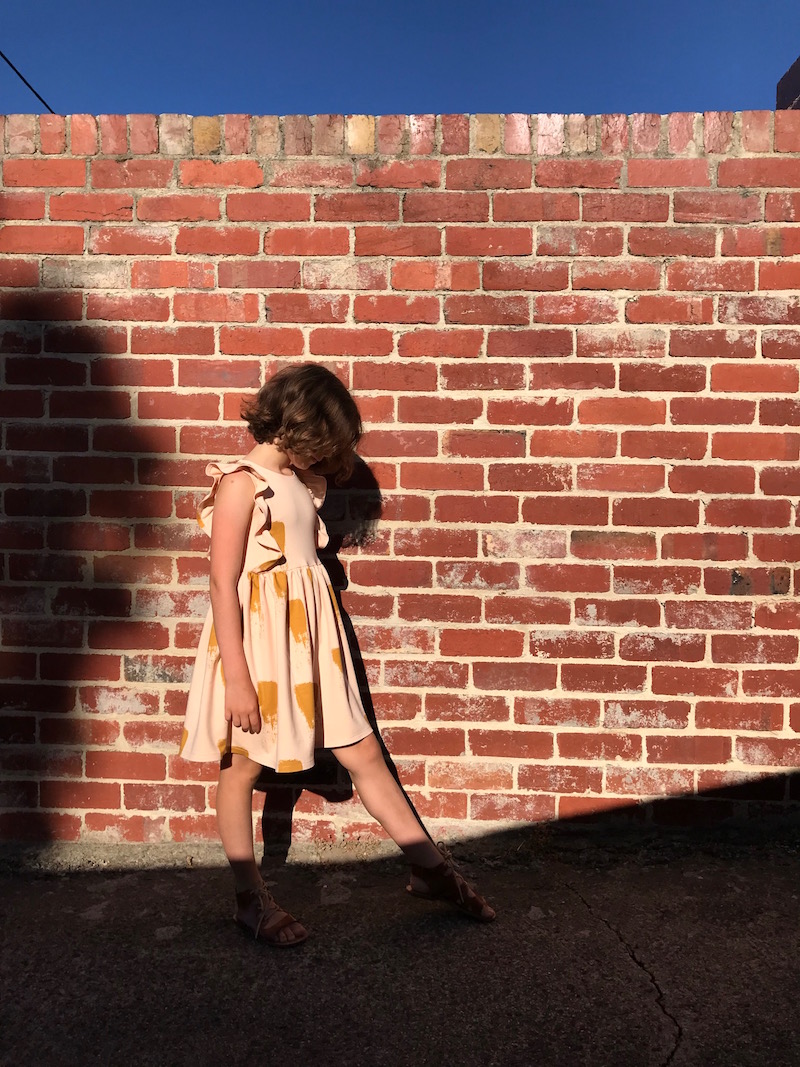
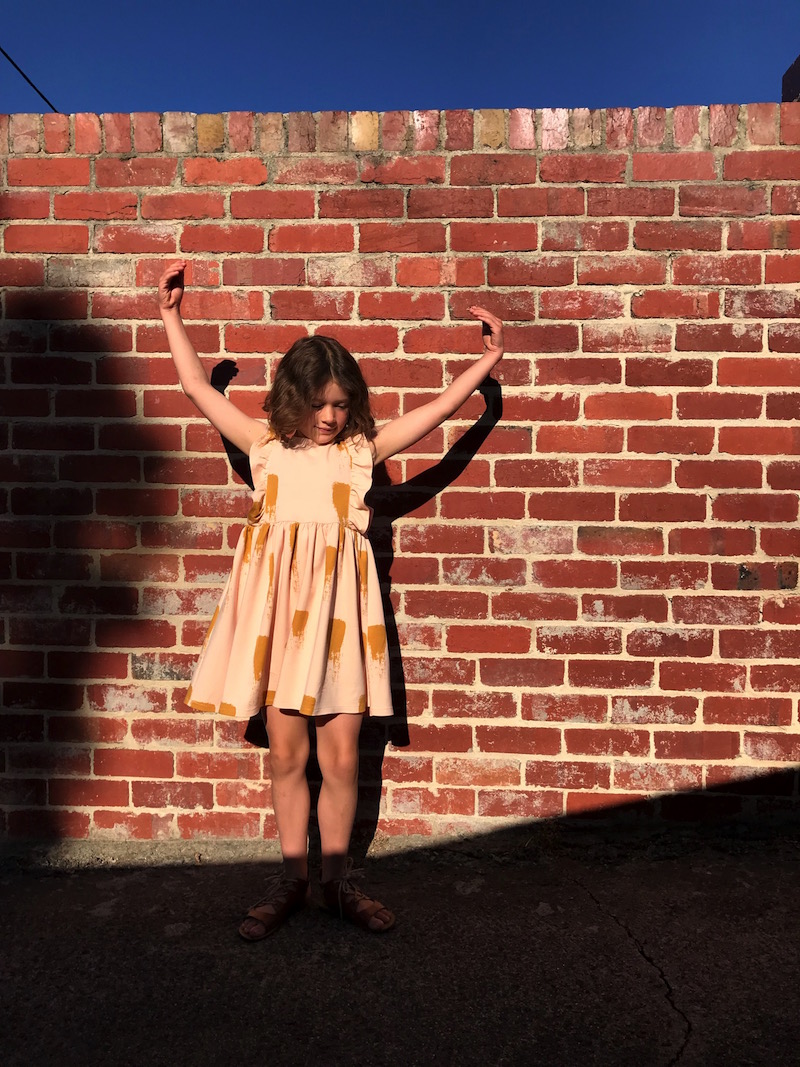
Millie Dress in See You at Six French Terry

I've had my eyes on this beautiful Millie Dress pattern for a while now. I even went and downloaded the original version but my little beanpole of a girl outgrew the size range before I had a chance to make it.  Happily for me the lovely designer, Nicky of Mix it Make it, has updated the pattern and it now comes in sizes 2-12 - Hurrah!  When she asked whether I would like to be part of the international blog tour to celebrate the release of the English version of the pattern I quite naturally jumped at the chance! 

Millie Dress International Blog Tour

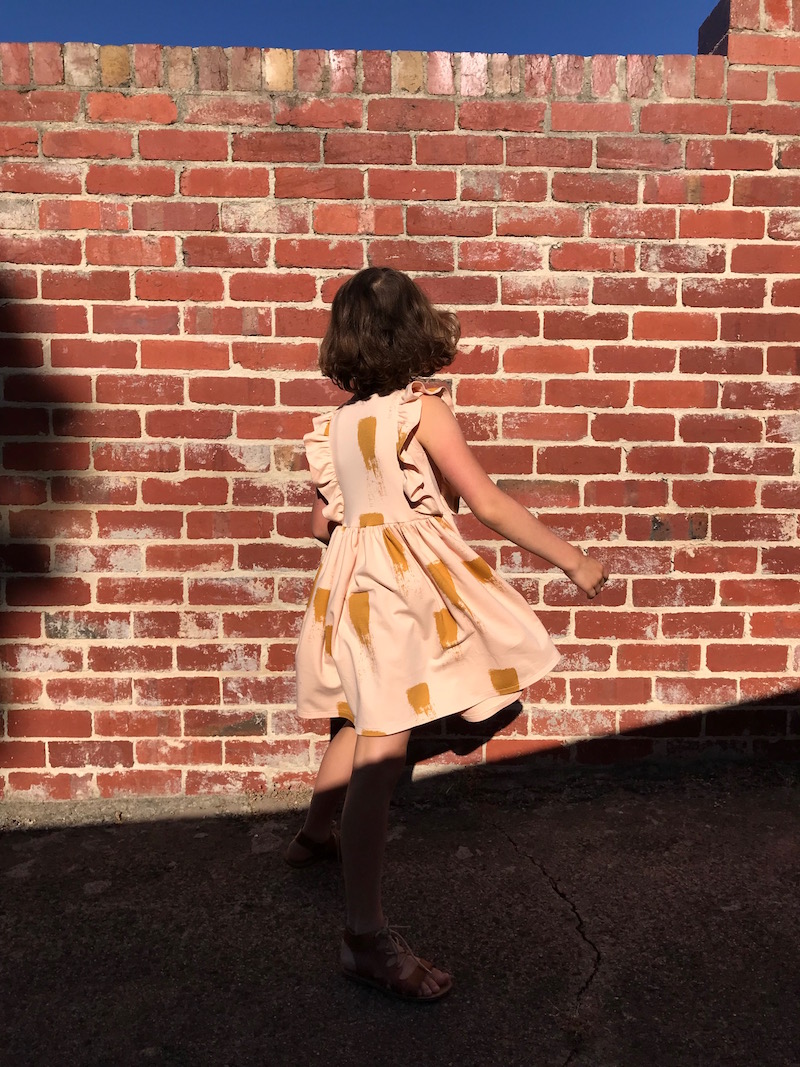
Summer is in full swing down under so I decided to hack my Millie Dress a little to make a sleeveless version.  It was a really simple alteration - I just turned the seam allowance to the wrong side and stitched it down, exactly the same as the neckline.  Super easy.

Millie Dress in See You at Six French Terry

I used a beautiful soft See You at Six French terry which I have recently become completely obsessed with.  I blame MaaiDesign for introducing me to it and enabling my addiction!  It's just so lovely to work with and so heavenly to wear.  Each time I make something from it my kids put the clothes on and say 'Oooooh, yes! I love this one!'  I can't get enough of this beautiful pink with gold paint strokes on it.

Sleeveless Millie Dress in See You at Six French Terry

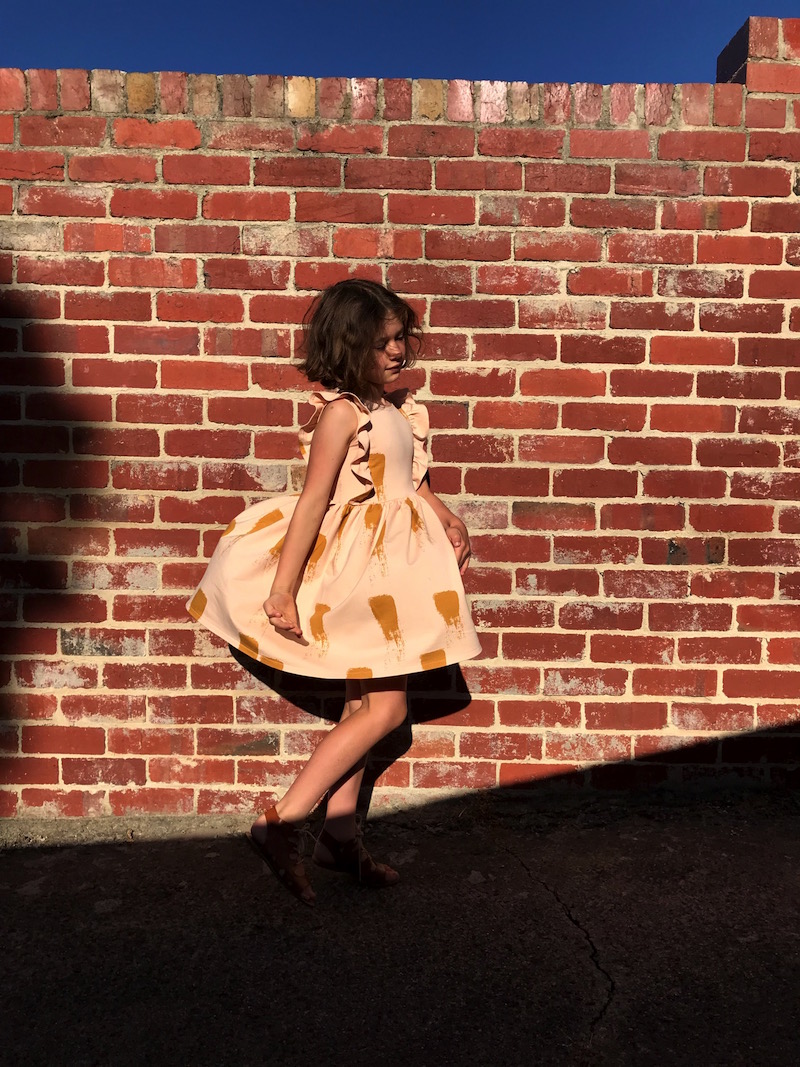
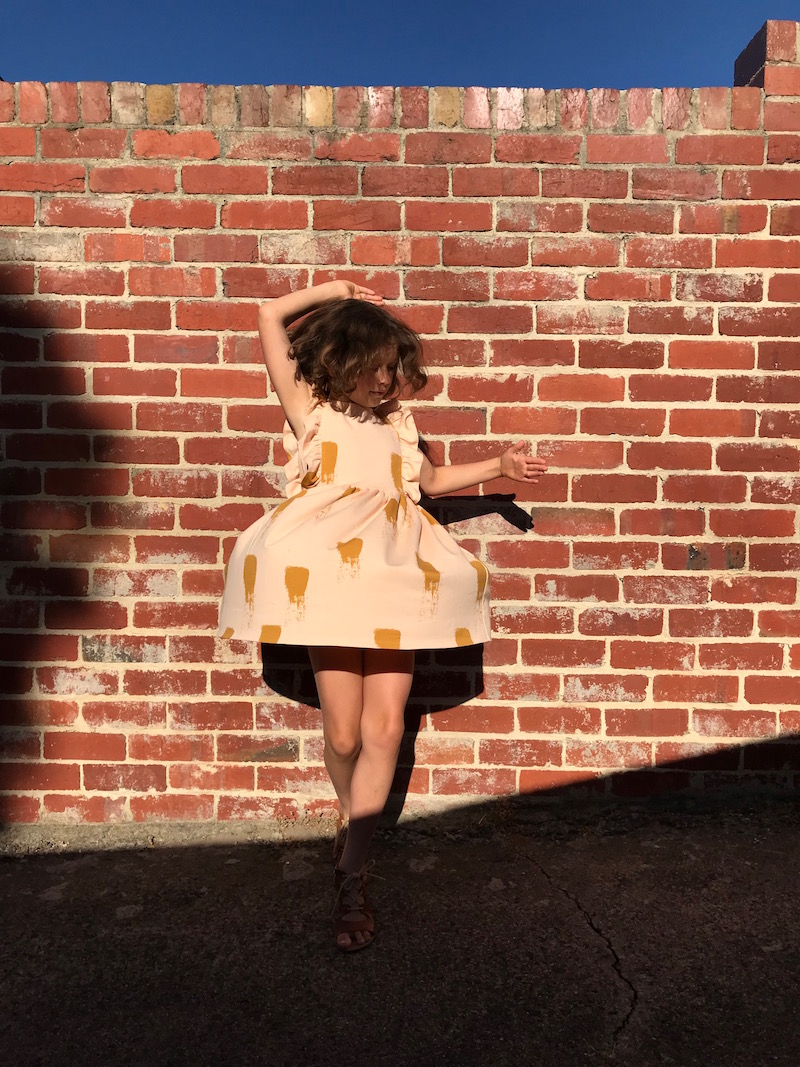
I think this may well be one of Ella's favourite things that I have ever made for her.  Pretty, Twirly, Comfy. What more could a girl want?  

The pattern is beautifully drafted and the instructions are clear and simple.  I made the mistake of getting a little over excited and accidentally cut the front and back bodice along the ruffle insertion lines before joining them at the shoulders.  I spent about 2 minutes kicking myself and then decided to just try sticking them back together with washi tape before sewing and what do you know - it worked a treat!  Washi tape for the win every time!

There will certainly be more Millie Dresses in our future.   I've already got a long sleeved version planned for autumn in this lovely April Rhodes fabric.  Any dress that makes you want to dance and twirl is a winner in my opinion! (Click through the images above to see more dancing and twirling!)

If you'd like to see more Millie Dresses go and take a look at the beautiful creations by the other lovelies on the Millie Dress Blog Tour:

Kneesocks and Goldilocks | Just Add Fabric | Van Jansen

Groovy Baby and Mama | La Folie Sewing Booth | My Petite Sophie

Freezer Paper Stencilling

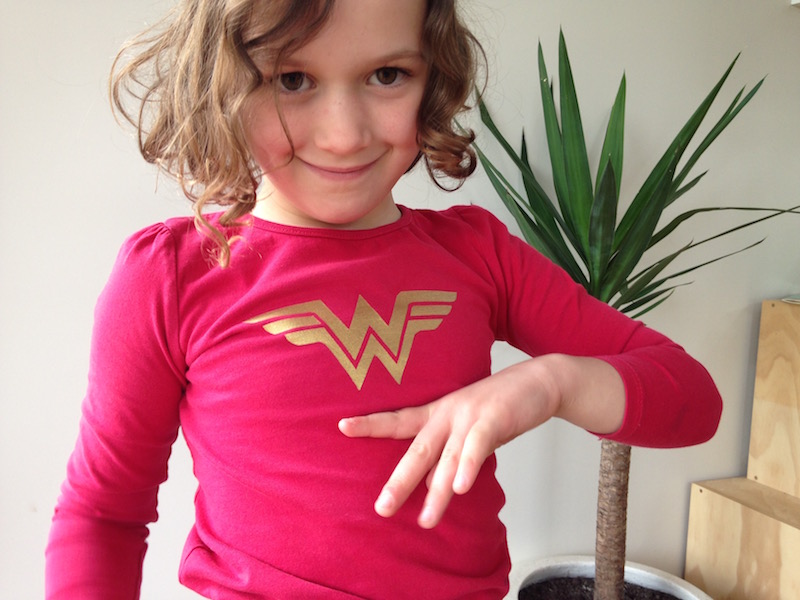
Freezer Paper Stencilling - Wonderwoman

Is it a bird?  Is it a plane?  No! It's Wonder Woman!  Someone is very pleased with my first efforts at Freezer Paper Stencilling!  Ella had a superhero party this weekend so we dug out one of the Wonder Woman headbands from my Etsy store stock, rustled up a blue star spangled skirt and jazzed up an old red T-Shirt by adding the Wonder Woman logo.

The Try Something New Every Month theme for July was 'Yarn' which I obviously didn't stick to.  I had intended to have a go at macrame but didn't manage to get organised in time so that's going to be next month's project instead - I've got grand plans for that one!

Instead I decided to have a go at Freezer paper stencilling which is one of those things that I have been meaning to try forever so it was great to finally have a reason to do it.  The freezer paper really is pretty amazing - which is fortunate really given how ridiculously difficult it is to get hold of here in Australia.  I had no luck in 3 of my local craft / fabric stores and then spent what felt like an eternity on the phone to another trying to get them to understand exactly what I wanted and then being passed from department to department while they tried to figure out whether they actually had any....  Still, we got there in the end and I bought a ton of it so that I hopefully never have to go through that palarver again!

Superheroes are very serious...

Superheroes are very serious...

Check out that awesomely wide gold elastic waistband - thanks Jimmy Buttons!

Check out that awesomely wide gold elastic waistband - thanks Jimmy Buttons!

Freezer Paper Stencilling - Wonderwoman

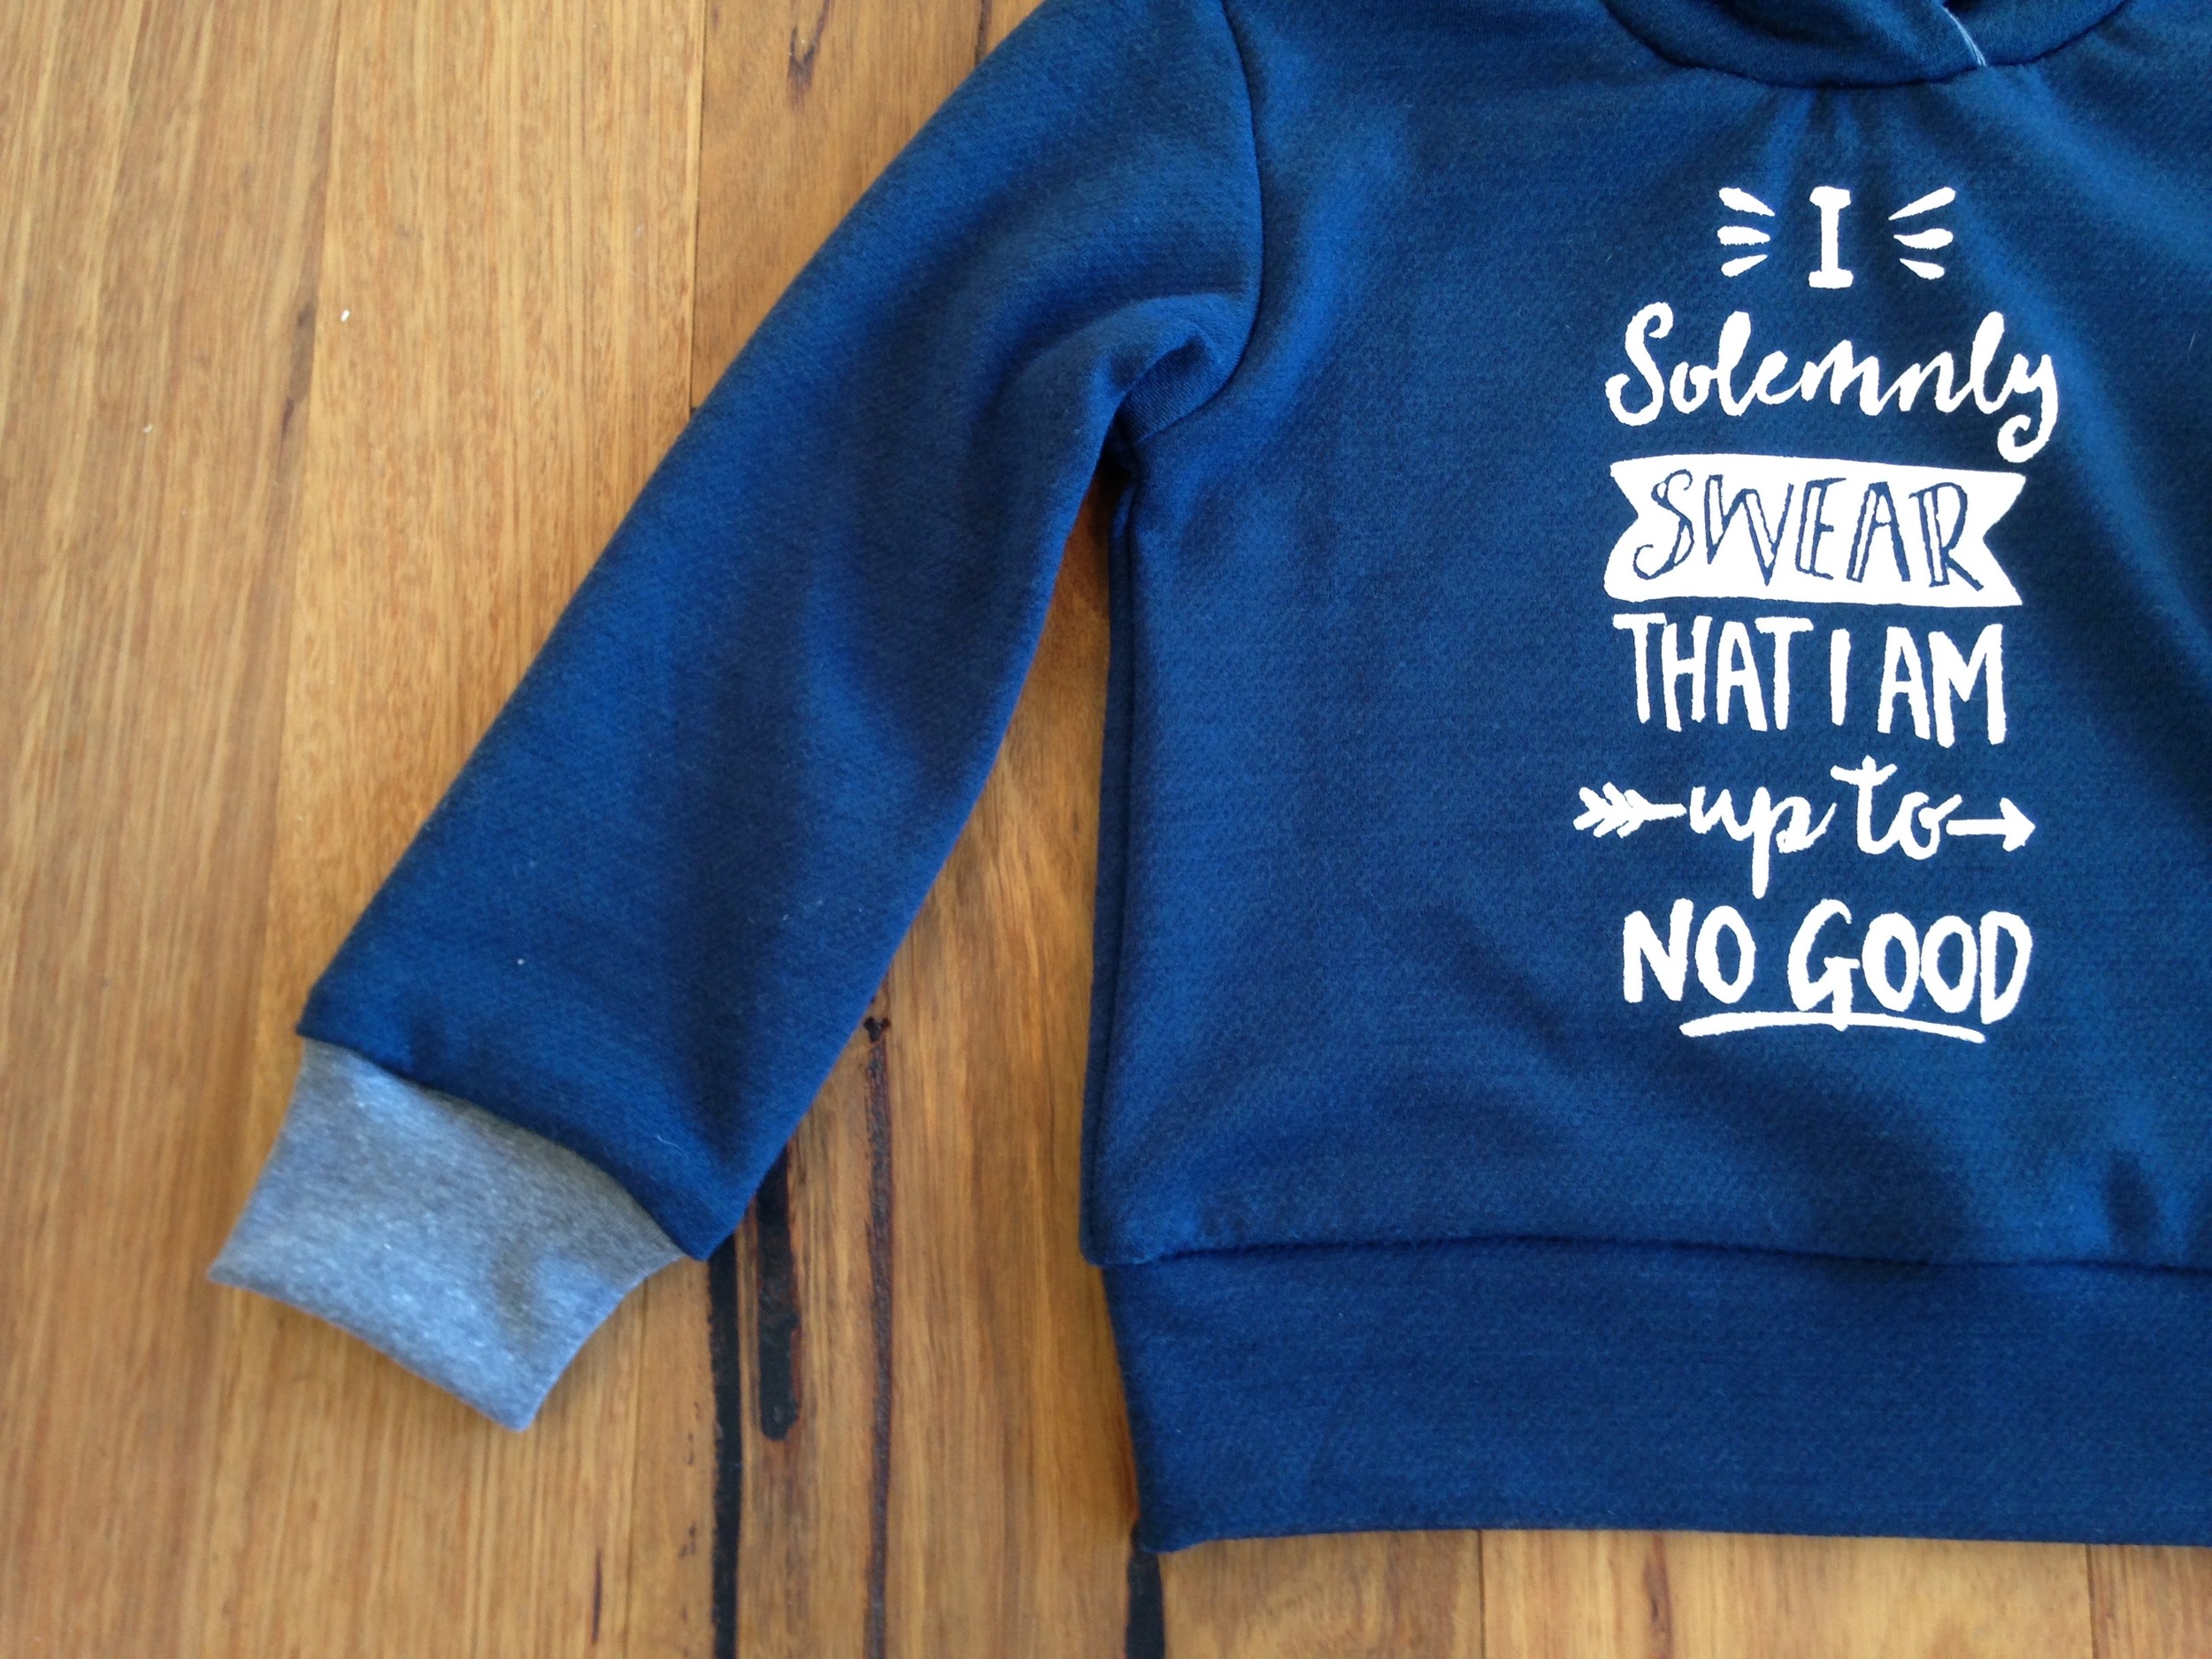
Having got the hang of Stencilling I decided to go for something wildly ambitious, because, well I'm ridiculous and I fell completely in love with this illustrated quote from Harry Potter by Rachel White Art. 

I spent about 2 hours cutting this one out and then managed to stuff it up in several different ways!  Firstly I melted my lovely merino wool while ironing on the freezer paper because I accidentally left my iron on very hot.  So, I had to try to peel the freezer paper off and reaffix it to a new piece (It took forever to cut out so I wasn't about to start again!) Consequently it didn't adhere quite as well as it should have and I got a little bleeding under the paper in places.

I solemnly swear I am up to no good hoodie - freezer paper stencilling

 I also used 3 coats of paint which was too much and made it really quite difficult to pull all the fiddly little bits around the letters off.  Still, I got there in the end!

The pattern was just a generic pullover pattern from an old Ottobre Magazine which I modified to give sleeve cuffs and a waistband because, well, frankly I'm too lazy to be bothered with using the twin needle on my sewing machine to hem it!  I also added a hood (arguably to avoid having to do the neck binding) but also because I really wanted to have a hood on it.

I can't help but think that this one was more for me than for the boy, but I did think the quote was very apt for such a cheeky little monkey!  Being the cheeky monkey that he is however, the little toad refused flat out to put it on.  This is his standard approach to jumpers at the moment but he usually comes up with some meandering excuse like 'I  don't like red, I only like blue' or 'I don't want to wear it if it used to be so and so's' (the vast majority of his clothes are hand-me-downs). It was partly this which led me to make him a jumper in the first place - my logic being that if I made something especially for him, in a colour that i know he likes, he surely won't have any problems with wearing it, right?

WRONG.

What I failed to take into account with all my well applied logic, was that my darling 4 year old exists beyond the realms of reason, in a world where 'I don't want to try it on now, I want to try it on next Wednesday' is a perfectly valid argument and no amount of persuasion, bribery or threatening is going to change his mind.  So.  Here are some pretty flatlay photos for you.... I give up, I'm going to throw myself on the sofa and watch Outlander.  Good night. xx

I solemnly swear I am up to no good hoodie - freezer paper stencilling

You May Also Like...

A Free Batman Mask Pattern for you!

Free Batman Felt Mask Pattern | Willow & Stitch

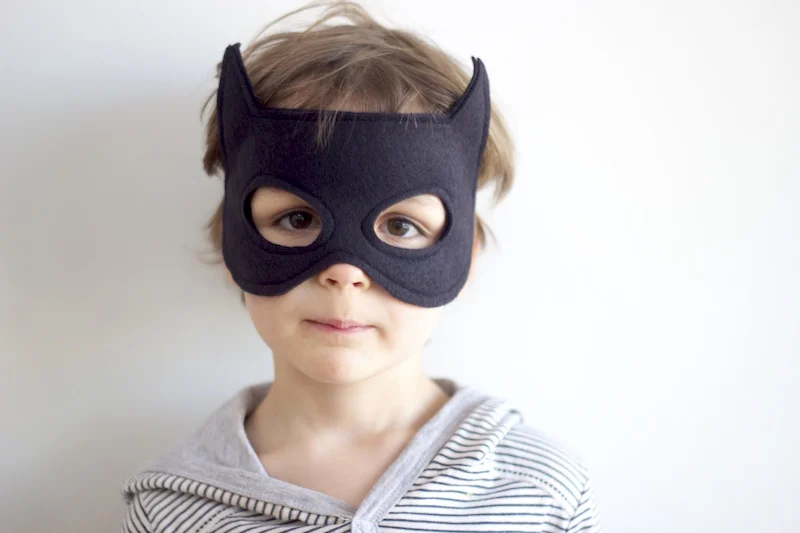
Bam! Pow! Kaboom!  There have been a lot of superheroes racing around my house recently, rescuing dolls and dinosaurs in distress and generally causing well intentioned chaos.

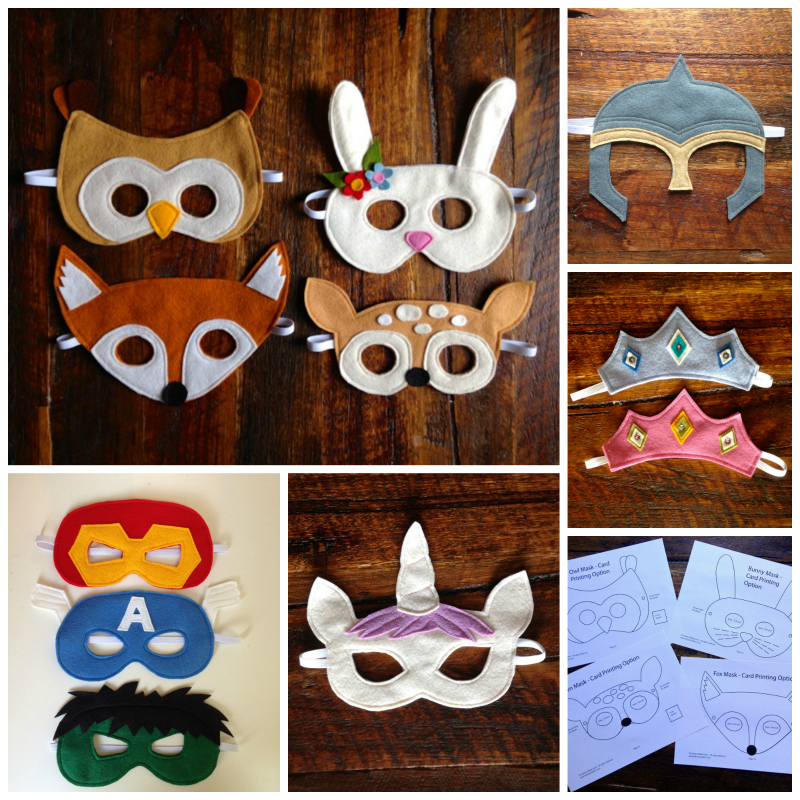
I've been sewing an AWFUL lot of masks in the last month or so, stocking up my Etsy shop and preparing for the Christmas markets, and silly season in general.  I'm working on getting my second set of superhero mask patterns up in the Etsy shop soon, but in the meantime I thought you might like a little freebie!

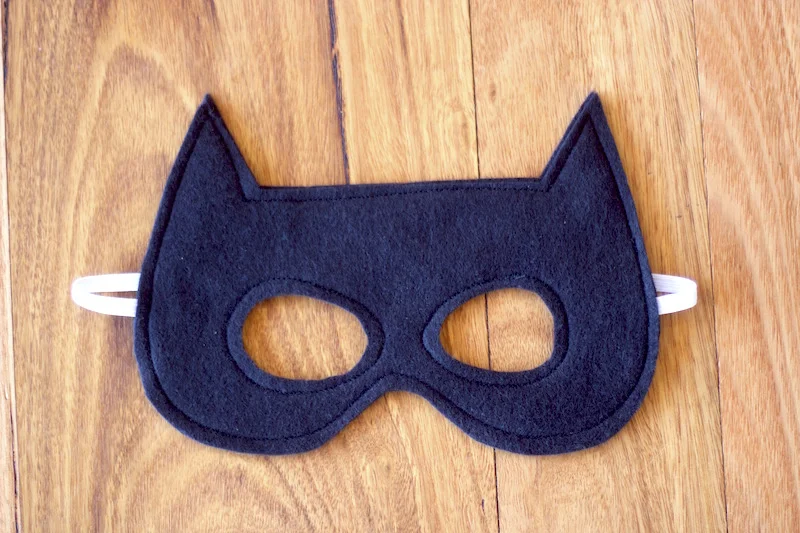
Click here to download your FREE Batman felt mask sewing pattern.

The pattern can also be printed onto cardstock, painted, coloured or decorated and cut out - perfect for entertaining the kids on a rainy day or for children's parties.  Be sure to print the pattern at actual size - do not select scaling in your print options.

It's super easy this one; I don't have any photo illustrations for you but you won't need them! This mask should fit most children from around age 2.

You will need:

21 x 30cm (9 x 12") of high quality black felt

Approximately 31cm (12") of 8mm (3/8") wide woven elastic

Black thread

1.  Print the pattern piece and cut 2 mask shapes from your black felt.  TIP:  Draw around the insides of the eyes (with a white pencil or chalk) but do not cut them out yet. 

2.  Lay the 2 pieces one on top of the other, right sides together.  Pin in place.  Use a pin to mark the placement of the elastic on each side of the mask.  

3. Sandwich the elastic between the two layers of felt, pinning it in place so that it extends approximately 1.5cm (1/2") into the mask at each side.

4. Sew right around the outside of the mask, sewing through both layers of felt, and sewing 5mm (1/4") from the edge.  When you reach the spots where the elastic enters the mask sew backwards and forwards a few times to really secure it.

5.  Sew around the eye hole markings, sewing at least 5mm (1/4") from the white lines that you have drawn and keeping the lines INSIDE the circle that you are sewing. Take care not to catch the elastic in your stitches.

6. Cut along the white lines to reveal the eye holes. Again; take care with the elastic, this time making sure you don't cut through it! Cutting the eye holes out after you have sewn around them will give you a much neater finish.

Hope you and your little superheroes enjoy this tutorial.  I always love to see your creations if you feel like sharing them!

You May Also Like...

Awesome Knee Patch Tutorial

Knee Patches

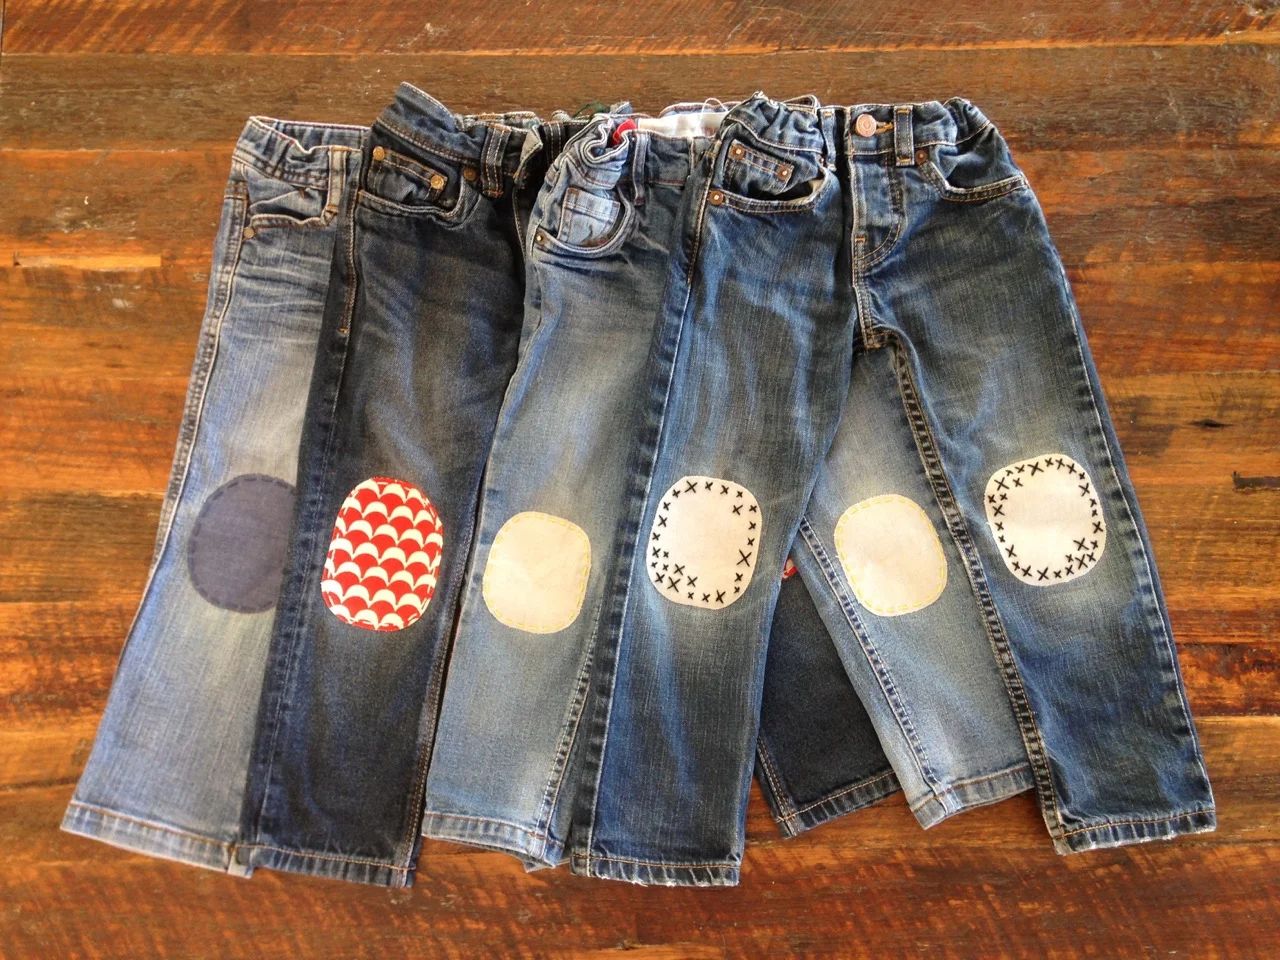
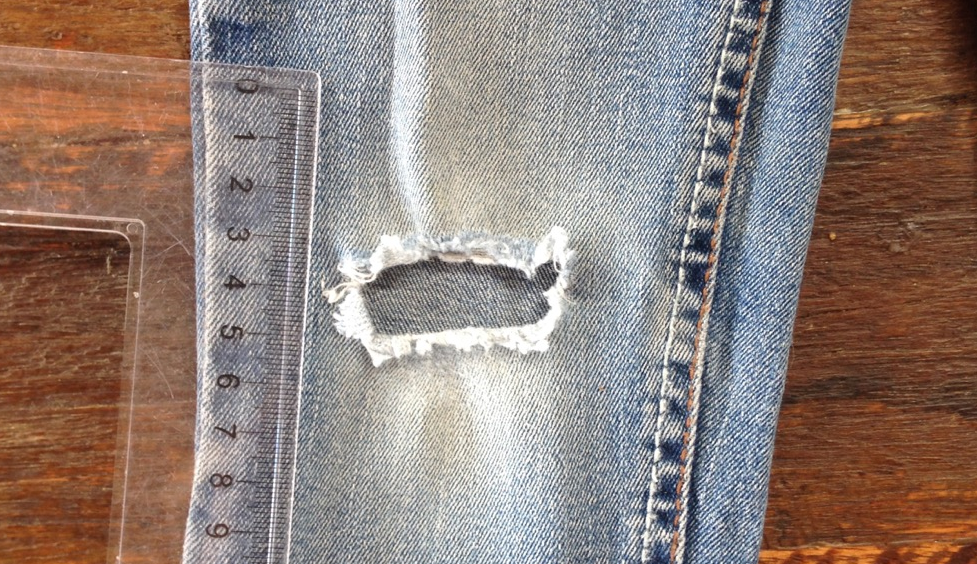
Little boys.  They are amazing in so many ways.  I love their enthusiasm and their exhuberance.  It has it's downsides though.  Like bruises, bumped heads and worn knees and ALL their pants.  I've had a huge stack of jeans sitting in my mending pile for weeks now and today I finally got around to patching them.  

This is my favourite patching method for pants.  It's quick, it's easy, there's lots of room for being creative and best of all you don't even need a sewing machine.  I don't know if you've ever tried, but it's actually really difficult to use a sewing machine to patch little boy's pants.  The legs of them are so slim that they often won't fit over the arm of your sewing machine and even if they do, there certainly isn't room for turning corners.  

This method uses double sided fusible interfacing and a bit of good old fashioned hand stitching.

You will need:

Approx 6 x 4" fabric

Approx 6 x 4" double sided fusible interfacing

Embroidery thread and needle

Iron


Start by measuring the size of the area that you want to patch.  

Knee Patch Tutorial

Cut 2 rectangles of fabric to size and lay them onto one side of the fusible interfacing.  Press using a hot, dry iron to fuse.  Leave the paper backing on the interfacing and draw the shape of your patch on the paper.  Trim to shape and repeat for the second patch.

Knee Patch Tutorial

Remove the paper from the second side of the fusible interfacing and position on the pants over the hole.  Iron the pants before doing this so that you don't get a lumpy finish.

TIP: Slide the paper from the fusible interfacing inside the pants leg so that the interfacing will not bond to the back of the knee at the site of the hole.

Iron the patches to fuse them in place.

Knee Patch Tutorial

Take a needle and embroidery thread in complementary or contrasting colour and sew right around the edges of the patch to secure it in place.  

Knee Patch Tutorial
Knee Patch Tutorial
Knee Patch Tutorial

If you don't do this step you will find that after a few washes the patch begins to peel away from the pants. Also it's a lovely way to add detail.  The quickest way to do this is with a simple running stitch but you can get creative and try something different.  This version with embroidered crosses is one of my favourite.

Knee Patch Tutorial
Knee Patch Tutorial

Don't be put off by the hand stitching.  I know lots of people hate it, but it an be a lovely, relaxing thing to do. Get yourself a cup of tea and put your feet up.  Find your happy place.

Knee Patch Tutorial

Even the cats can get involved.. I really don't know what it is with this one.  She just has to be wherever my focus is.  It's very cute but makes life a little difficult sometimes...!

Knee Patch Tutorial

Do your kids wear out their clothes?  Do you have a favourite method for patching pants?

You May Also Like...

Kids Clothes Week Roundup

Kids Clothes Week Summer 2015 Traveling

Wow.  Well this is very late, but here is the second outfit that I made for Kids Clothes Week.  I honestly did make it during Kids Clothes Week but have been struggling to getting any photos as we are seriously lacking in natural light at the moment – its dark when we get up and dark when we get home.  I’m really very envious of all of you in the Northern Hemisphere at the moment, enjoying sunshine, swimming pool and ice creams.  I shall have to console myself with stew and mulled wine and other winter goodness  (fruit crumble, hand knitted scarves, open fires, frosty mornings and hot chocolate).. am I making YOU jealous yet?  - I doubt it somehow!

With the ‘Travelling’ theme of Kids Clothes Week, one of the first things that sprang to mind was our recent trip to Europe and I wanted to find a way that I could somehow capture some of those wonderful memories in an outfit. 

One of the things that I love most about England is the countryside and on this trip we took many walks through beautiful summer meadows.  This amazing field of Buttercups was one of my favourites. 

image.jpg
image.jpg
image.jpg

The colour was just magical and the kids had an absolute ball wading through, skimming their fingertips through the flowers, running around and frolicking generally. 

I wanted to capture the essence of this beautiful field and when I saw this gorgeous Leah Duncan - Art Gallery knit fabric I though it was perfect.  I paired it with this amazing remnant of yellow wool flannel that I found in the Fabric Store.  The skirt and top are both self drafted.  The tee is a batwing top with banded cuffs.

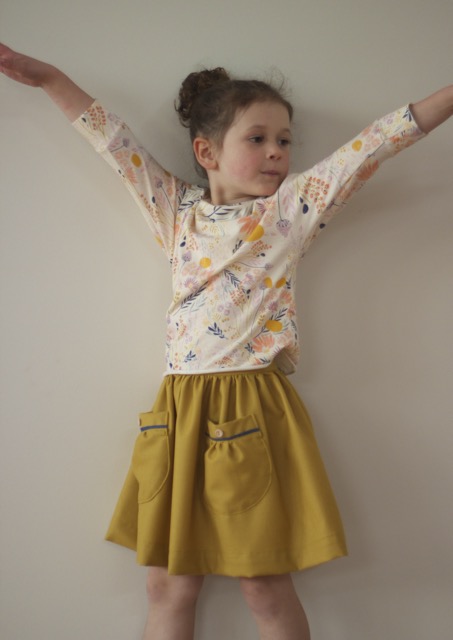
The skirt is a simple gathered skirt with a waistband and cute little rounded pockets.  I didn’t quite manage to finish the button hole on the back before my sewing machine packed up – possibly in protest at being made to work so hard! I suppose this is the first problem I’ve had with it in 5 years of practically constant use so I won’t curse it too much. Still, it means that the Mama Clothes Week that I had planned for this week will have to wait!   

I also managed to finish off this blue tee which has been sitting in my WIP pile since before we went on holiday.  Happily it also goes very nicely with the new yellow skirt.

Kids Clothes Week
Kids Clothes Week

Not much of a one for standing still this one....

Kids Clothes Week

"Enough photos now mum!  I want to go and watch Star Wars!"

A Handmade Birthday

My little boy, my baby, turns 3 on Saturday.  I almost literally cannot believe it. So I have been trying to distract myself this week by pouring my love for this little man into some handmade birthday presents for him.

I've been meaning to make a duffel coat ever since I found these amazing wool remnants in the bargain bin at my favourite fabric store on Brunswick Street.  I struggled to find a pattern for a while but settled on this Oliver & S one in the end.  It's their Schooldays Jacket / Coat.  I'm pretty pleased with how it turned out.  It's going to be much too big of course - as everything I make generally is - I seem to live in fear of spending lots of time and effort making something only to find that it's too small.  I'd much rather it was too big and could be grown into.  In this case I had to make a size 4 because the pattern is sold in 2 sizes and I opted for the 4+ size so that I would be able to make more in the future.  

I originally had my heart set on lining it with a brown fabric with big white polka dots, but of course I couldn't find exactly what I had imagined so went with this Rupert Bear fabric which is actually really cute and Jacob will probably love it more than he would have liked brown anyway!

The Elephant is from a RicRac pattern that I spotted in my local fabric store.  I think he's rather lovely don't you?

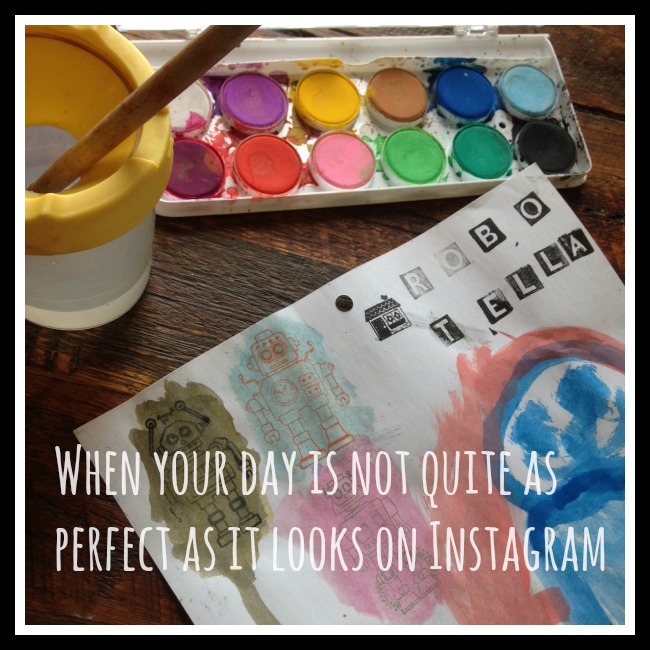
When your day is not quite as perfect as it looks on Instagram

This was our day today, exactly as it appeared on Instagram.  Or rather, exactly as it would have appeared on Instagram, IF I could have been bothered to post all of it.

We had such a great day! We played with stamps and ink, we painted, we got a wonderful harvest of delicious 'lemon raindrop tomatoes' as Jacob calls them, from the garden.  We planted out the peas, sweet peas and the spaghetti squash.  We got to taste the very first raspberries from the canes that we planted in spring.  We went to the park and climbed and swung and laughed with friends.  We built train tracks and marble runs.  We baked a delicious pumpkin bread and indulged in a bit of art and crafts with a cup of tea.

We had a great old time today. Today was FANTASTIC!  Wasn't it? Well, yes and no.  There really were some lovely moments, but the Instagram photos don't really tell the whole picture. They don't show you the moment where Jacob wet himself for the second time because he didn't want to stop playing and go to the toilet and I got cross because our washing machine is broken and the laundry pile has reached a ridiculous height.  They don't show you the kids melting down in tears when it was time to leave the park.  They don't show you the 15 minutes that I spent trying to comb the knots out of Ella's wild hair.  They don't show you the 100th time that I had to tell them to "STOP SWINGING THOSE STICKS AROUND - YOU ARE GOING TO TAKE SOMEBODY'S EYE OUT".  They don't really give you much insight into what our day was actually like.  Sometimes I think that this is a problem.  I am being fraudulent.  I am deceiving you.  I am editing my life.  Removing the ugly bits and painting a false picture. 

That's one way to look at it anyway.  Do you want to see the tantrums? The wet undies? The mess? I'm not sure you do; not all of it anyway.  You're smart enough to know that this Instagram feed is not the whole story.  That of course there are times when we are all grumpy, times when the kids cry and whine and drive me crazy, times when I loose my cool, when I yell and whole weeks where the house looks like it has been hit by a particularly violent tornado.  

The photos that I put on Instagram aren't an attempt to con you into thinking that my life and my children are perfect.  They are my attempt to find and recognise the beautiful moments in the most ordinary of days.  A way of focusing on the positive and taking pleasure in the smallest things. Of practicing mindfulness and noticing all the tiny things.

At the end of the day, my Instagram photos make me forget all the crap.  They are a reflections of the things that I choose to remember.  They make me smile at the world and I hope they make you smile too.

A Quilt for Baby Olive

IMG_0945.jpg

This is the playmat / quilt which I made for my new little niece, Olive. I'm not a quilter and they usually turn out full of 'rustic charm' (i.e. slightly wonky and rather uneven) but I'm really pleased with this one.  I LOVE the colours, which I chose because I thought they would go well with my sister's house and because we didn't know if she was having a boy or a girl so it needed to be pretty gender neutral.

I chose a very simple design for obvious reasons!  The finished quilt measured 140cm x 110cm wide (so that i could use a single piece of backing fabric). I pretty much just cut strips of my fabrics in 3 different widths - I think they were 8, 10 and 12cm (approx 3, 4 and 5").  I sorted the strips by width and sewed all of the same ones together, then cut the strips up into pieces which ranged from about 70 - 90cm (2-3 feet).

I played around with the arrangement of my strips until I was happy with them (all the while trying to fend off the cat who seemed hell bent on sitting on my fabric as usual! Does anyone else have this problem? - it happens EVERY TIME!).  I then cut some strips of white fabric in the same widths, sewing them to the ends of my patterned fabric to make each one the right width (or wider). I did this very imprecisely and then trimmed them afterwards.

I bought the bias binding (because, quite frankly, I HATE making bias binding - it's like the bane of my life! OK, well that might be a little bit of an overstatement, but I do find it very annoying.  It's worth it sometimes of course, but still… if you can buy a lovely one like this then why bother?!)

It's hand quilted, because any time I try to quilt on my sewing machine it just ends up all puckered. Also, I wanted to be able to sit in front of the TV with my feet up, re-watching episodes of The West Wing while I did it (I may be a little obsessed with that show…)

I can't remember the name of the backing fabric, but I do love it so! Can anyone enlighten me?

Rockpools and Childhood Memories

We just got back from a lovely weekend away at Blanket Bay in the Otways. It was the first time we've camped with the kids and it was really great to get away for a few days.  Yesterday morning my friend and I went for our usual Sunday morning run and on the way back I got a little lost.  Not literally lost, just lost in my own head.  I've had this while running before, and I know that many people say how they get into 'the zone' and stop noticing that they're even running. Well this morning I got so completely lost (metaphorically speaking) that I think I could have kept running for days, Forrest Gump style.

It was rather like being in a meditative state - or at least I imagine it was, I'm hopeless at meditating usually - but for some reason I went back to the house I grew up in.  It was a huge house (or at least it seemed that way to me at the time) and while I was running I took a little walk through it, remembering the rooms and the furniture, the memories I have of each little space.  The bay window in the dining room where Mum would do her sewing and fix my favourite toy (Mouse), the breakfast bar in the kitchen where my sister and I would sit eating our cornflakes and watching 'Barry the lodger' eating his bacon and eggs.  The cellar, dark and damp with the secret door into it from the drive way, which used to be for delivering the coal but which was now hidden under a honeysuckle bush and which we could climb in and out of if we ever found ourselves locked out. There were so many things which came back to me on this mental tour of my childhood home, things I hadn't thought about for such a long time. 'Seeing' the wardrobe in the spare room took me back to a birthday party where we played Sardines, 'walking' around the garden reminded me of early morning Easter egg hunts in our nighties, wellies and hand knitted jumpers. The air was so fresh, there was dew on the lawn and the wood pigeons' soft calls carried through the still air - it felt so real that I could have been back there.

I was bombarded with an avalanche of memories; eating tiny wild strawberries from the rock garden at the front of the house, pouring salt on slugs (forgive me- it was at my mum's encouragement), crushing tin cans for recycling with my dad, building castles of stones in the puddles that formed in our back yard, watching my mum digging the veggie garden from my swing, the 'Dolly Tree' in the middle of the lawn where my sister would perch all of her soft toys, writing letters to the Queen, to Santa, to Blue Peter and posting them in the letter box in the wall of our garden. I remembered making rose perfume from petals and water, and pots from dried mud that we tried to sell to the unsuspecting ramblers who walked past the end of our drive.

So many memories, of so many seemingly inconsequential things. Such unimportant things that turned out to form a huge part of who I am. Things that have almost accidentally shaped me into the person I have become.  My parents could never have imagined how important to me they would turn out to be, they were just ordinary, everyday things. There are probably a hundred other things like that from my childhood that we used to do which I have forgotten. I have no idea why these are the ones that come back to me so strongly.

Once this flood of memories had subsided I naturally moved to wondering what the things that my own children remember will be?  I imagine that even if I tried to guess I could probably never even come close.  In a way it's a frightening thought, it's certainly an overwhelming one, to know that every moment, good or bad, may turn out to be one of those key things that your child remembers, a moment that shapes them in one way or another.  It doesn't do to think too much about it, you could drive yourself crazy that way, but the occasional reminder of just how much influence we have over them with the things we say, and, probably more importantly, DO, can only be a good thing. Particularly if it causes us to be a little more considered in our actions.

It's a strange thing how your children have the ability to bring out both the best and the worst in you.  I hope that it will be the best that shines through when they look back, I hope they won't remember the times I was grumpy, the times I yelled, but I'm going to try to be less like that, just to make sure.  I'm sure I won't succeed, not completely anyway, but even if I manage to be just slightly better I think it'll make a difference.

I have no idea what the most significant memories for my own children will be but I hope very much that weekends like this will be among them. I hope they will remember exploring rock pools, collecting shells and noticing all the tiny things; that they will remember cooking dinner on the fire and toasting marshmallows, remember the sensations of the warm sun on their backs, the coolness of the waves lapping around their feet, the salt on their skin, I hope they will remember the perfect quiet of the morning before everyone is awake, the awe-inspiring wonder of a sky full of stars, and the joy of being lulled to sleep by the sounds of the ocean.  Sorry if I've gone way too poetic for you, the great out doors does that to me - I don't get to experience it nearly enough these days, and that's something that we're going to try to improve on now that the children are old enough to enjoy weekends away camping!

What are your favourite childhood memories? What memories do you hope your children will treasure when they are older?