Gracious Threads 'A New Look' Blog Tour | Lazy Days Lounge Pants

Gracious Threads 'A New Look' Blog Tour | Willow and Stitch
Gracious Threads - Lazy Days Lounge Pants | Willow and Stitch

It seems to be 'Blog Tour' week here at Willow & Stitch.  Today I'm joining in with the Gracious Thread's 'A New Look' blog tour.  Jess is celebrating her new look website and shop with this brilliant tour where we all get to create a 'new look' of our own using her patterns.

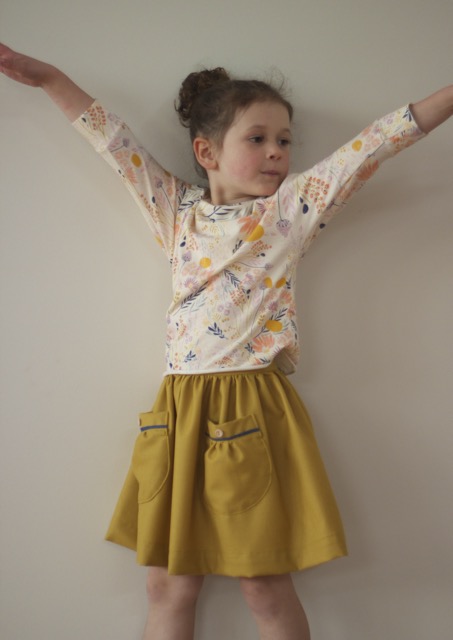
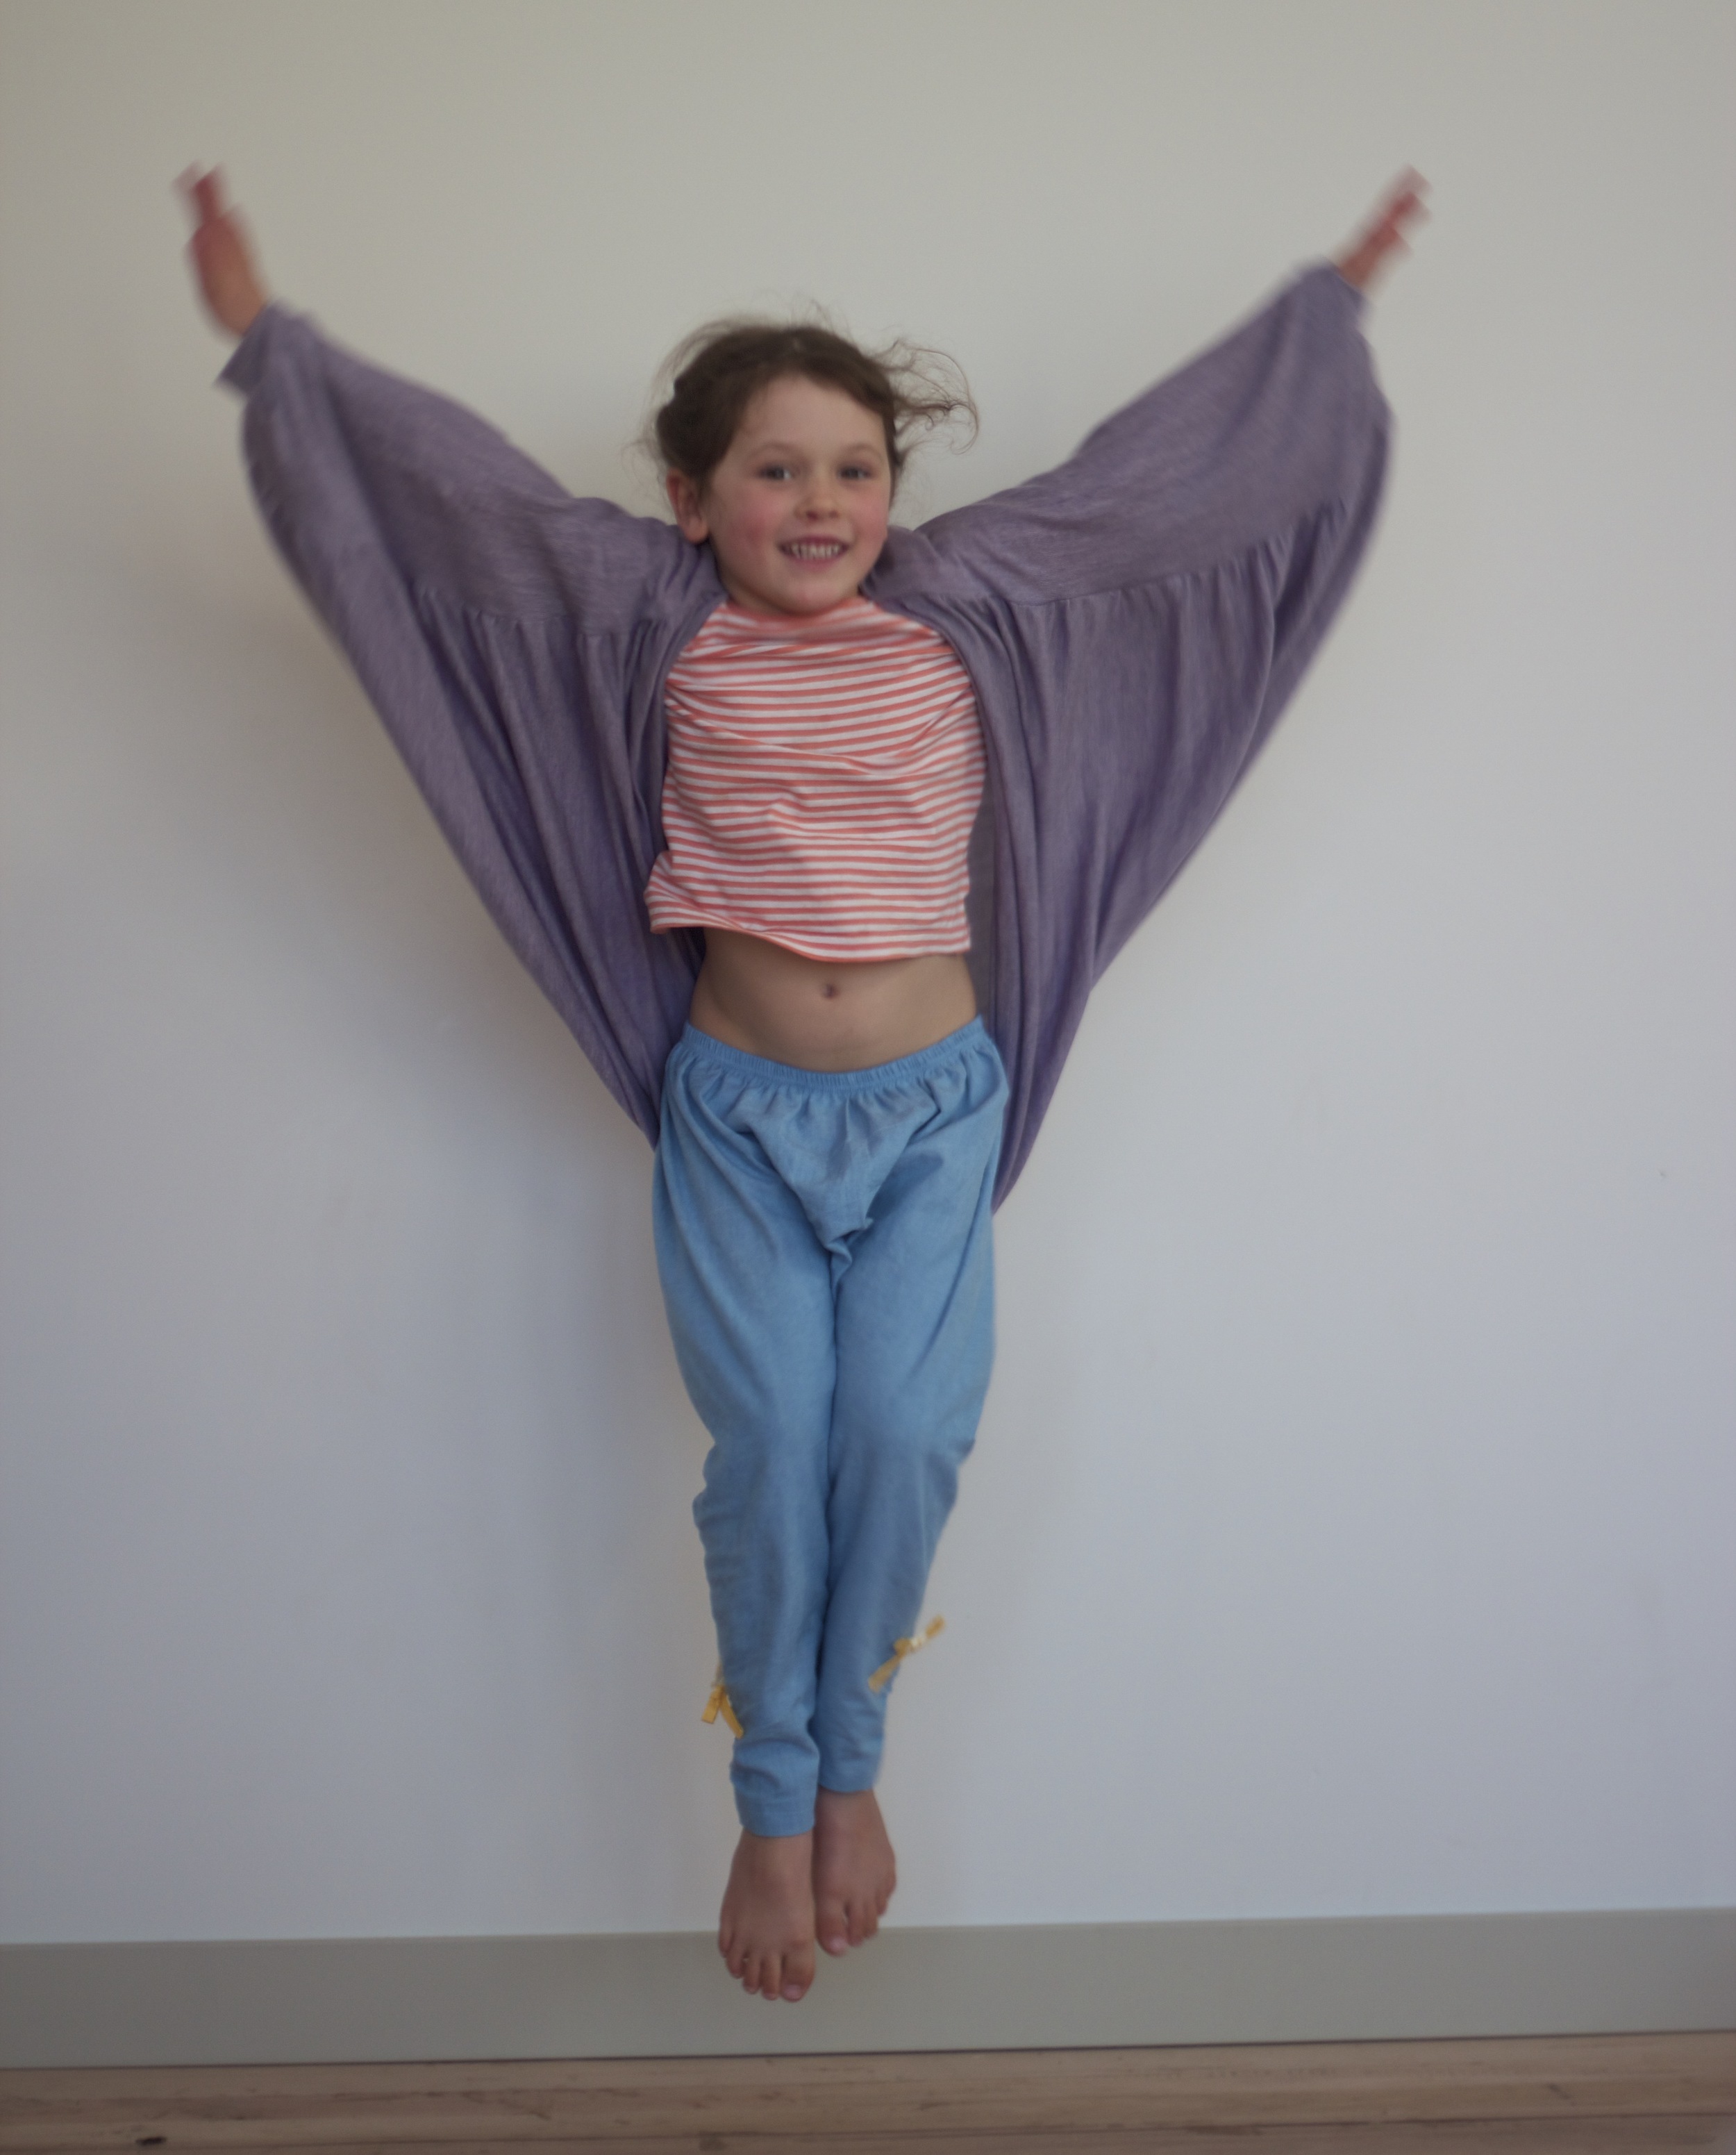
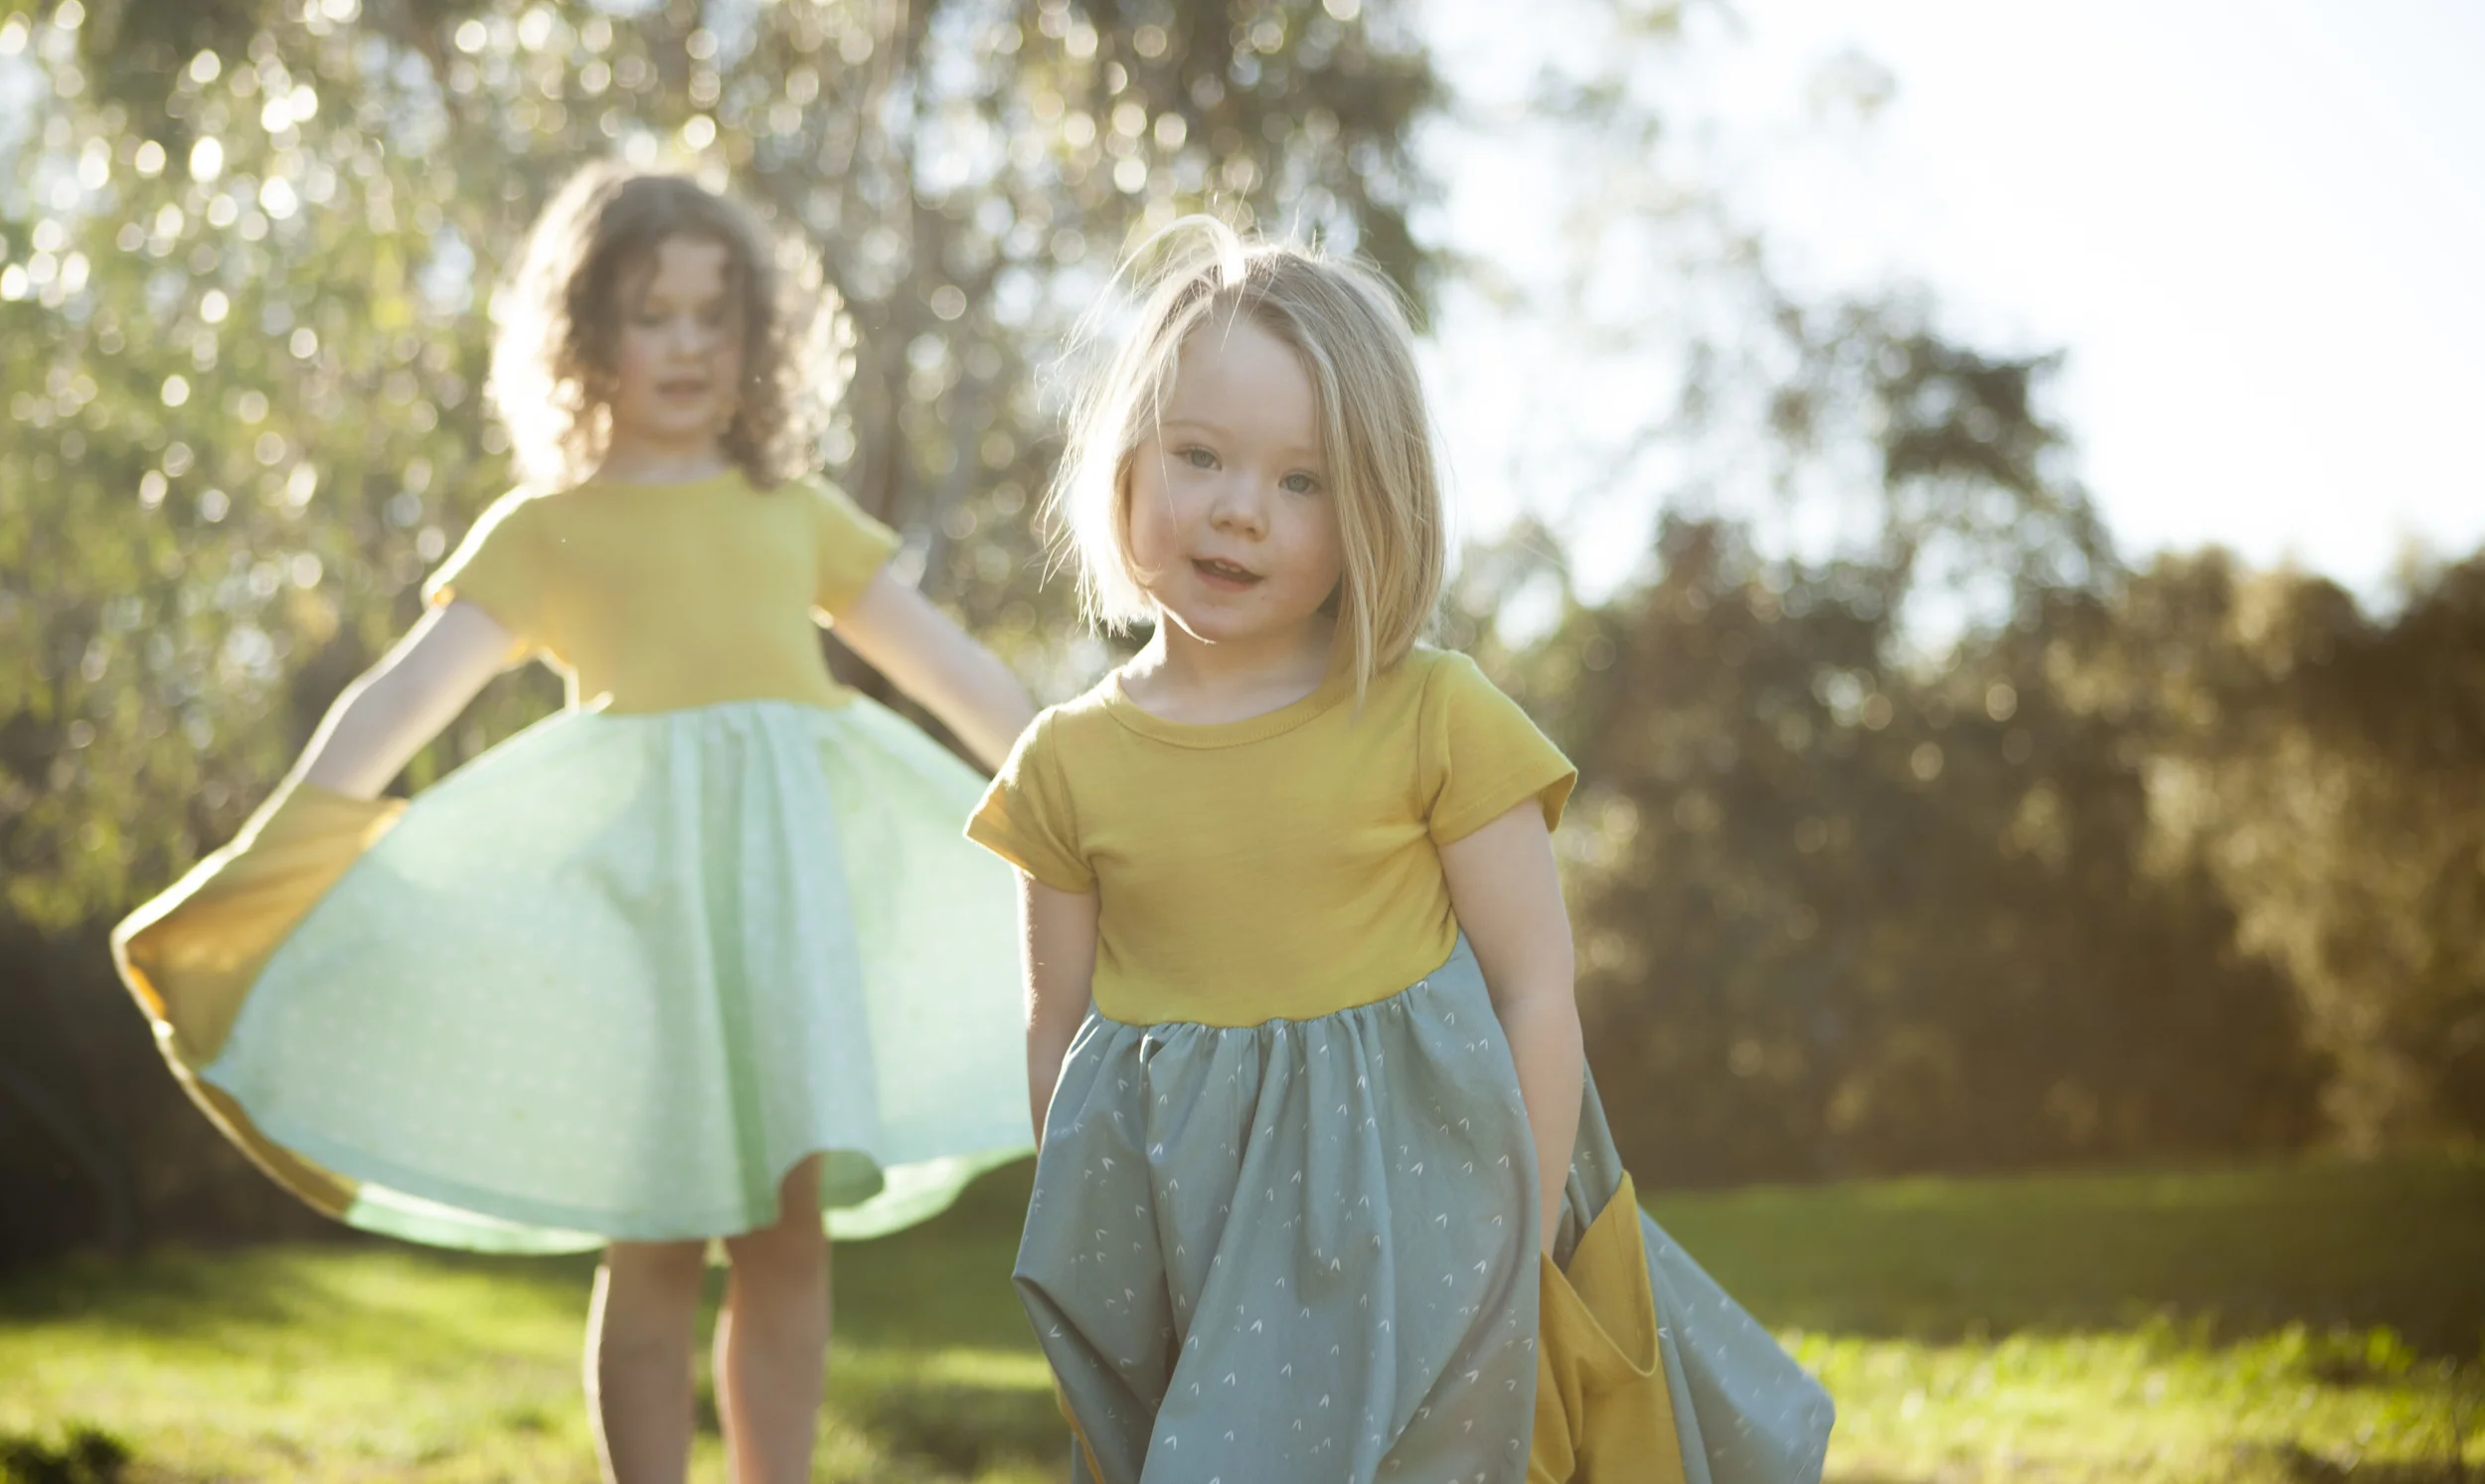
Since my little girl is such a fan of dresses I thought I would sew up something completely different for her and made these 'Lazy Days Lounge Pants'.  Surprisingly they were a big hit with her.  She loved having something so comfy to wear, and something that didn't restrict her movement in any way.  She immediately decided that they were going to be her yoga pants and started showing me her moves!  I had no idea that she knew any of this - turns out they do some yoga in her dance classes.  Don't you love it when they surprise you with things like that?It still always seems miraculous to me when she knows something that I haven't personally taught her,  I'm really not sure why because it happens all the time now!  Check out that 'down dog!'.....

Gracious Threads - Lazy Days Lounge Pants | Willow and Stitch

My little one was measuring up between a size 5 and 6 so I went with the bigger size and they were a really good fit actually, not too big and still room to grow (way too much of that going on at the moment for my liking - I've asked her to slow down but she's hell bent on growing up as fast as possible *sob*).  We both loved that the pants have pockets although I think next time I would make them deeper to ensure that none of those oh so precious posessions get lost!  I also omitted the faux drawstring on the waistband because I couldn't quite be bothered with sewing the buttonholes for it and potentially getting into an argument with my sewing machine which I pretty much always loose.  I don't think they look any worse for the omission!

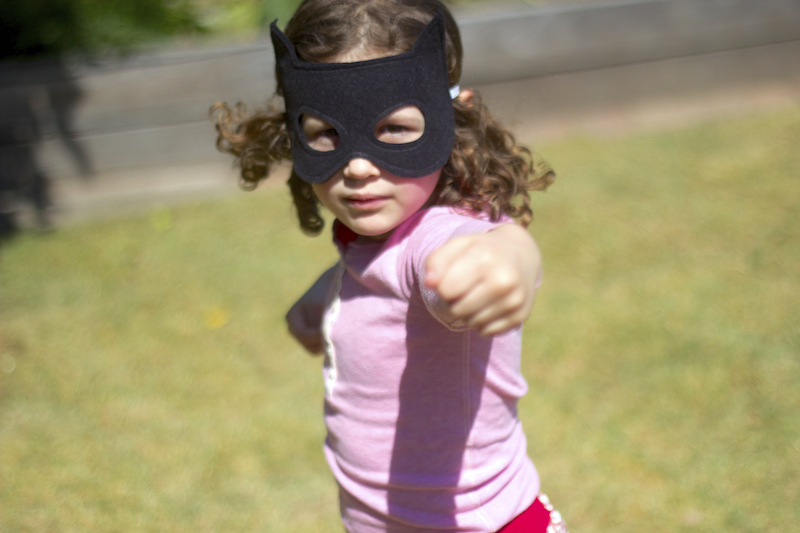
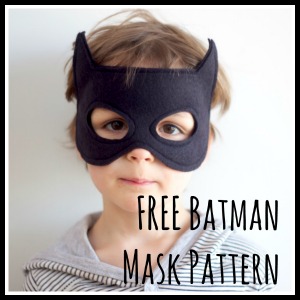
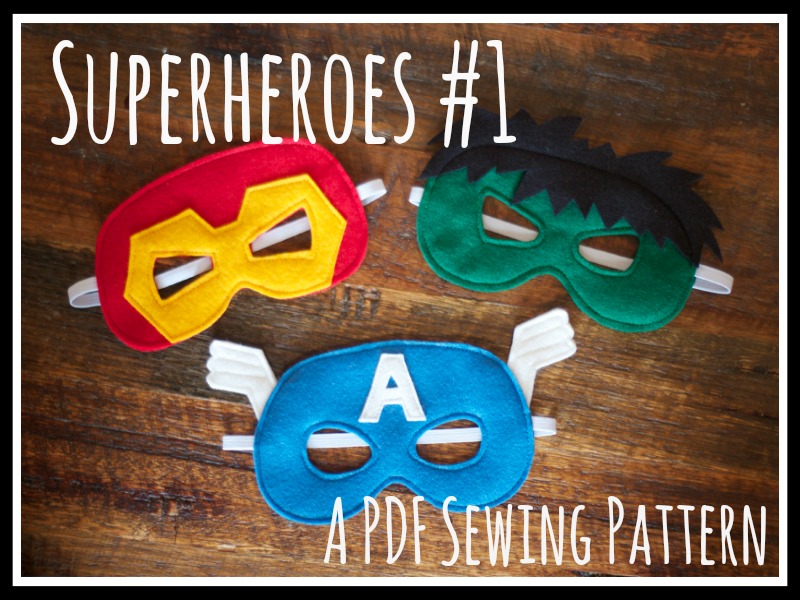
3 minutes of calming yoga and deep breathing is apparently more than sufficient for a 5 year old however because pretty soon Ella decided that actually (her favourite word) what these pants are perfect for is a crime fighting superhero.  Batman* to be precise.  I'm personally not sure that Batman would be seen dead in pink and red yoga pants but I kept my reservations to myself.  I have to admit she was pretty kick ass.

Gracious Threads - Lazy Days Lounge Pants | Willow and Stitch
Batman Mask PDF Sewing Pattern | Willow and Stitch

To celebrate this new look Gracious Threads is offering 40% off all patterns with the code 'ANEWLOOK'.

I've also got 1 Gracious Threads pattern of your choice to give away to one of my readers. Comment on this post and record your entry here to win!

 Thanks for stopping by!  Make sure you go and take a look at all the other awesome bloggers who are taking part in this blog tour. 

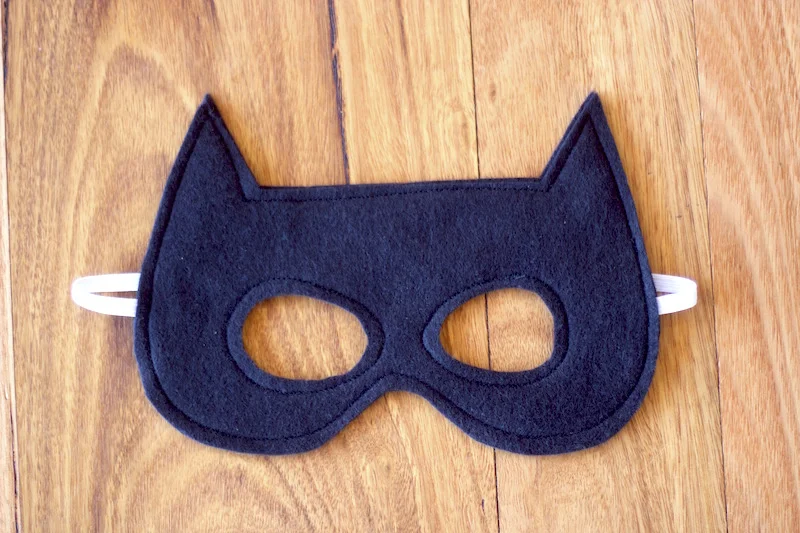
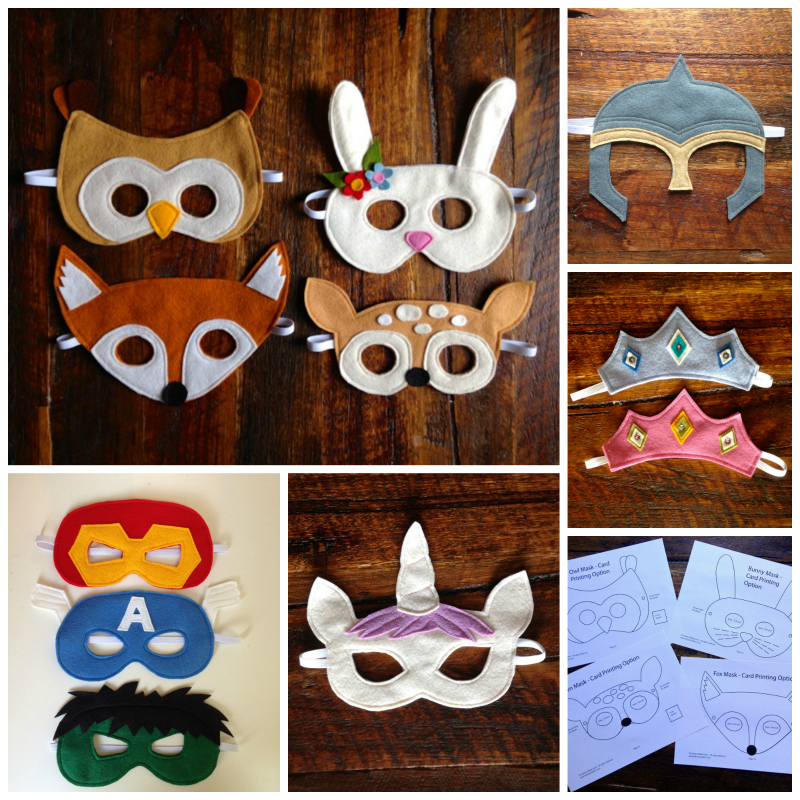
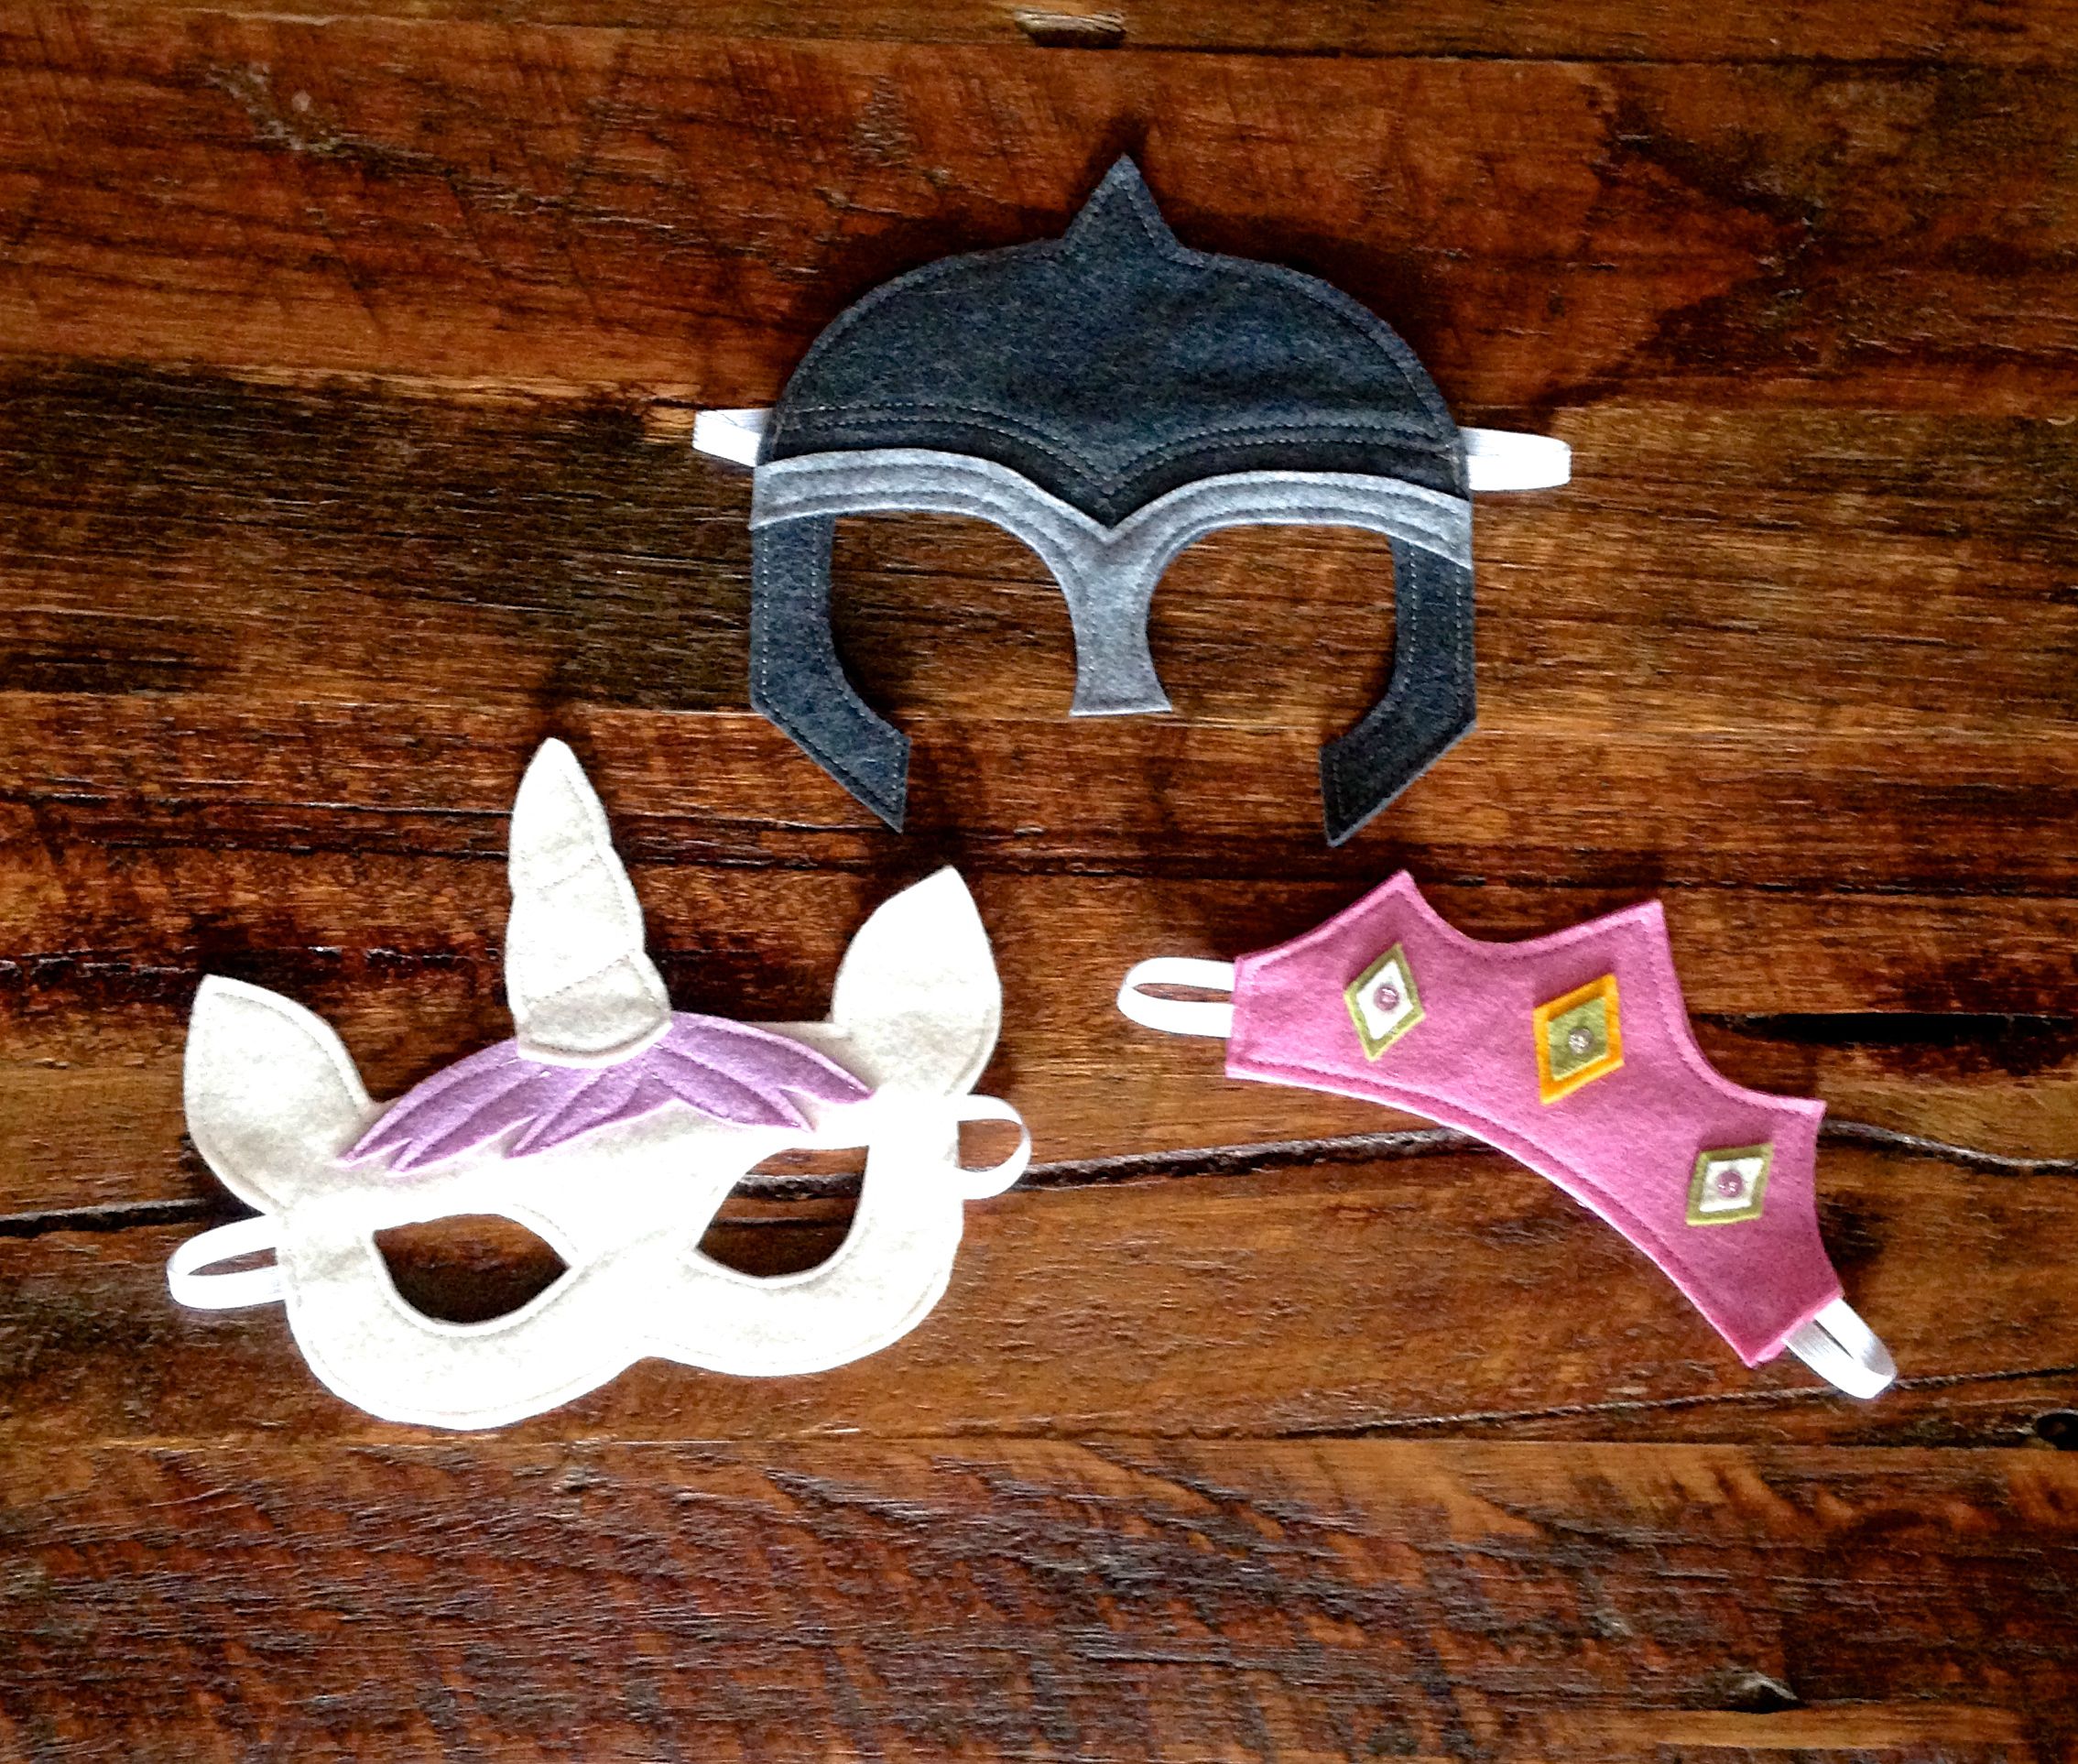
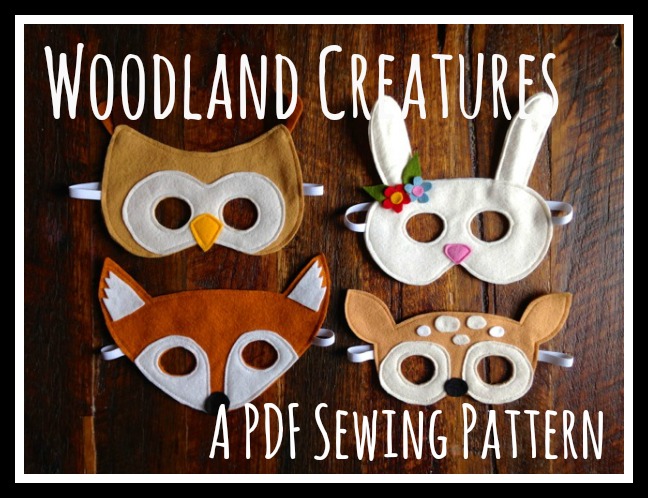
*The batman mask is from a selection of superhero masks that I make and sell through my Etsy shop.  It's available as a free pattern on my tutorials page if you would like to make one for yourself. There are also other superhero, animal and fairytale mask pattern sets available for sale through my Etsy shop.

Batman Mask PDF Sewing Pattern | Willow and Stitch

Bam!  And we're out......

You May Also Like..

A Free Batman Mask Pattern for you!

Free Batman Felt Mask Pattern | Willow & Stitch

Bam! Pow! Kaboom!  There have been a lot of superheroes racing around my house recently, rescuing dolls and dinosaurs in distress and generally causing well intentioned chaos.

I've been sewing an AWFUL lot of masks in the last month or so, stocking up my Etsy shop and preparing for the Christmas markets, and silly season in general.  I'm working on getting my second set of superhero mask patterns up in the Etsy shop soon, but in the meantime I thought you might like a little freebie!

Click here to download your FREE Batman felt mask sewing pattern.

The pattern can also be printed onto cardstock, painted, coloured or decorated and cut out - perfect for entertaining the kids on a rainy day or for children's parties.  Be sure to print the pattern at actual size - do not select scaling in your print options.

It's super easy this one; I don't have any photo illustrations for you but you won't need them! This mask should fit most children from around age 2.

You will need:

21 x 30cm (9 x 12") of high quality black felt

Approximately 31cm (12") of 8mm (3/8") wide woven elastic

Black thread

1.  Print the pattern piece and cut 2 mask shapes from your black felt.  TIP:  Draw around the insides of the eyes (with a white pencil or chalk) but do not cut them out yet. 

2.  Lay the 2 pieces one on top of the other, right sides together.  Pin in place.  Use a pin to mark the placement of the elastic on each side of the mask.  

3. Sandwich the elastic between the two layers of felt, pinning it in place so that it extends approximately 1.5cm (1/2") into the mask at each side.

4. Sew right around the outside of the mask, sewing through both layers of felt, and sewing 5mm (1/4") from the edge.  When you reach the spots where the elastic enters the mask sew backwards and forwards a few times to really secure it.

5.  Sew around the eye hole markings, sewing at least 5mm (1/4") from the white lines that you have drawn and keeping the lines INSIDE the circle that you are sewing. Take care not to catch the elastic in your stitches.

6. Cut along the white lines to reveal the eye holes. Again; take care with the elastic, this time making sure you don't cut through it! Cutting the eye holes out after you have sewn around them will give you a much neater finish.

Hope you and your little superheroes enjoy this tutorial.  I always love to see your creations if you feel like sharing them!

You May Also Like...

Free Dribble Bib Pattern and Tutorial

This is another project from the Mama and Baby sewing book which I wrote for my sister last year.  I'm still working on getting it ready to publish online but thought I'd share some of the projects beforehand.  Check out my Tutorials page for more free patterns and tutorials.

This little cowboy style neckerchief is fantastic for keeping your baby’s clothes dry, particularly as wet t-shirts can cause chaffing and soreness on their little chins and chests. The soft jersey fabric is very absorbent and the folds catch all the dribbles.  When it gets too wet or dirty you can just pop on a new one without needing a whole outfit change.  These are quick and simple to make and are the perfect project for using up scraps. Click on the image above to download the pattern.

Many people are afraid of using stretch / knit fabrics – and I have to admit that I was one of them before I started playing around with them and discovered that they’re actually great to work with and really very easy once you understand a few basics.  If you're new to sewing with knits then I suggest you check out my 'Beginner's Guide to Knits'.

In any case, don’t panic, all you need to remember is not to stretch the fabric when cutting it (a rotary cutter and mat is perfect for this) and to use a ball point (stretch) needle for your sewing machine. A ball point needle (as the name suggests) is a needle with a slightly rounded tip, meaning that it can pass between woven fibres without cutting them and potentially causing runs in knit fabrics.


You will need:

25cm x 50cm of Jersey knit (you can up-cycle an old t-shirt if you like)

25cm x 40cm of fleece / bamboo / towelling or similar for backing.

2 press studs

Dribble bib pattern pieces - click on the image at the top of the page to download them. Pattern pieces include a 1cm (1/2") seam allowance.


Directions:

1. Cut 1 of the bib front from your knit fabric, and 1 of the bib back from your fleece or bamboo backing fabric. Be sure to transfer all pattern markings. Markings for press stud positions should be copied onto the RIGHT side of the bib backing.

Press and sew the pleats:

2. With the bib front right side up, fold bib right sides together so that one of the outer pleat markings is matched to the middle mark.  Pin through both layers of fabric where the mark is, then fold bib back to the right side to form a pleat. Press the pleat away from the centre of the bib and pin in place. Repeat for the other side of the bib. Baste along the top edge of the bib front to hold pleats in place.

Willow & Stitch | Free Dribble Bib Tutorial

Join the bib front and back:

3. With bib front and back right sides together, match central notches along the top edge of the bib. Pin in place. Next, match and pin the notches at the pointed tip of the bib (the bottom).  Now align the corners of the bib front and back and pin these in place.  Ease the knit fabric into place so that it matches the edge of the bib back, taking care not to stretch either piece as you do so and allowing the excess knit fabric to form gentle folds in the middle of the bib.  Continue pinning the top and side edges.

4. Using a ball point needle on your sewing machine, join the two pieces with a 1cm (1/2") seam allowance. Sew right around the big, leaving a 5cm (2") turning hole on one of the side edges and backstitching at either side of your turning hole to secure the stitches.

Clip seams and Topstitch bib:

5. Trim seams at corners and tip of bib to 5mm.  Clip seams every 2 cm along sides and top of bib, taking care not to cut through your line of stitching.  Do not clip seam allowance at your turning hole.

6. Turn the bib to the right side, using your fingers or a knitting needle / chopstick to push out the corners. Use your fingers to pinch seams along the edges and pin them in place. Allow your knit fabric to extend a few mm (1/8") past the bib backing so that if you look at the bib from the back you can see a very narrow band of the bib front right around the edge. This will give the bib a better shape by ensuring that the backing fabric is not stretched too tight which would cause the bib tip to curl upwards.

7. Topstitch 5mm (1/4") from the edge, right around the bib, closing the turning hole at the same time. Remove pins as you sew, taking them out just before you reach them to allow fabric to relax into shape.

Attach press studs:

8. Attach your poppers according to the manufacturers instructions. The pattern includes positions for 2 press studs so that you can adjust the size of the bib as your baby grows.

Free Dribble Bib Pattern | Willow and Stitch

Look at that dribble bib in action, soaking up all that goo - Isn't it a beautiful thing?!  Is there a dribbly baby in your life who needs one (or two or three?) of these?

You May Also Like...

Kids Clothes Week Roundup

Kids Clothes Week Summer 2015 Traveling

Wow.  Well this is very late, but here is the second outfit that I made for Kids Clothes Week.  I honestly did make it during Kids Clothes Week but have been struggling to getting any photos as we are seriously lacking in natural light at the moment – its dark when we get up and dark when we get home.  I’m really very envious of all of you in the Northern Hemisphere at the moment, enjoying sunshine, swimming pool and ice creams.  I shall have to console myself with stew and mulled wine and other winter goodness  (fruit crumble, hand knitted scarves, open fires, frosty mornings and hot chocolate).. am I making YOU jealous yet?  - I doubt it somehow!

With the ‘Travelling’ theme of Kids Clothes Week, one of the first things that sprang to mind was our recent trip to Europe and I wanted to find a way that I could somehow capture some of those wonderful memories in an outfit. 

One of the things that I love most about England is the countryside and on this trip we took many walks through beautiful summer meadows.  This amazing field of Buttercups was one of my favourites. 

image.jpg
image.jpg
image.jpg

The colour was just magical and the kids had an absolute ball wading through, skimming their fingertips through the flowers, running around and frolicking generally. 

I wanted to capture the essence of this beautiful field and when I saw this gorgeous Leah Duncan - Art Gallery knit fabric I though it was perfect.  I paired it with this amazing remnant of yellow wool flannel that I found in the Fabric Store.  The skirt and top are both self drafted.  The tee is a batwing top with banded cuffs.

The skirt is a simple gathered skirt with a waistband and cute little rounded pockets.  I didn’t quite manage to finish the button hole on the back before my sewing machine packed up – possibly in protest at being made to work so hard! I suppose this is the first problem I’ve had with it in 5 years of practically constant use so I won’t curse it too much. Still, it means that the Mama Clothes Week that I had planned for this week will have to wait!   

I also managed to finish off this blue tee which has been sitting in my WIP pile since before we went on holiday.  Happily it also goes very nicely with the new yellow skirt.

Kids Clothes Week
Kids Clothes Week

Not much of a one for standing still this one....

Kids Clothes Week

"Enough photos now mum!  I want to go and watch Star Wars!"

Kids Clothes Week - Going Japanese

Wildflower Kimono and Japanese Pants
Wildflower Kimono

It's Kids Clothes Week again! I'm not sure why I love Kid's Clothes Week so much; I mean it's not like I can't just sew for my kids whenever I feel like it; I think it's the feeling of participating in something bigger; of sharing my experiences and making connections with new people.

The theme this time is 'Travelling'; a bit of a tricky one don't you think?  I'm on a mission to sew only with fabric from my stash at the moment so going out and buying some 'travel' themed fabric is not an option.  Also, I don't really get much time to just sit down and sew for my kids so when I do I want to make sure that I'm sewing things that will get lots of use, and not just sew novelty items.

When I saw the Wildflower Kimono Cardigan from Striped Swallow Designs on Instagram this week I fell in love with it instantly and thought the Japanese style would fit perfectly with the 'Travelling' theme of Kid's Clothes Week.  It's a pretty great pattern, with no pieces to print and stick - It's just made out of rectangles! You've got to love that!

Dana at Sew Thrifty wrote a great post recently on how to decide whether a pattern is worth purchasing and this one definitely ticked several boxes for me; It comes in Sizes Newborn to Women's XXXL so I'm pretty sure that neither Ella or I will ever (hopefully!) grow out of It. Also, I love it so much that right now I want to make one for pretty much everyone I know!   I'm sure its going to be great value.  Actually, for the first time ever, I'm bummed that it's kids clothes week because all I want to do is sew about 10 for myself.  Next week is going to have to be Mama's Clothes Week...

Wildflower Kimono and Japanese Pants

The Wildflower Kimono was a pretty quick sew, I managed to cut the pieces and sew it in one evening, but most importantly It was a BIG hit with the girl who loved it because it's so big and soft and snuggly; perfect for winter in Australia.  She also discovered within about a nanosecond that if she spreads her arms she gets WINGS!!  Or she can be a superhero.  Or cover herself up entirely.  Big bonus points for that!

Wildflower Kimono

In keeping with the Japanese theme I decided to make this pair of Japanese Inspired pants from a (slightly modified) Ottobre Pattern.  I really loved how they turned out and thought that they looked great, but unfortunately the little lady had other ideas and instantly hated them.  I really had no idea why! Kids can be so irrational sometimes.  Fortunately they're also really easy to buy and I managed to bribe her with a few smarties to get these photos! Mwah ha ha ha ha ha....


Gumnut Dress Pattern Launch! (and ANOTHER giveaway!)

It's time!  Time to send my baby (erm, dress pattern...) off out into the world alone.  I'm so excited to be able finally release this pattern. It's been a whole lot of work to get to this point, let me tell you!  One day perhaps I will be able to do this full time but until then it's a lot of late nights.  Not that I'm complaining; I have had so much fun designing this pattern and I have learnt so much over these past few months.

I'm so proud of this dress pattern and I hope you'll love it as much as I do.  What's not to love really; Twirly skirt, comfy knit top, huge pockets for collecting treasures.... Cute enough for parties, and comfy enough to wear all day long it's the only dress pattern you'll need this summer! 

Thank you to everyone who signed up before the pattern release.  I'll be sending out your free copies shortly.  Sorry to those who missed the deadline.  But don't despair - the pattern is now available for purchase via Craftsy and also in my Etsy store.  

By happy coincidence today is also Sew Mama Sew's Giveaway Day!  So, to celebrate the launch I'm giving you another chance to win a free copy! I have 2 free Gumnut Dress PDF Patterns to give away.  To enter simply leave a comment below. I blogged yesterday about some of the things I love about sewing; How about you - why do you love to sew?

If you follow me on Instagram then you can have an extra entry, just leave two comments - easy peasy!

If you're new here why not take a look at the Patterns and Tutorials page - there are lots of free patterns that you can download instantly!  Or scroll down the side bar for some of my favourite blog posts.

Winners will be chosen at random and announced on Monday 11th May. Good luck and thanks for stopping by!

UPDATE:  This giveaway is now closed.  Thank you everyone who left a comment.  I really loved reading them all and hearing your thoughts.  Winners were drawn by random number generator.

Winners of the Free Gumnut Dress pattern were:

Comment #4: Cheryl

Comment #88: Cherie

Congratulations ladies! Please email me at willowandstitchdesign@gmail.com so that I can send you your prize!

Sorry to all of those who didn't win.  I've very grateful for your kind words about my Gumnut Dress Pattern.  If you would like to purchase a copy you can do so via Craftsy or Etsy for just $9 USD. 

Gumnut giveaway competition winner #1
Gumnut Dress Givaway winner number #2

Gumnut Dress Pattern Giveaway

I love my Gumnut dress

I love Instagram.  I love the way we use it to highlight the beautiful parts of ordinary days.  I love the way that it makes me view the world differently.  And most of all I love this wonderful community that I have discovered, of people who love to sew as much as I do.  I think there must be few industries in the world which are so positive, supportive and caring as this one that I feel so lucky to be part of.  

For me sewing is about more than just being creative.  It's about slowing down, stepping away from the culture of frantic consumerism that has become the norm and practicing mindfullness.  I believe that taking time to make something by hand, pouring love and effort into creating something unique is the ultimate antidote to everything that has gone wrong with our modern society. 

I am so very grateful to have discovered the joy that sewing brings and to be on the road to making it a much bigger part of my life, that I want to give something back.  I want to say thank you to all the people who inspire and encourage this passion in me and I want to begin my new venture with a wonderful bang!

The Gumnut dress is the first graded dress pattern that I've designed and developed.  It has taken a lot of my time and effort and love and dedication to get to this point.  It feels a little like my baby - I love it dearly and I'm so proud of it and I am a little afraid of letting it out into the world alone.  So this has been a difficult decision for me and it's a little bit scary too, but I have noticed that the scary decisions are often the right ones don't you think?

I expect that by this point you're thinking 'Enough already! What ARE you on about?!' It's a fair question.  I've decided that I'm going to give this pattern away for free.  Totally free to anyone who registers their interest before the pattern release: 9pm Australian Eastern Standard time on the 6th May (7am EST if you're in the States.) In other words you have 24 hours.  When the pattern is released I will send you a free copy.

This is the first pattern that I've put out there for sale so I'm hoping that you will all act as reviewers for me.  I know there are a lot of Indie designers out there and I'm well aware that the quality can vary dramatically.  You don't know me yet and I don't know you so I want you to know that my patterns are good.  That they work. That they are easy to follow. That the end products are great.  I want to earn your trust.

All I ask in return is that you don't distribute your free copy amongst your friends and family.  I rely on your honesty to protect my business.  Knowing what a great community we have I feel confident that the majority of you will respect this.  If you love the dress and the pattern please tell people about it.  Most of all I just hope that you have fun making this and that the little one you are sewing for loves it!


UPDATE:  The free dress pattern giveaway is now closed.  Sorry if you missed out.  Why not subscribe to my newsletter anyway (link in the side bar) then you'll always be the first to know when there's a special offer.

If you'd like another chance to win a free copy then you can enter my 'Sew Mama Sew Giveaway Day' promotion.  See previous blog post for details.


Gumnut Dress Photo Shoot

Gumnut Dress Photo Shoot
Gumnut Dress Willow and Stitch

We had such a beautiful afternoon down by the creek yesterday.  It was one of those heavenly days where the sunbeams turn everything gold.

The girls had so much fun playing in the bush.  Running, jumping, twirling, turning their skirts into butterfly wings, feeling like princesses and playing like tomboys! What could be better?

Pattern release is set for Wednesday 6th May and I can't wait!

Gumnut Dress Pattern Testers Wanted!

Gumnut Dress
Gumnut Dress

My Gumnut dress pattern is finally finished! I'm so pleased with how it's turned out and I really love this Cotton and Steel with stripes combo.  I'm also very happy about how much Ella loves it, the knit top makes it super comfy, it has huge pockets for storing treasures and a skirt that's perfect for twirling!

I've spent the weekend perfecting and testing and now it's your turn!  I need pattern testers for all sizes from 1 to 8 years.  You don't need to be an expert to pattern test, confident beginners should be able to sew this pattern.  There's a pretty short deadline on this one, testers need to have completed that pattern and submitted their feedback by Friday 1st May.  All testers will receive free copies of the finished pattern and my eternal gratitude for their help!

If you're interested and able to meet the deadline then please either email me at willowandstitchdesign@gmail.com or enter your details below.  Be sure to hit 'Submit'

UPDATE:  Applications for pattern testing are now closed.  I'm hoping to release the Gumnut Dress Pattern in the first week of May and I've got a MASSIVE givaway planned so if you'd like to be updated enter your details below:

Gumnut Dress
Gumnut Dress